This topic explains how to configure hardware tiers, executor machines (for on-premises deployments), executor timeouts (for VPC deployments), and explains instance actions available on the dispatcher page.
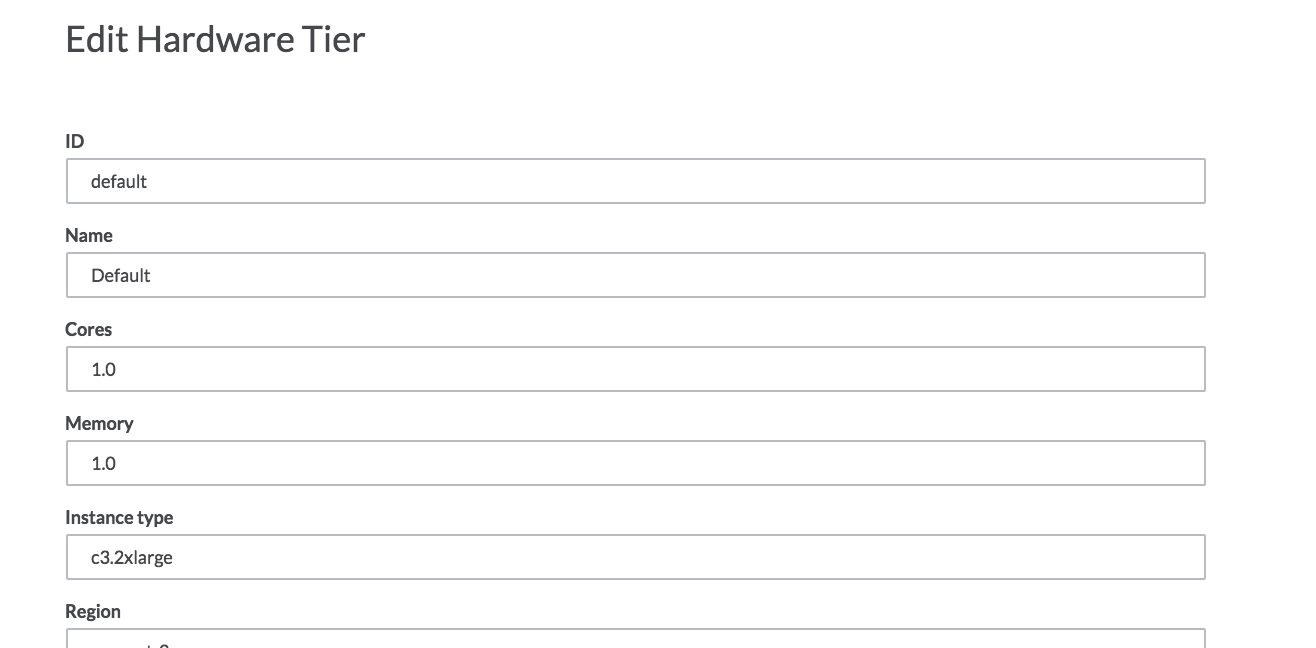
To view and configure the hardware tiers available in your deployment, go to the admin page, then click Advanced > Hardware Tiers. Click New to add a hardware tier, or click the links in the table below to edit or delete existing hardware tiers.

VPC hardware tiers include a number of AWS-specific configurations. For on-premises deployments, you only need to fill in ID, Name, Cores, and Memory, and the Is Default box - the rest of the fields do not appear. Please see the next section ("executor instances") for more info about how to link your on-premises hardware tier to executor machines.

Here are the fields you can modify:
-
ID
Internal name, used on the dispatcher page and to link the executor group (or individual executor instances, in the case of on-premises deployments) to a hardware tier.
-
Name
Name as it appears in the UI.
-
Cores, Memory
-
Amount of CPU (# of cores) and memory (GB RAM) as displayed in the UI.
-
This is an estimate and is purely for cosmetic purposes. We suggest deriving them from the machine specs, divided each by the per-executor run capacity (for VPC deployments, this is part of the hardware tier definition. For on-premises deployments, this is defined for each executor machine - see the next section, "executor instances", for more info).
-
-
Is Default
Specifies whether new projects will default to using this hardware tier. Please check this box for exactly one hardware tier.
The following additional fields are only available for deployments running in AWS.
-
Instance Type
The AWS ec2 instance type used by this tier.
-
Region
The AWS region (e.g. us-west-2) where instances will be launched.
-
Subnet ID
VPC subnet into which instances will be launched.
-
Executor Image
The AWS AMI id that will be used to spin up new executor instances.
-
Per Executor Run Capacity
-
The maximum number of simultaneous runs per instance.
-
Each running executor will accept additional jobs until this limit is reached, at which point it will try to launch a new instance.
-
-
Minimum number of instances
This setting is used by the background monitoring process that is designed to stop and then terminate idle executor instances, see the Executor Timeout information below for more details on this process.
If terminating an executor instance will make the number of available instances fall below this minimum setting, then the instance will not be terminated.
Note that this setting is not designed to automatically start executor instances so that this minimum number are available.
-
Maximum number of instances
Limits the number of instances that will be launched of this type. Once reached, additional runs will be queued until space opens. You can manually launch a new instance beyond this limit from the dispatcher.
-
Security group IDs
AWS security groups the instance will be a part of.
-
User data
Specify your AWS instance user data, if any, here.
-
EBS Volume Size Overrides
Hardware Tiers can be configured to override the default volume sizes specified in the snapped AMI. To use this functionality, you need to specify the overrides you want in the EBS Volume Size Overrides box in the following format:
[ {
  "deviceName" : "/dev/sda1",
  "overrideVolumeSize" : 64
}, {
  "deviceName" : "sdf",
  "overrideVolumeSize" : 500
} ]
The device name is the name of the EBS device. Note that depending on the block device driver of the kernel, the device might end up attached with a different name.
The override volume size is specified in GiB. You should not specify an override volume size smaller than the default size specified in the AMI.
Multiple overrides can be specified. The syntax accepts and expects an array of overrides.
Do not forget that the filesystem must be resized to accept the larger block device. To do this, append this command to the User Data field:
runcmd:
  - pvresize /dev/xvdf
  - [ lvextend, -l, +100%FREE, /dev/vg0/domino ]
  - resize2fs /dev/vg0/domino
You will need to change
/dev/xvdfand the volume paths as appropriate. -
Is Default
Will make this hardware tier the default for all projects. Note: There can only be one default hardware tier.
-
Is Visible
If checked, this hardware tier will be visible to any user it’s made available to. Unchecking this box will prevent users from selecting this tier, but will not remove it from projects where it’s already used.
-
Is Globally Available
If checked, this will make this hardware tier available globally to all users. Unchecking this box will limit availability to this hardware tier to organizations which have been specifically given access. Access to hardware tiers for an organization can be controlled in the organization’s settings.
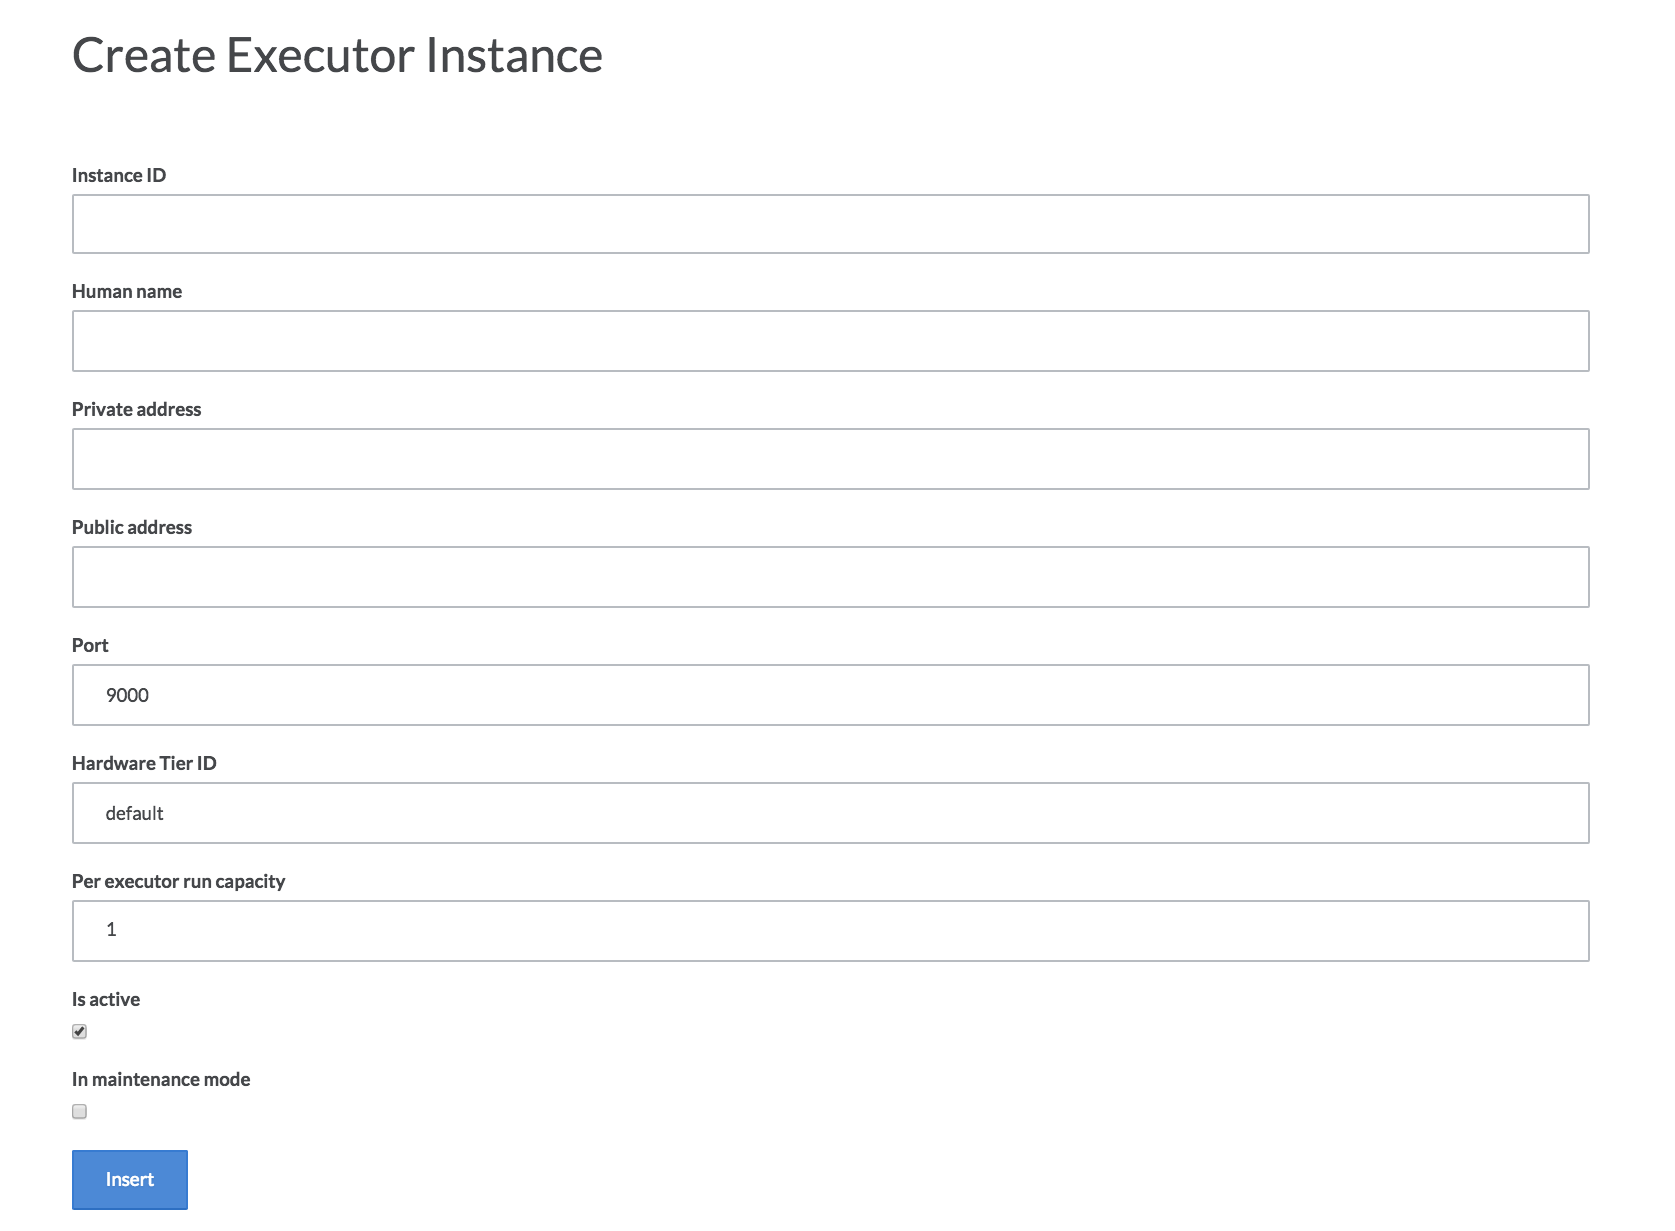
For on-premises deployments, you’ll need to specify the machines that will be used as executors. You can do so from the Admin page, by choosing Advanced>Executor Instances. From there, click "new" to add an executor.

You’ll need to fill in the following fields:
-
Instance ID
A name to identify your instance.
-
Human Name
Display name of the instance.
-
Private Address, Public Address
The private/public IP or DNS address of the machine.
-
Port
The port from which the domino service is configured to access. Default value is 9000.
-
Hardware Tier ID
The ID of a hardware tier as explained in the previous section. The instance will be made available to the dispatcher to accept runs that utilize this hardware tier.
-
Per Executor Run Capacity
The maximum number of jobs that this particular instance can run simultaneously. Beyond this limit, runs will be sent to another machine on the tier if available, or otherwise will remain queued until space opens up.
-
Is Active
Whether or not the machine is active and available to the dispatcher.
A machine in maintenance mode will not accept any new runs. It will still be visible from the dispatcher page.
|
Note
| For on-premises deployments, the Domino run load will be routed prioritizing the least-used machines (i.e. those with the most slots available in the run capacity). In cloud deployments, runs will be distributed across available slots on running machines until capacity is reached, when a new executor will be spun up if possible._ |
With VPC deployments, you can set timeouts that determine how long an executor instance will sit idle before it is stopped, and how long it will remain stopped before being terminated ("stopped" and "terminated" are used in the AWS sense). You’ll need to modify a few parameters in the central configuration. To do so, navigate to the Admin page, and then choose Advanced > Central Config from the top menu.

The relevant items to modify have the keys com.cerebro.domino.dispatcher.executorStopTimeout and com.cerebro.domino.dispatcher.executorTerminateTimeout.
Find the entry from the list, and click on it to edit.
Values specify the length of the timeout, e.g. 30min, 2h, or 1d.
The dispatcher page shows a list of running and stopped executors. The rightmost column of each executor in the list contains a link named "Action", which brings you to a page with buttons for various instance actions:

Start, Stop, Terminate
-
Same as AWS definitions.
-
Stopped instances can be started quickly and resume their state prior to being stopped (including any cached data).
-
Terminated instances are gone forever.
MM on/off
-
Maintenance mode keeps an instance in the current state (running or stopped).
-
The dispatcher will not submit jobs to running instances in maintenance mode.