This article will guide you through a hands-on tutorial on using Domino Datasets in advanced mode. Advanced mode allows you to set up multiple customized dataset configurations, and swap between them from one Run to the next.
If you want to understand the basic features of Domino Datasets, see Domino Datasets.
In this tutorial, you’ll be working with data from the Climate Analysis Indicators Tool (CAIT) via World Resources Institute. If you follow along you’ll learn how to write, read, append, revert, and manage Domino Datasets.
This tutorial will take you approximately 30 minutes to complete.
Domino Datasets belong to Domino projects. Permission to read and write from a Dataset is granted to project contributors, just like the behavior of project files. For your first step in this tutorial, you should create a new project. This project will be used to ingest, process, and store data.
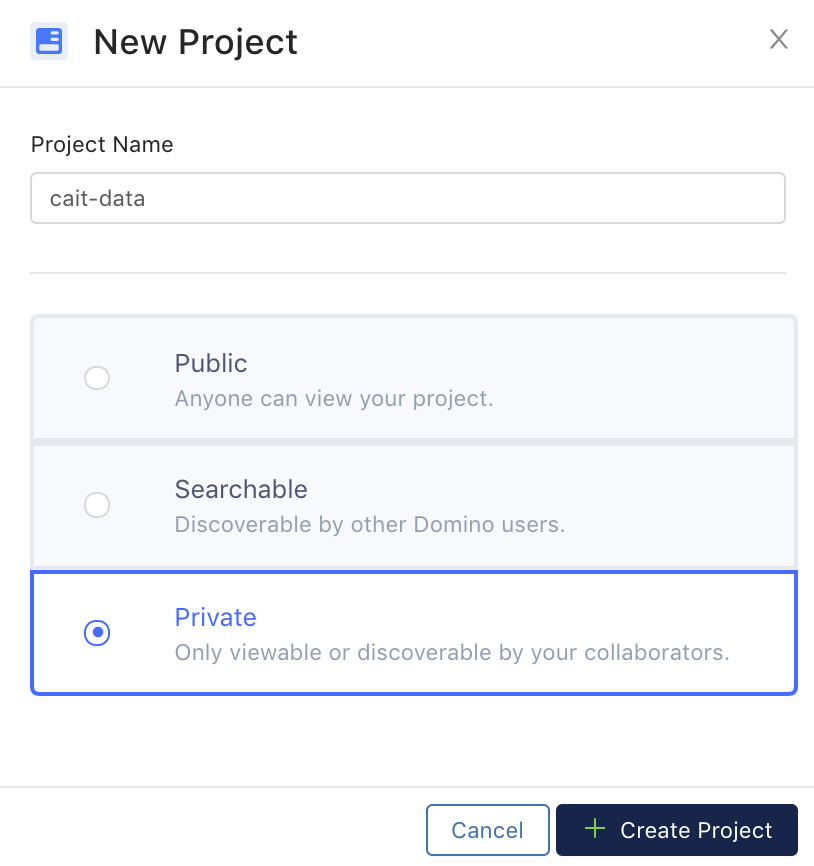
Navigate to your Domino application, then click + New Project from the landing page. Give the project an informative name, set its visibility to Private, then click + Create Project.
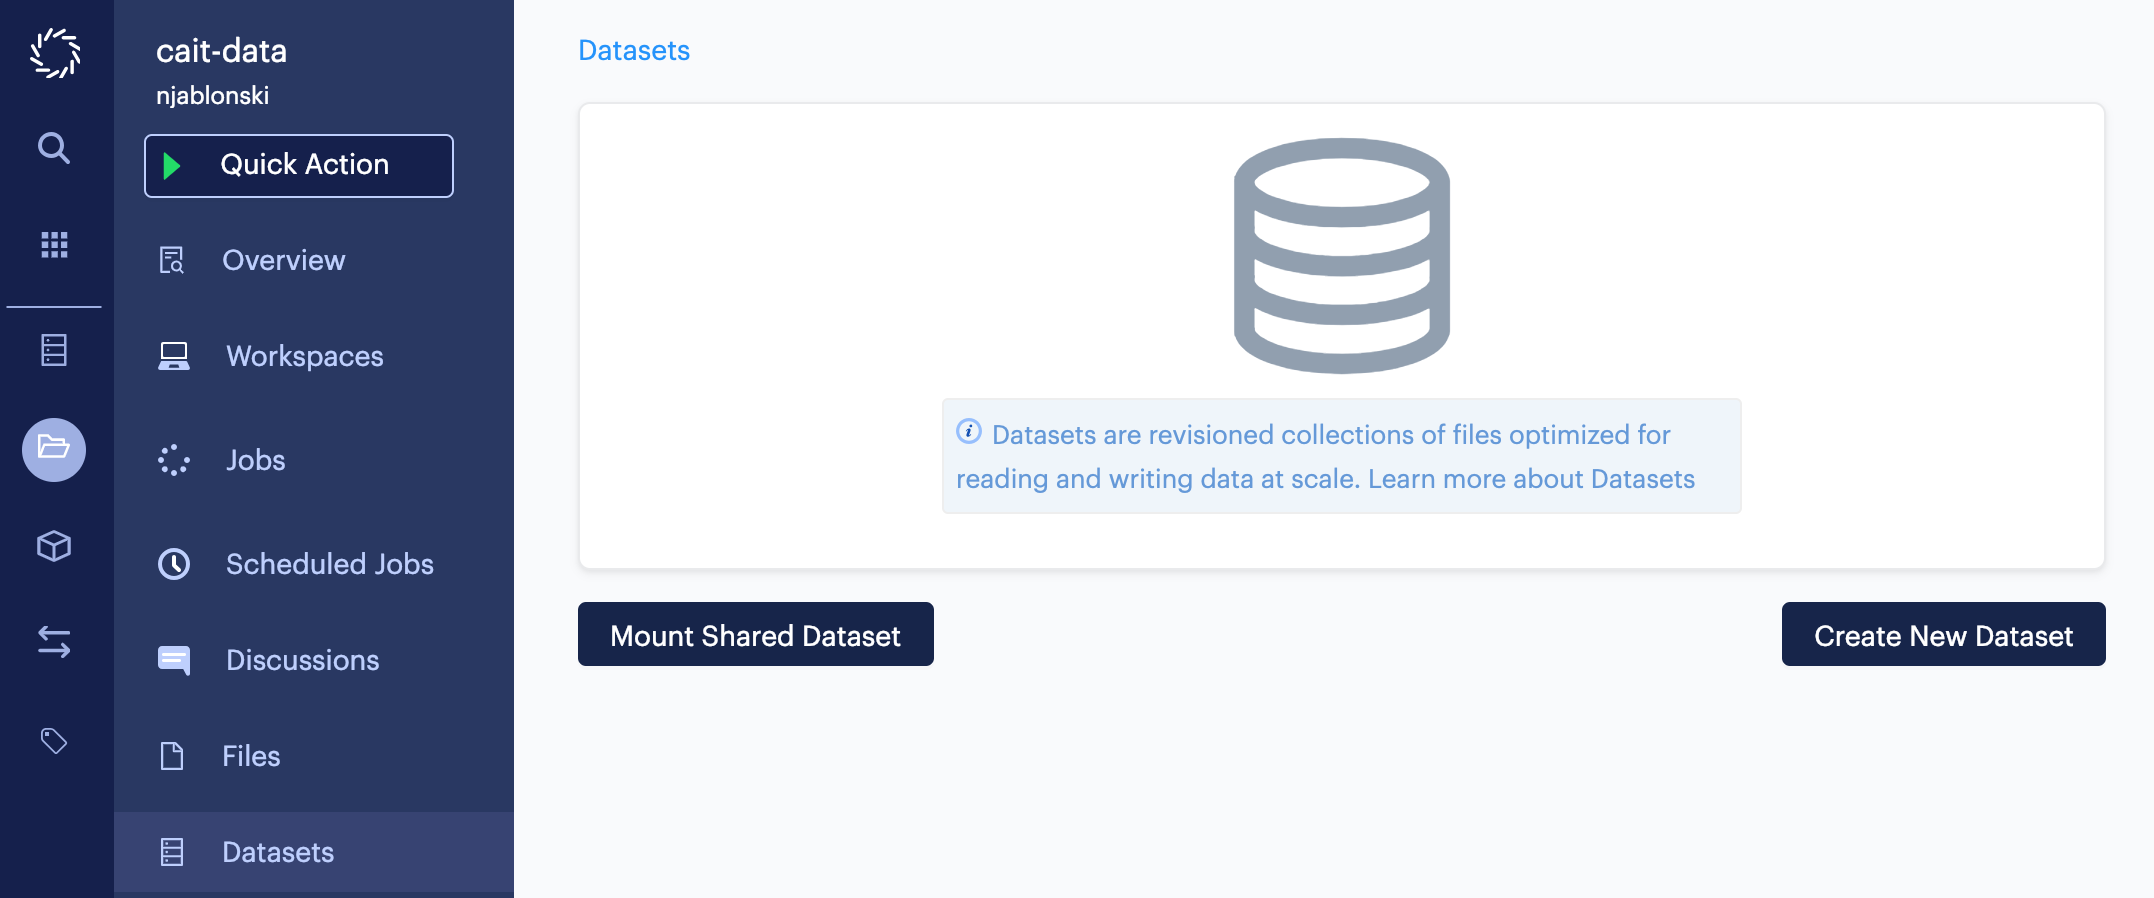
You’ll be automatically redirected to the Files page for the new project. From the project menu, click Datasets. This page will show information about the Datasets in this project, plus any shared Datasets that are mounted. Since this is a new project, there are no Datasets to display here. Click Create New Dataset to get started.
For the purpose of this tutorial, you’ll want to create two new Datasets.
One to store raw imported data, and one to store some derivative processed data.
Name the first Dataset cait-raw, give it an informative description like the one shown above, then click Upload Contents.
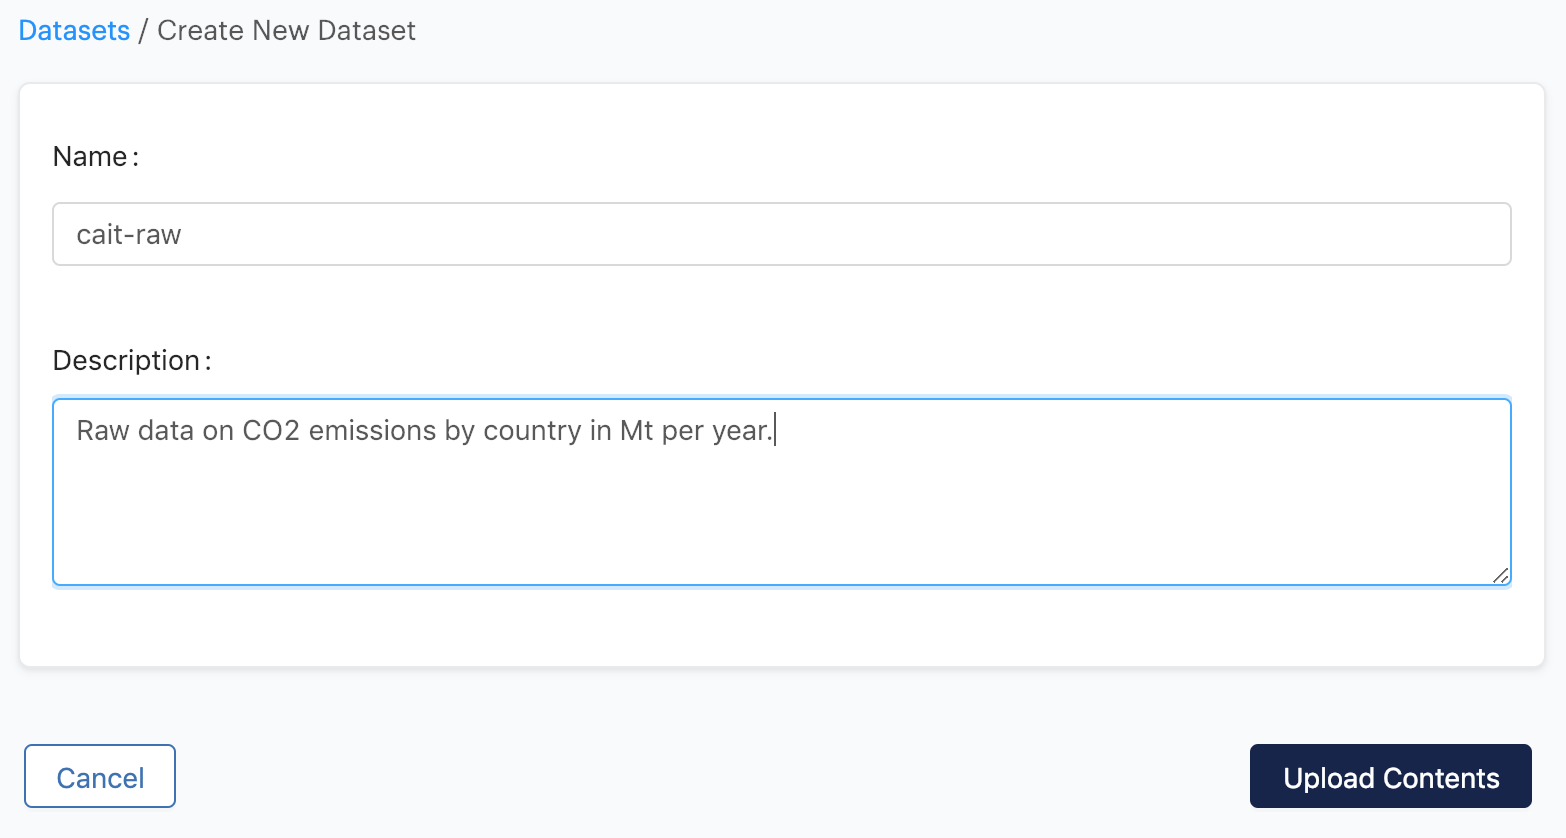
The Dataset will be created, and you will then be directed to the upload page. You can ignore this page for now, since this tutorial focuses on writing to Datasets with advanced mode. Click Datasets from the project menu again, and you’ll see the Dataset you just created listed with zero active Snapshots.

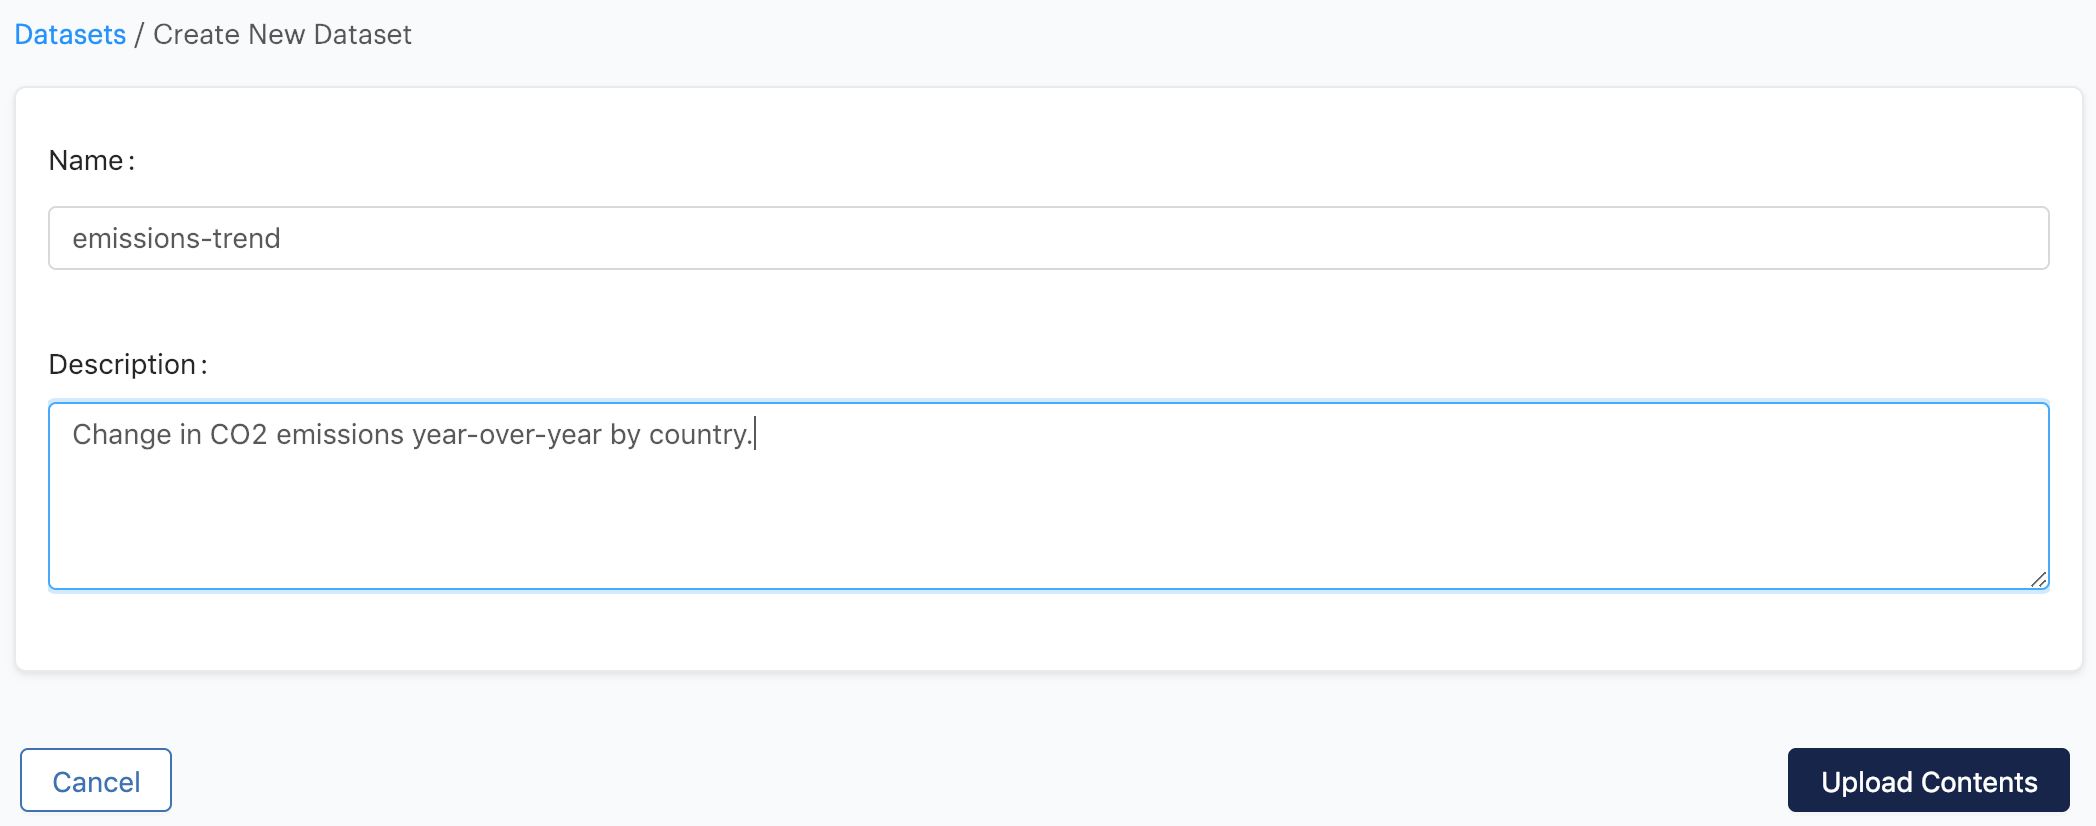
Click Create New Dataset again, and follow the same process to create an emissions-trend Dataset.
Now that your Datasets are created, the next step is to configure your project to use them in advanced mode.
When you want to interact with a Dataset from your Domino project in advanced mode, you must mount the Dataset.
There are two ways to do so:
-
Mounting a Dataset as an input Dataset makes the contents of a specific snapshot (the most recent, by default) available in a directory at the specified mount point in your Workspace or Run. A Dataset mounted only for input cannot be modified.
-
Mounting a Dataset as an output Dataset creates an empty directory at the specified mount point, and when your Run or Workspace is stopped a new snapshot is written to the Dataset with the contents of that directory. Note that the new snapshot will only contain exactly those files that are in the mounted output directory. Snapshots do not append by default.
It’s important to note that the same Dataset can be mounted for input and output simultaneously at different mount points, which will be important when we perform append and revert operations later.
For now, we’ll set up our project to mount the cait-raw Dataset for output, so we can populate it with some data.
Dataset configurations for Domino projects are controlled by a file named domino.yaml.
If Domino sees this file in the root of your project, it will attempt to read it and make available the Dataset configurations specified within.
The domino.yaml file doesn’t exist by default, so from the Files page of your project, click the Add File button.

Name the file exactly domino.yaml.
You can read the full YAML scheme for the configuration file, but for now you can just copy and paste the following markup to create a configuration that mounts cait-raw for output.
datasetConfigurations:
 - name: "PopulateRaw"
   outputs:
     - path: "raw-output"
       dataset: "cait-raw"
The three important values in this configuration are:
-
"PopulateRaw"is the name you give this configuration so you can identify and select it when starting a Workspace or Run. -
"raw-output"is the directory name that will be mounted to receive new output at/domino/datasets. -
"cait-raw"is the name of the Dataset you want to mount.
Once you’ve filled in the filename and contents, click Save.

You’re now set up to write data to a Dataset.
If you’ve created a valid domino.yaml file in the root of a project, you’ll see an option to select the configurations defined within when launching a Run or Workspace.
To populate some initial data into cait-raw, you should start up a Jupyter Workspace with the PopulateRaw configuration selected.
From the project menu, click Workspaces.
Click Jupyter, give the workspace session an informative name, then click the Advanced tab in the Datasets panel.
Select the PopulateRaw configuration in the dropdown menu, then click Launch Jupyter Workspace.
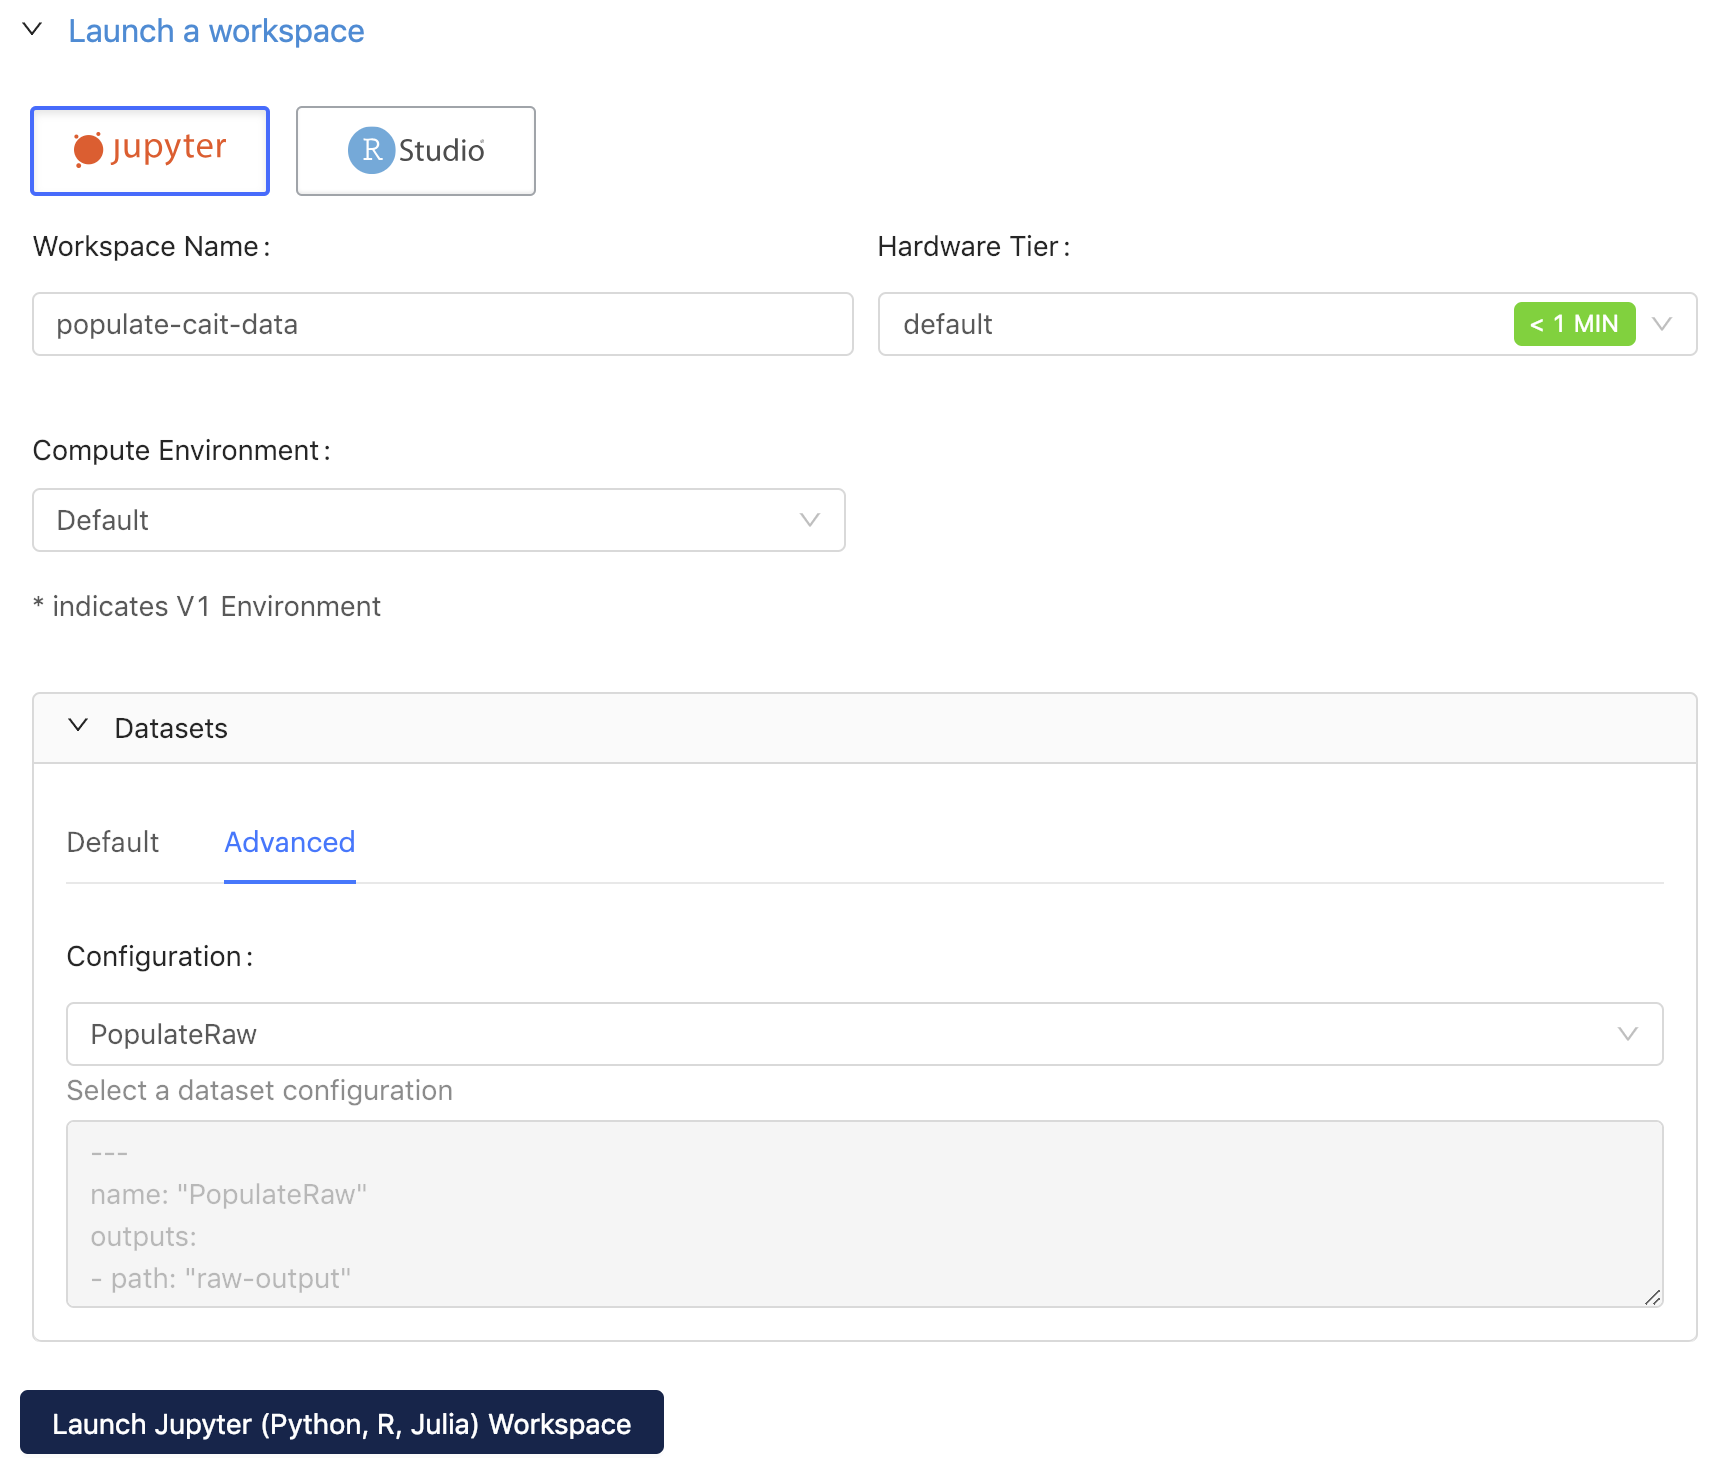
If you get an error saying that a valid Dataset configuration file was not found, double-check that your file is correct YAML, uses spaces instead of tabs for indentation, and is named exactly correctly with no spaces before or after the filename.
In your new Jupyter Workspace, click New > Terminal to access the executor shell.
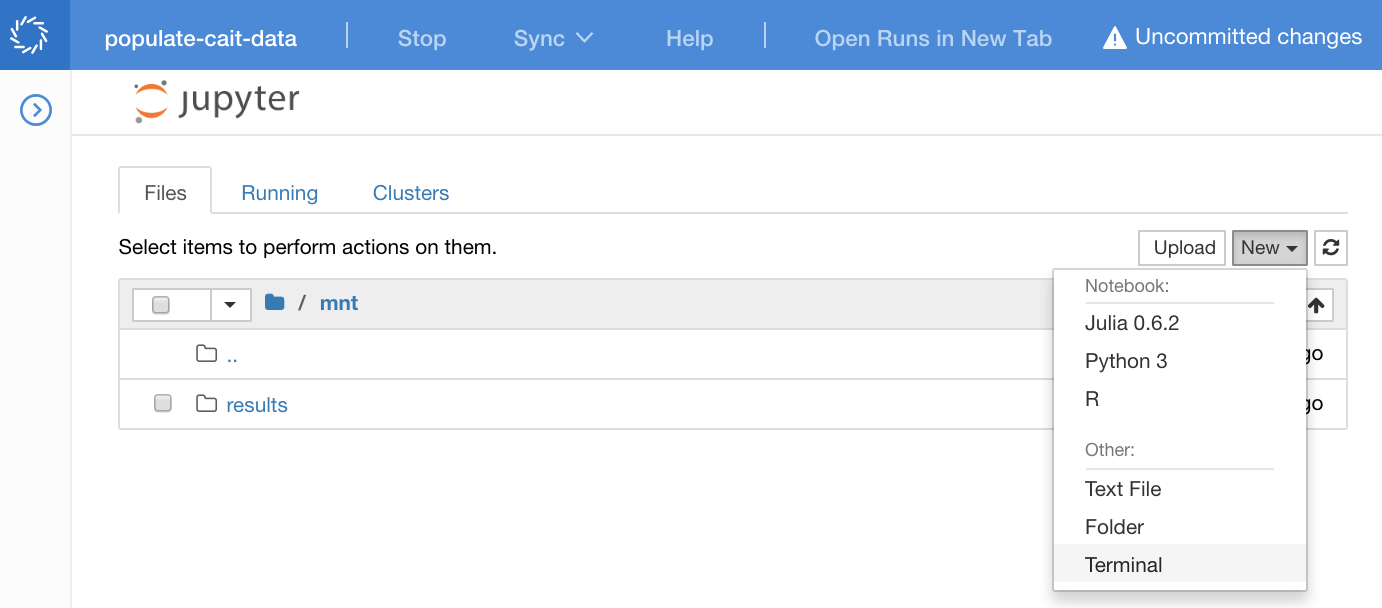
Domino has made some of the CAIT data available in a public bucket on Amazon S3. Run the following commands to fetch two files containing data on CO2 emissions by country for the years 2010 and 2011.
wget https://s3.amazonaws.com/dominodatalab-cait/country-emissions-2010.csv
wget https://s3.amazonaws.com/dominodatalab-cait/country-emissions-2011.csv
When finished, you should have the two downloaded files in your /mnt working directory.
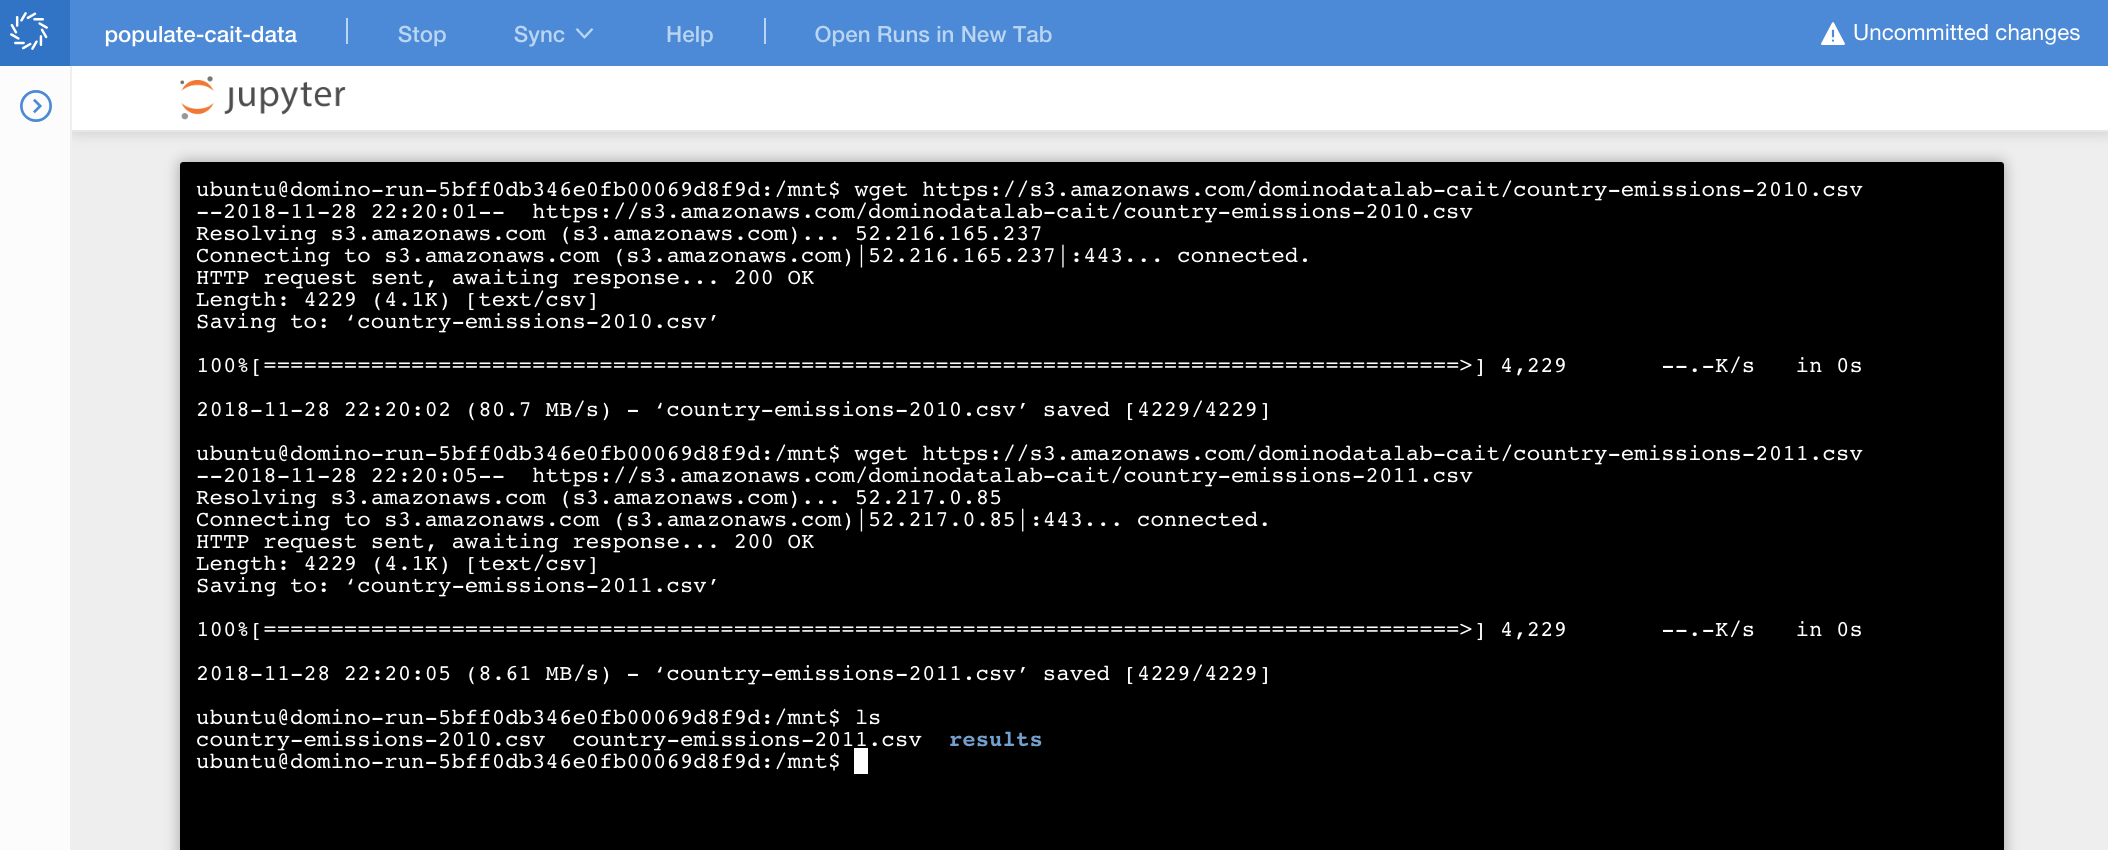
To write these files to your output Dataset, you need to copy them to the mount path set in your Dataset configuration.
In the PopulateRaw configuration, the output Dataset was mounted at raw-output.
That directory path gets appended to a base path of /domino/datasets.
To queue the files you downloaded for writing to the Dataset, use these commands to move them to the output mount.
mv country-emissions-2010.csv /domino/datasets/raw-output/
mv country-emissions-2011.csv /domino/datasets/raw-output/
Now, the output mount directory contains the two files you want to write to the next snapshot for the output Dataset.

To write the snapshot, all you need to do is stop your Workspace session. Click Stop from the top menu, then Stop and Commit in the prompt. Domino will detect that there is data in the output mount, and will write a new snapshot.
Back in Domino, open the Datasets page.
Click the name of the output Dataset (cait-raw) to view details on it, and you’ll see the snapshot you just wrote to the Dataset.
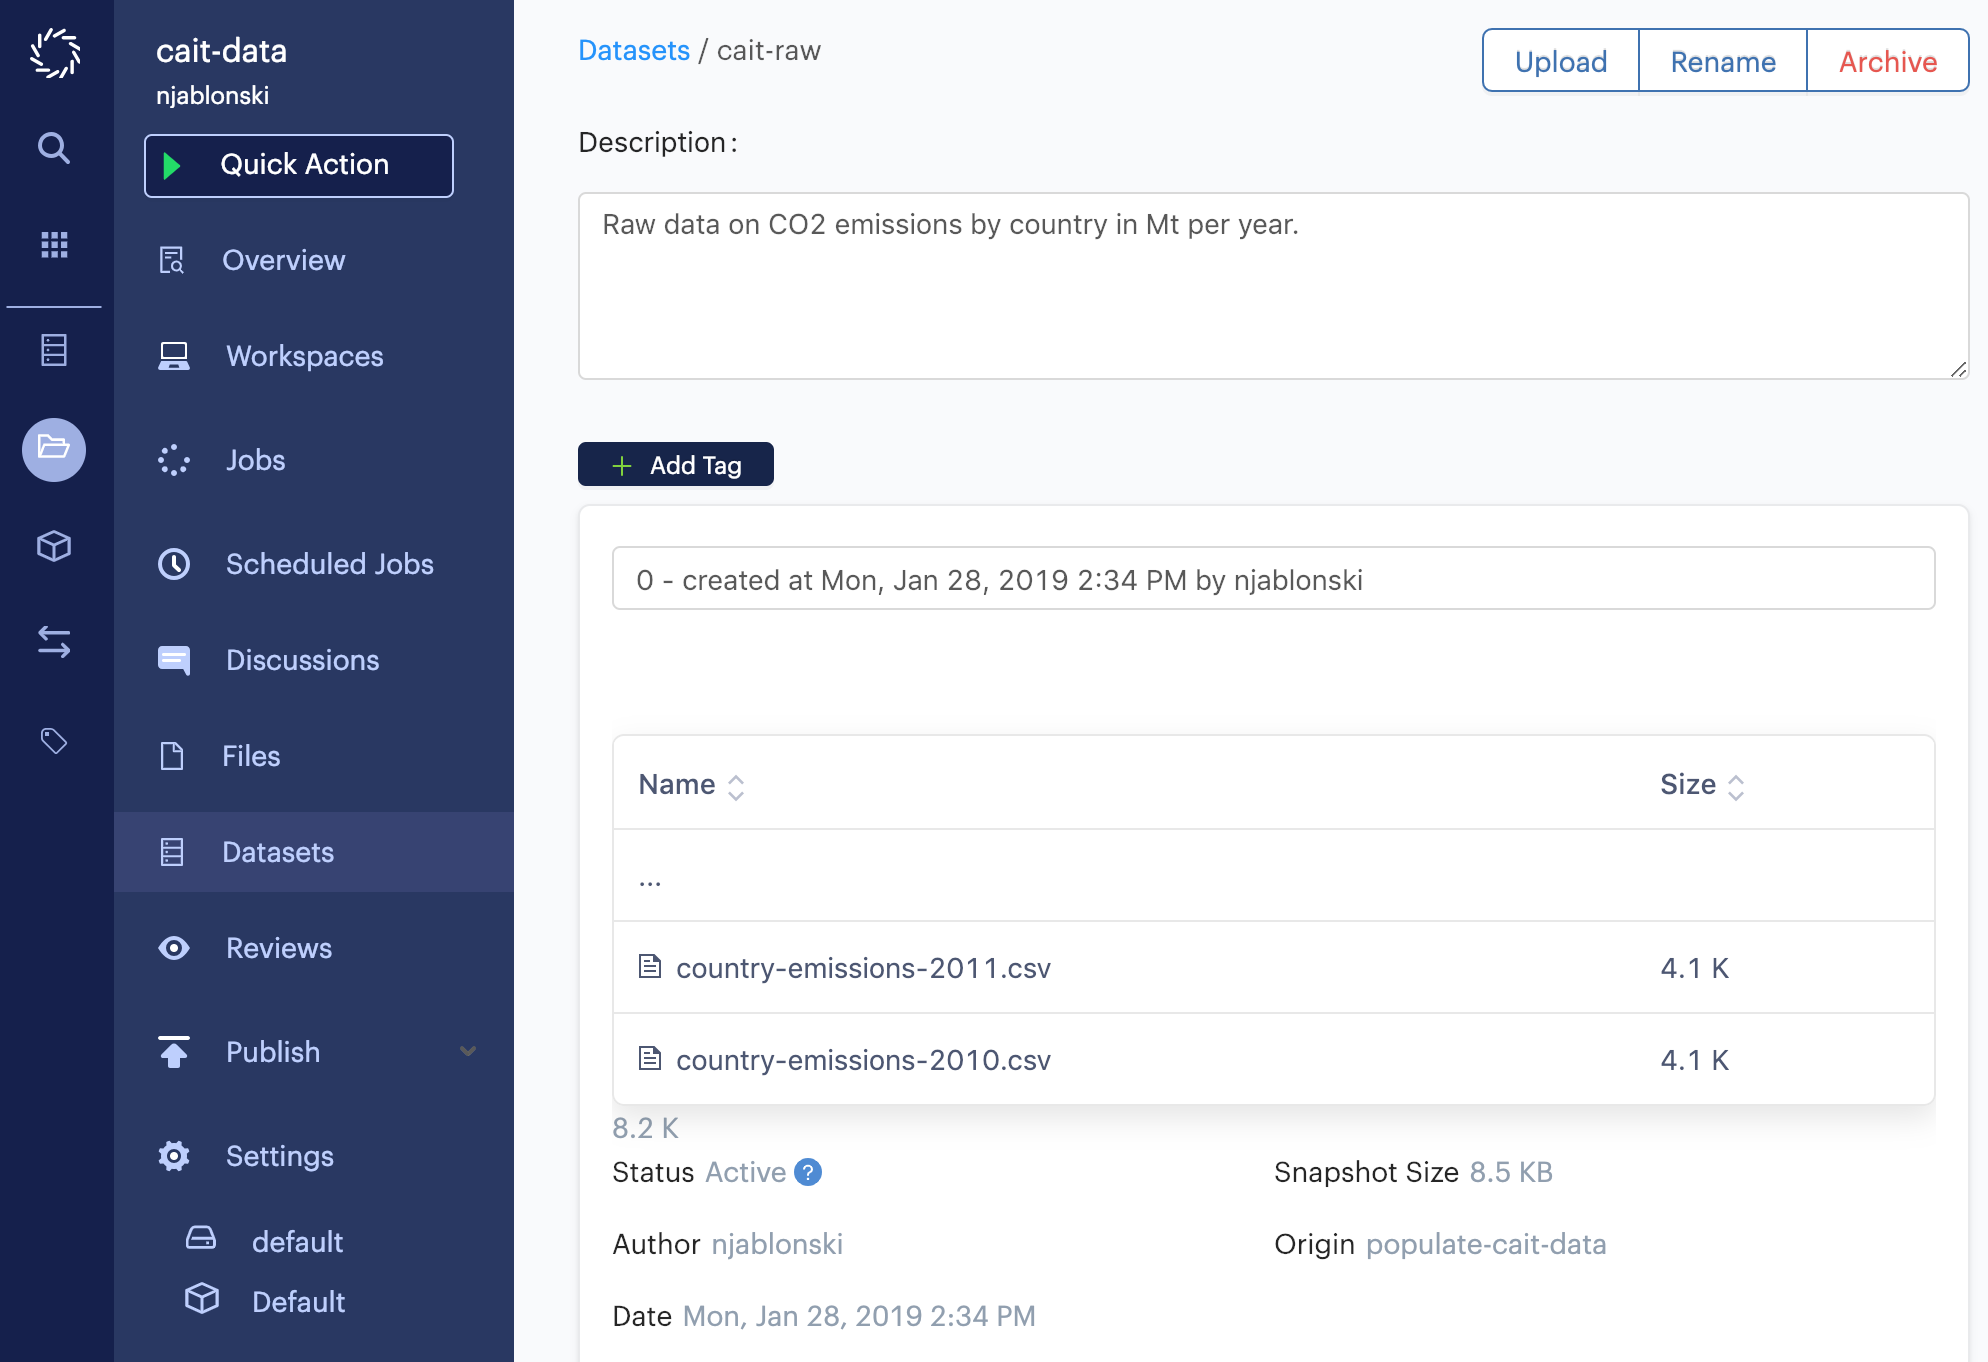
You now have a populated Dataset that you and other contributors to your project can use to access data for analysis and transformation.
In this step, you’ll read in the data from the raw Dataset, transform it, and write it to a new Dataset. The first step is to create a new Dataset configuration.
From the Files page of your project, click the filename of domino.yaml to open the file, then click Edit.
Add the following new Dataset configuration at the end of the file, then click Save.
- name: "WriteTrend"
  inputs:
    - path: "raw-input"
      dataset: "cait-raw"
  outputs:
    - path: "trend-output"
      dataset: "emissions-trend"
When finished, your domino.yaml file will describe two configurations:
-
the
PopulateRawconfiguration you used in the previous step -
the new
WriteTrendconfiguration that mounts thecait-rawDataset for input, and theemissions-trendDataset for output
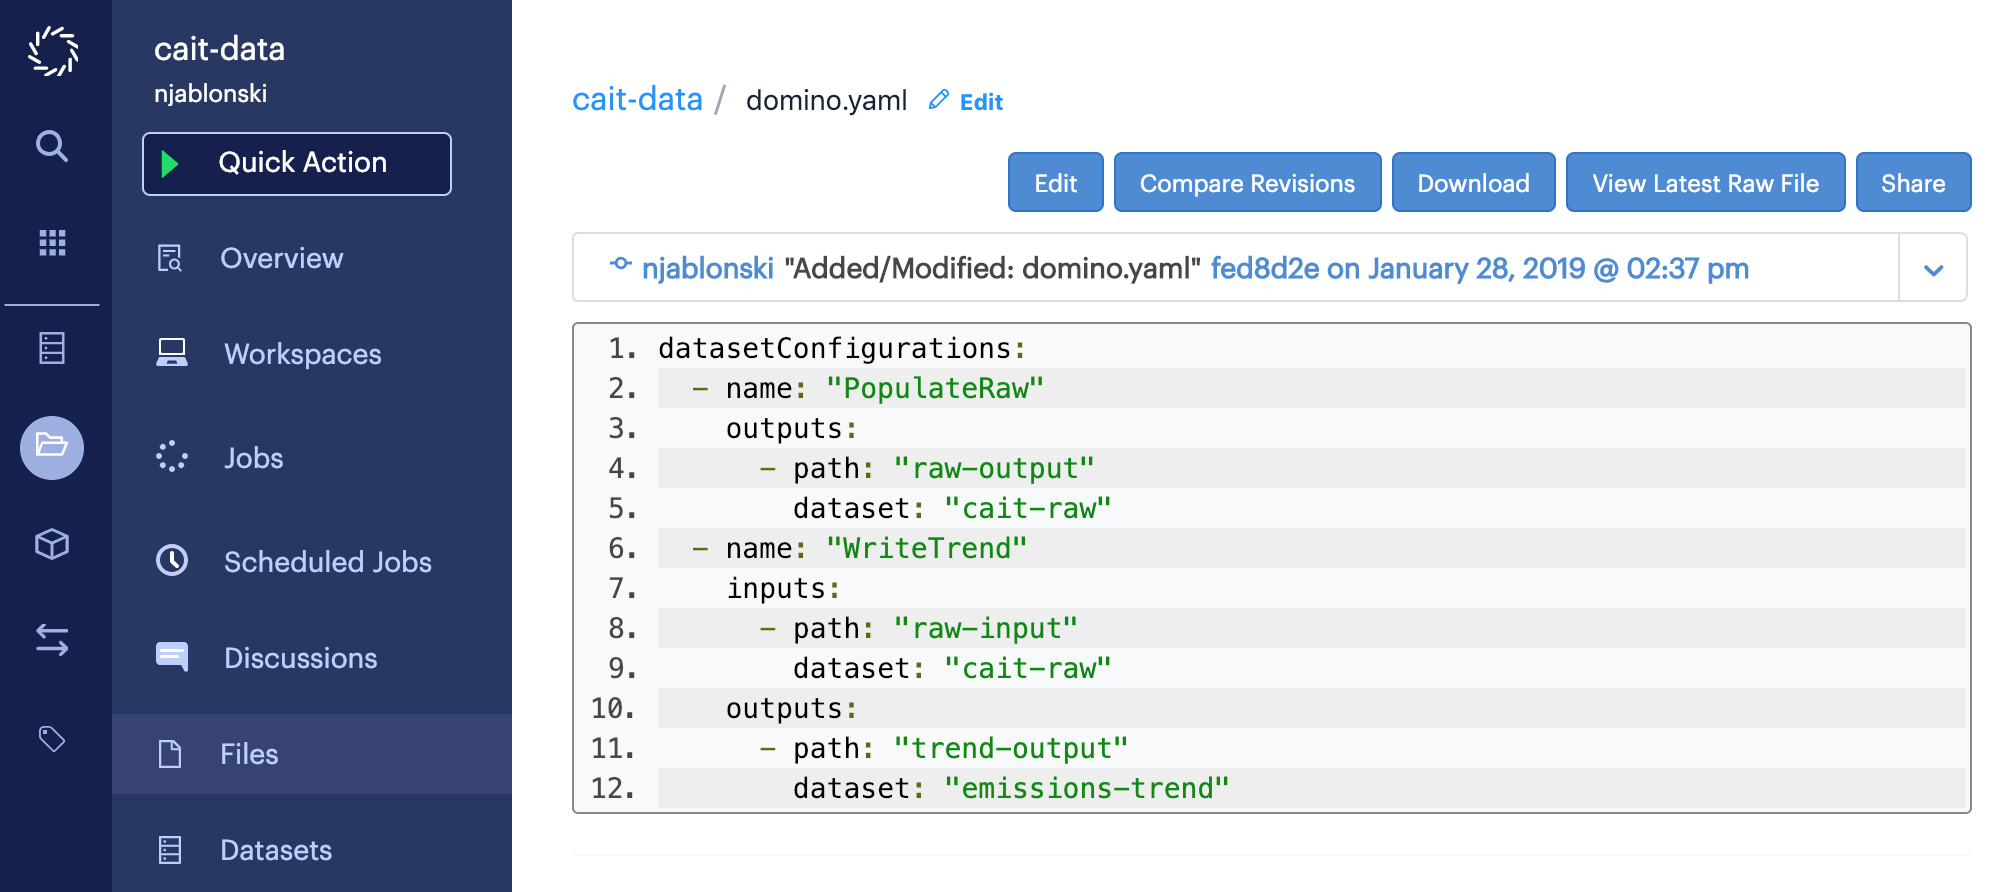
Using the new WriteTrend configuration, you can write code that reads from the input Dataset, performs some processing or analysis operations on the data within, then writes to the different output Dataset.
For this step you will write and execute a Python script as a Domino Run, rather than using a Domino Workspace. The same operations could be done in a Workspace if desired, but using a batch Run will create a repeatable step in a data pipeline, which you could run every time the input Dataset changes to get an updated output Dataset.
From the Files page of your project, click Add File.
Name the file calculate-trend.py, paste in the Python script below, then click Save.
from __future__ import division
import pandas as pd
import os
import glob

# load all files from input datasets as pandas dataframes
df_list = []
data_dir = "/domino/datasets/raw-input/"
data_files_list = glob.glob(data_dir+'*')

# function takes two raw MtCO2 columns and returns percentage change
def percentage_change(year1_df, year2_df):
  year1_data = year1_df["CO2 emissions (Mt)"]
  year2_data = year2_df["CO2 emissions (Mt)"]
  change = (year2_data-year1_data)/year1_data * 100
  change_formatted = str(round(change,2))+"%"
  return change_formatted

# create output dataset
emissions = pd.DataFrame()
emissions['Country'] = pd.read_csv(data_files_list[0])['Country']

# write new columns for each year on year pair
for i in range(len(data_files_list)):
  if i == 0:
    continue
  df_year_1 = pd.read_csv(data_files_list[i-1])
  df_year_2 = pd.read_csv(data_files_list[i])
  year1 = str(df_year_1.loc[0,'Year'])
  year2 = str(df_year_2.loc[0,'Year'])
  column_name = "Emissions change " + year1 + " to " + year2
  emissions[column_name] = percentage_change

# send data to output dataset
output_file = "/domino/datasets/trend-output/emissions-trend.csv"
emissions.to_csv(output_file)
To run this script with the WriteTrend Dataset configuration, click Jobs from the project menu, then click Run at the top of the Runs list.
Enter calculate-trend.py as the file you want to run, then below that click the Advanced Datasets configuration tab and choose WriteTrend from the dropdown menu.
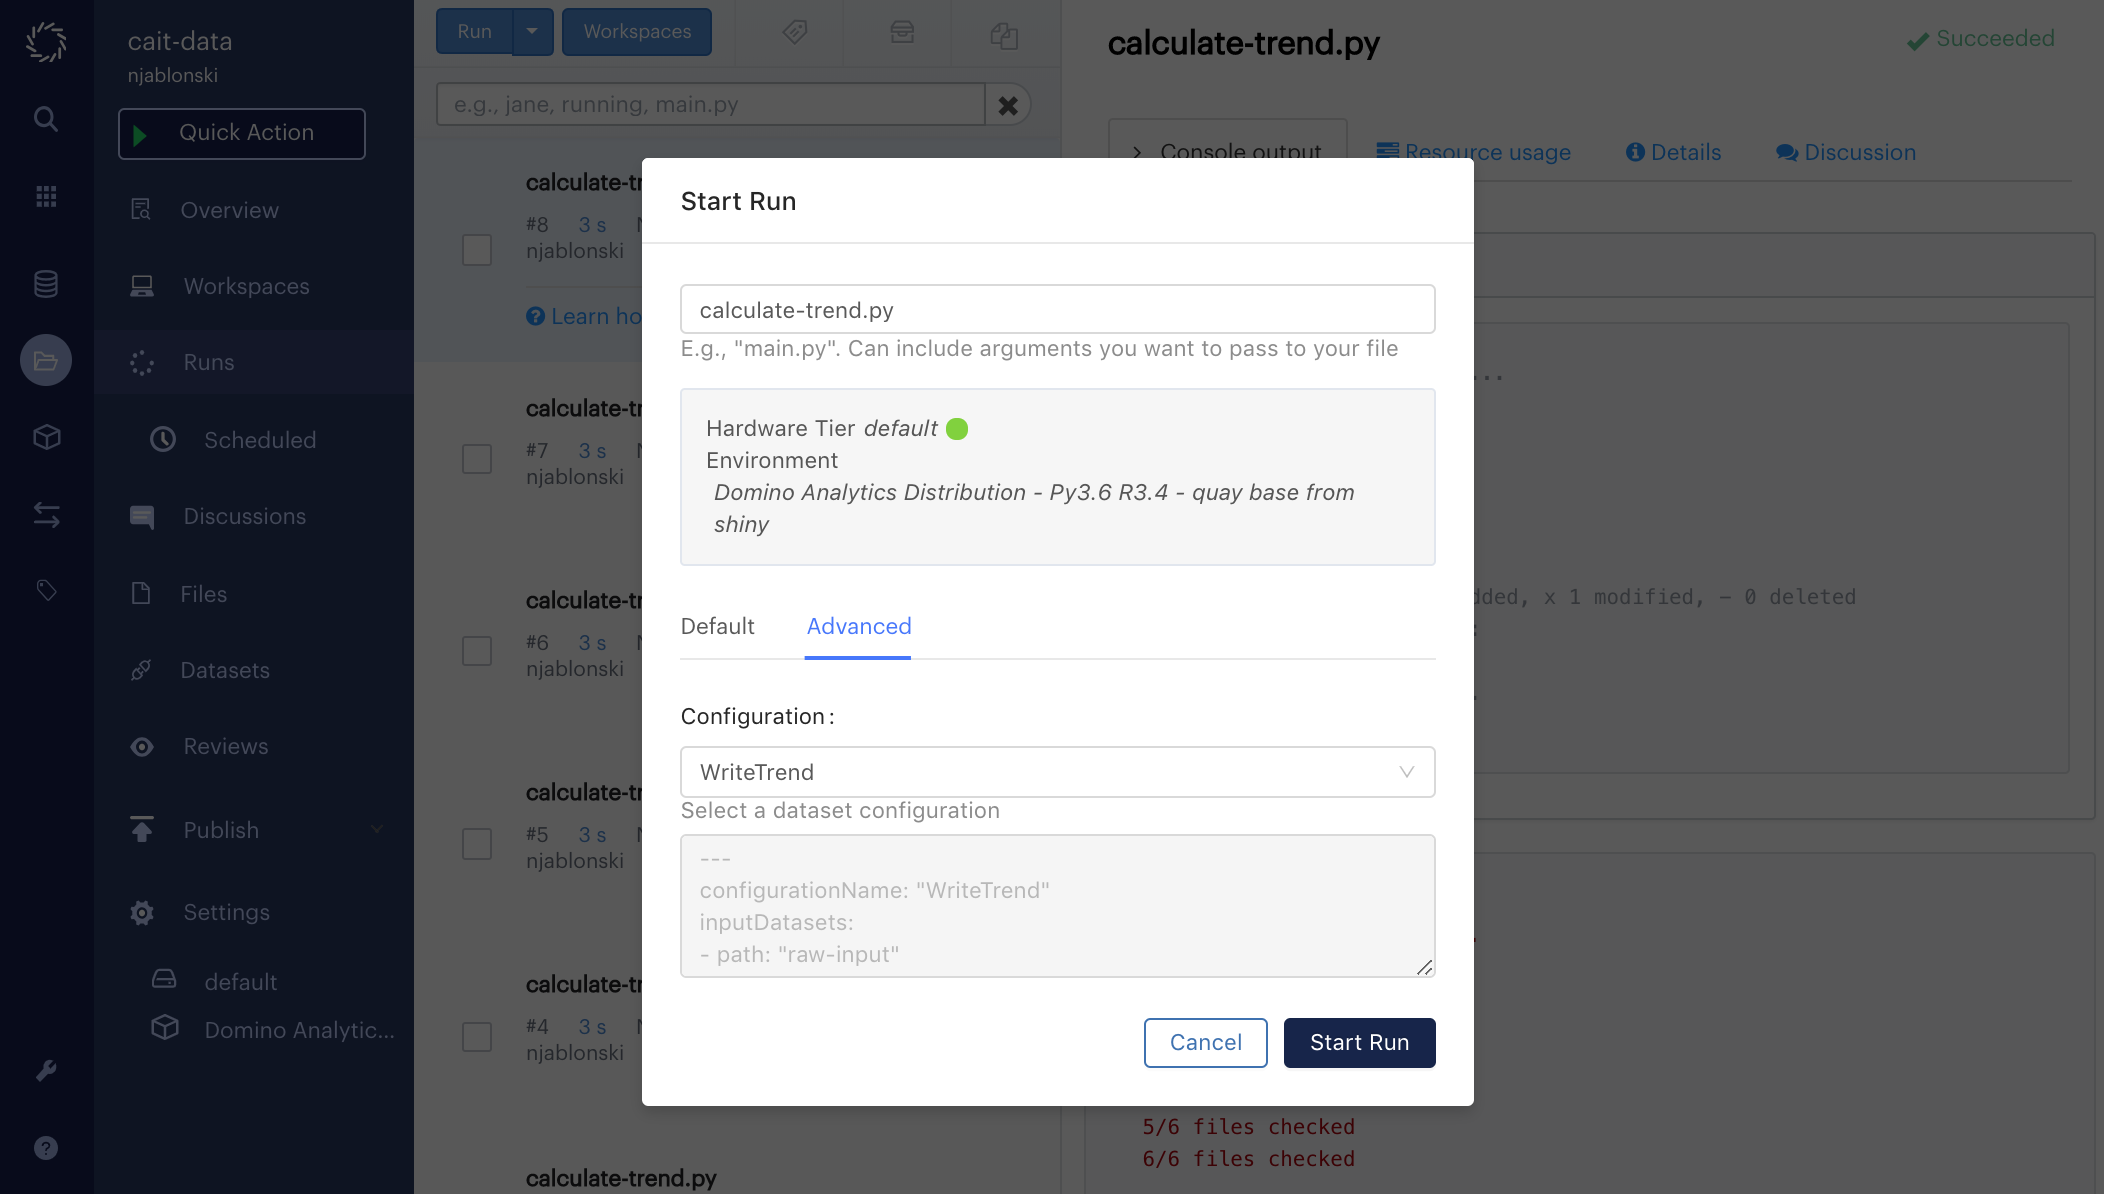
Click Start Run to execute your code.
When finished, you’ll see a new snapshot written to the emissions-trend Dataset, containing the transformed data from cait-raw.
Every time you run calculate-trend.py with this Dataset configuration, it will read and process the latest snapshot of cait-raw and write a new snapshot of emissions-trend.
In the next step, you’ll learn how to append to a Dataset by adding a new file to cait-raw.
Suppose you receive a fresh batch of raw data, in this case a new file with data from 2012 that you want to store alongside the data from 2010 and 2011. The logical operation you want to do is append that file to the existing content of the last snapshot. The procedure for appending to a Domino Dataset involves mounting it for both input and output simultaneously.
Remember that by default, mounting a Dataset for input makes available the files in the most recent snapshot, and mounting a Dataset for output provides an empty directory, the contents of which will become the next snapshot at the end of the Run or Workspace session.
The high-level steps to an append are:
-
Start a Run or Workspace session with the Dataset mounted for both input and output
-
Copy the contents of the input mount to the output mount
-
Add the data you want to append to the Dataset to the output mount
To continue this tutorial example, you first need to write a new Dataset configuration.
From the Files page of your project, click the filename of domino.yaml to open the file, then click Edit.
Paste the following new Dataset configuration at the end of the file, then click Save.
- name: "AppendRaw"
  inputs:
    - path: "raw-input"
      dataset: "cait-raw"
  outputs:
    - path: "raw-output"
      dataset: "cait-raw"
This new AppendRaw configuration mounts the cait-raw Dataset for both input and output.
The input mount will be at /domino/datasets/raw-input and the output mount will be at /domino/datasets/raw-output.
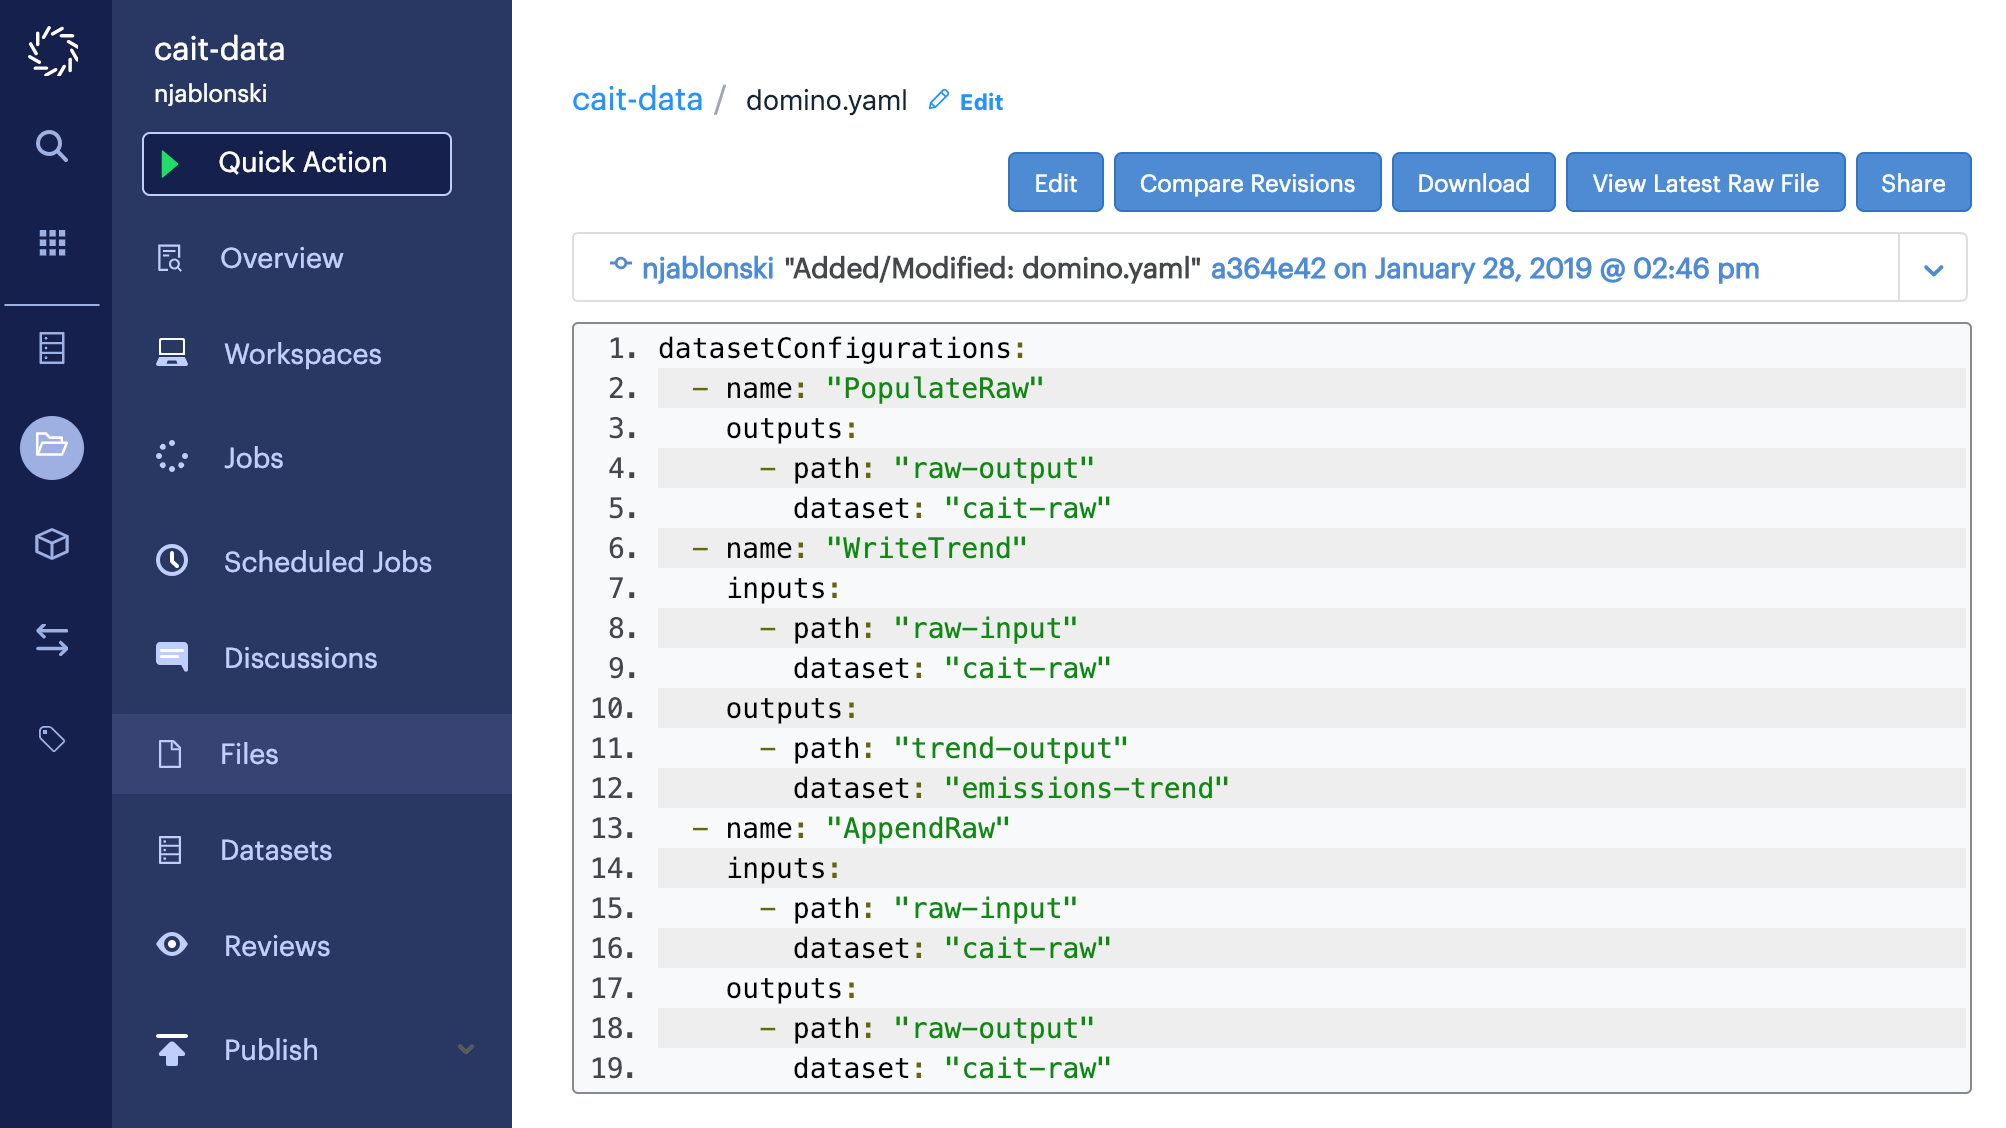
Now you can perform your append operation by starting up a Domino Workspace with the AppendRaw configuration.
-
From the project menu click Workspaces.
-
Select Jupyter.
-
Give the Workspace an informative name.
-
Click to open the Advanced tab in the Datasets panel.
-
Choose
AppendRawfrom the dropdown menu. -
Click Launch Jupyter Workspace.
In your Jupyter Workspace, click New > Terminal to access the executor shell. Follow these steps to complete your append operation:
-
Fetch the new file with 2012 data.
wget https://s3.amazonaws.com/dominodatalab-cait/country-emissions-2012.csv -
Copy the previous snapshot of the Dataset from the input mount to the output mount.
cp /domino/datasets/raw-input/* /domino/datasets/raw-output/ -
Move the new file to the output mount.
mv country-emissions-2012.csv /domino/datasets/raw-output/ -
Click Stop then Stop and Commit to end this session and write the new snapshot of the Dataset.
If you examine the cait-raw Dataset from the Datasets page of your project, you’ll see a new snapshot with the 2012 file appended to the contents of the previous snapshot.
Now, if you want to, you can start a fresh Run of calculate-trend.py with the WriteTrend configuration, to update the emissions-trend Dataset with the 2012 data.
Reverting a Dataset is similar to appending, in that you’ll mount the Dataset for input and output simultaneously.
However, instead of mounting the latest snapshot for input, you’ll mount a specified previous snapshot that you want to revert to.
Suppose there was an issue with the 2012 file you added in the previous section, and you want to go back to the initial snapshot of cait-raw.
To identify a specific snapshot in your Dataset configuration, you need to tag the snapshot.
From the Files page of your project, click the Datasets tab.
Next, click the name of the cait-raw Dataset.
From the dropdown menu, choose the snapshot you want to tag, in this case Snapshot 0.

Click the + Add Tag button below the Dataset name in the upper left, then fill in the string you want to tag the snapshot with. In the below example the snapshot is tagged with "good."
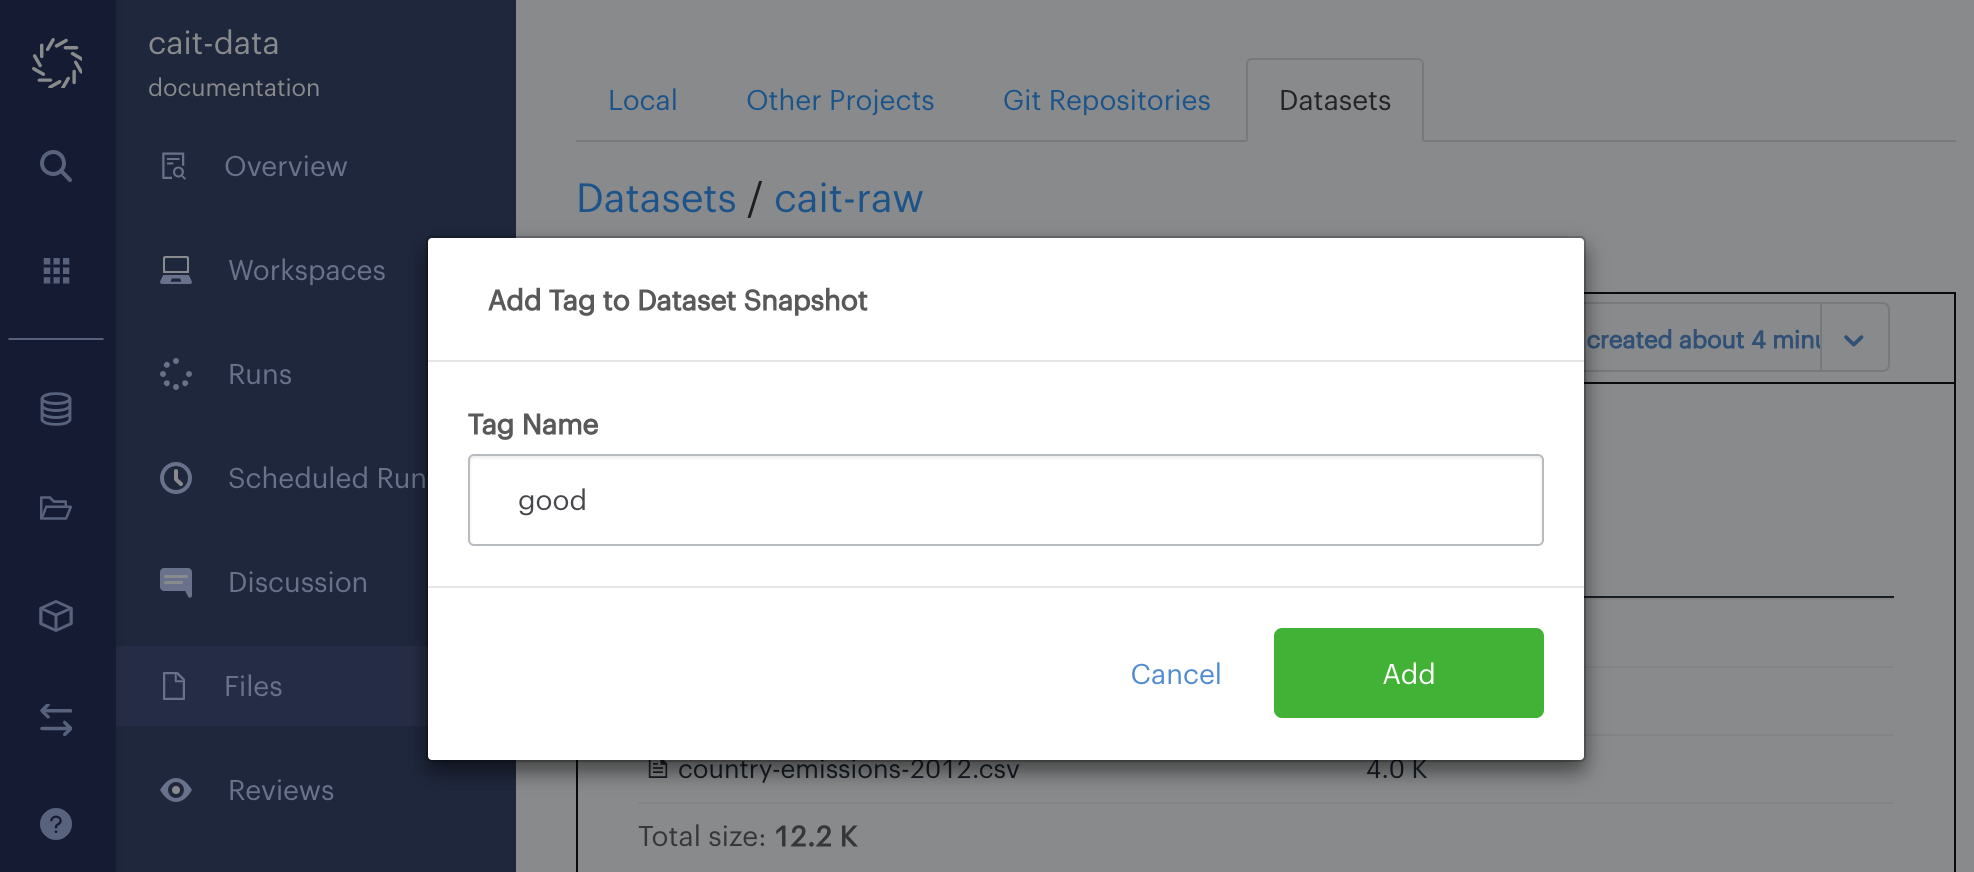
When finished, you’ll see a blue tag with the string you entered appear next to the + Add Tag button.
You’ll now need to write a Dataset configuration that mounts the tagged snapshot of the Dataset.
From the Files page of your project, click the filename of domino.yaml to open the file, then click Edit.
Paste the following new Dataset configuration at the end of the file, then click Save.
- name: "RevertRaw"
  inputs:
    - path: "raw-input"
      dataset: "cait-raw:good"
  outputs:
    - path: "raw-output"
      dataset: "cait-raw"
This is similar to the append configuration, but note that the input Dataset name is entered as cait-raw:good.
This is how to set up a dataset configuration to mount a tagged input snapshot.
A colon is appended to the Dataset name followed by the tag string.
Now you can perform your revert operation by starting up a Domino Workspace with the RevertRaw configuration.
-
From the project menu click Workspaces.
-
Select Jupyter.
-
Give the Workspace an informative name.
-
Click to open the Advanced tab in the Datasets panel.
-
Choose
RevertRawfrom the dropdown menu. -
Click Launch Jupyter Workspace.
In your Jupyter Workspace, click New > Terminal to access the executor shell. Follow these steps to complete your revert operation:
-
Copy the tagged snapshot contents from the input mount to the output mount.
cp /domino/datasets/raw-input/* /domino/datasets/raw-output/ -
Click Stop then Stop and Commit to end this session and write the new snapshot of the Dataset.
If you examine the cait-raw Dataset from the Datasets tab on the Files page of your project, you’ll see a new Snapshot 2 with only the original two files from Snapshot 0 in it.
To give another user access to the Datasets in your project, you need to add them to the project as a Contributor, Results Consumer, or Project Importer.
Once your colleague has been granted one of those permissions on the project, he or she can refer to your Datasets in a domino.yaml file with the scheme:
<your-username>/<your-project-name>/<dataset-name>
For example, to mount the emissions-trend Dataset from the above examples as an input Dataset, your colleague would use a configuration like this, noting that documentation in this path is the username:
datasetConfigurations:
 - name: "import"
   inputs:
     - path: "cait-input"
dataset: "documentation/cait-data/emissions-trend"The domino.yaml file respects the following schema.
datasetConfigurations: # contains array of configurations
  - name: string # identifier for this configuration
    inputs: # contains array of datasets to mount for input
      - path: string # path appended to /domino/datasets
        dataset: string # name of the dataset to mount as input
    outputs: # contains array of datasets to mount for input
      - path: string # path appended to /domino/datasets
        dataset: string # name of the dataset to mount for output