Domino supports connecting to a Cloudera CDH5 cluster through the addition of cluster-specific binaries and configuration files to your Domino environment.
At a high level, the process is as follows:
-
Connect to your CDH5 edge or gateway node and gather the required binaries and configuration files, then download them to your local machine.
-
Upload the gathered files into a Domino project to allow access by the Domino environment builder.
-
Create a new Domino environment that uses the uploaded files to enable connections to your cluster.
-
Enable YARN integration for the Domino projects that you want to use with the CDH5 cluster.
Domino supports the following types of connections to a CDH5 cluster:
You will find most of the files for setting up your Domino environment on your CDH5 edge or gateway node. To get started, connect to the edge node via SSH, then follow the steps below.
-
Create a directory named
hadoop-binaries-configsat/tmp.mkdir /tmp/hadoop-binaries-configs -
Create the following subdirectories inside
/tmp/hadoop-binaries-configs/.mkdir /tmp/hadoop-binaries-configs/configs mkdir /tmp/hadoop-binaries-configs/parcels -
Optional: If your cluster uses Kerberos authentication, create the following subdirectory in
/tmp/hadoop-binaries/configs/.mkdir /tmp/hadoop-binaries-configs/kerberosThen, copy the
krb5.confKerberos configuration file from/etc/to/tmp/hadoop-binaries-configs/kerberos.cp /etc/krb5.conf /tmp/hadoop-binaries-configs/kerberos/ -
Copy the
CDHandSPARK2directories from/opt/cloudera/parcels/to/tmp/hadoop-binaries-configs/parcels/. These directories will have a version number appended to their names, so complete the appropriate directory name in the commands shown below.cp -R /opt/cloudera/parcels/CDH-<version>/ /tmp/hadoop-binaries-configs/parcels/ cp -R /opt/cloudera/parcels/SPARK2-<version>/ /tmp/hadoop-binaries-configs/parcels/ -
Copy the
hadoop,hive,spark, andspark2directories from/etc/to/tmp/hadoop-binaries-configs/configs/.cp -R /etc/hadoop /tmp/hadoop-binaries-configs/configs/ cp -R /etc/hive /tmp/hadoop-binaries-configs/configs/ cp -R /etc/spark2 /tmp/hadoop-binaries-configs/configs/ cp -R /etc/spark /tmp/hadoop-binaries-configs/configs/ -
On the edge node, run the following command to identify the version of Java running on the cluster.
java -versionYou should then download a JDK .tar file from the Oracle downloads page that matches that version. The filename will have a pattern like the following.
jdk-8u211-linux-x64.tar.gzKeep this JDK handy on your local machine for use in a future step.
-
Compress the
/tmp/hadoop-binaries-configs/directory to a gzip archive.cd /tmp tar -zcf hadoop-binaries-configs.tar.gz hadoop-binaries-configsWhen finished, use
SCPto download the archive to your local machine. -
Next, you’ll need to extract the archive on your local machine, add a
javasubdirectory, then add the JDK .tar file you downloaded earlier to thejavasubdirectory.tar xzf hadoop-binaries-configs.tar.gz mkdir hadoop-binaries-configs/java cp jdk-8u211-linux-x64.tar.gz hadoop-binaries-configs/java/ -
When finished, your
hadoop-binaries-configsdirectory should have the following structure:hadoop-binaries-configs/ ├── configs/ ├── hadoop/ ├── hive/ ├── spark/ └── spark2/ ├── java/ └── jdk-8u211-linux-x64.tar.gz ├── parcels ├── CDH-version/ └── SPARK-version/ └── kerberos/ # optional └── krb5.conf -
If your directory contains all the required files, you can now compress it to a gzip archive again in preparation for uploading to Domino in the next step.
tar -zcf hadoop-binaries-configs.tar.gz hadoop-binaries-configs
Use the following procedure to upload the archive you created in the previous step to a public Domino project. This will make the file available to the Domino environment builder.
-
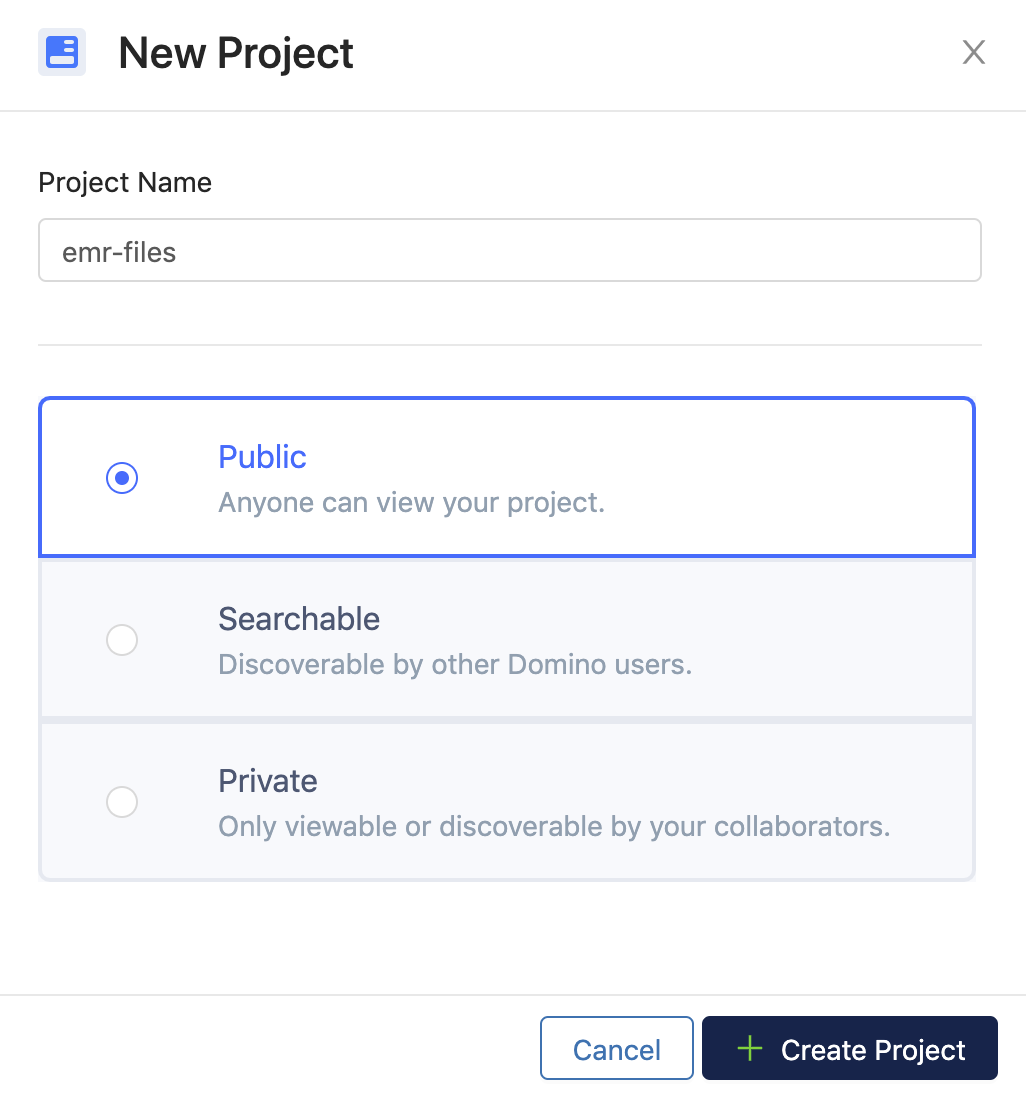
Log in to Domino, then create a new public project.
-
Open the Files page for the new project, then click to browse for files and select the archive you created in the previous section. Then click Upload.
-
After the archive has been uploaded, click the gear menu next to it on the Files page, then right click Download and click Copy Link Address. Save the copied URL in your notes, as you will need it in the next step.
After you have recorded the download URL of the archive, you’re ready to build a Domino environment for connecting to your CDH5 cluster.
-
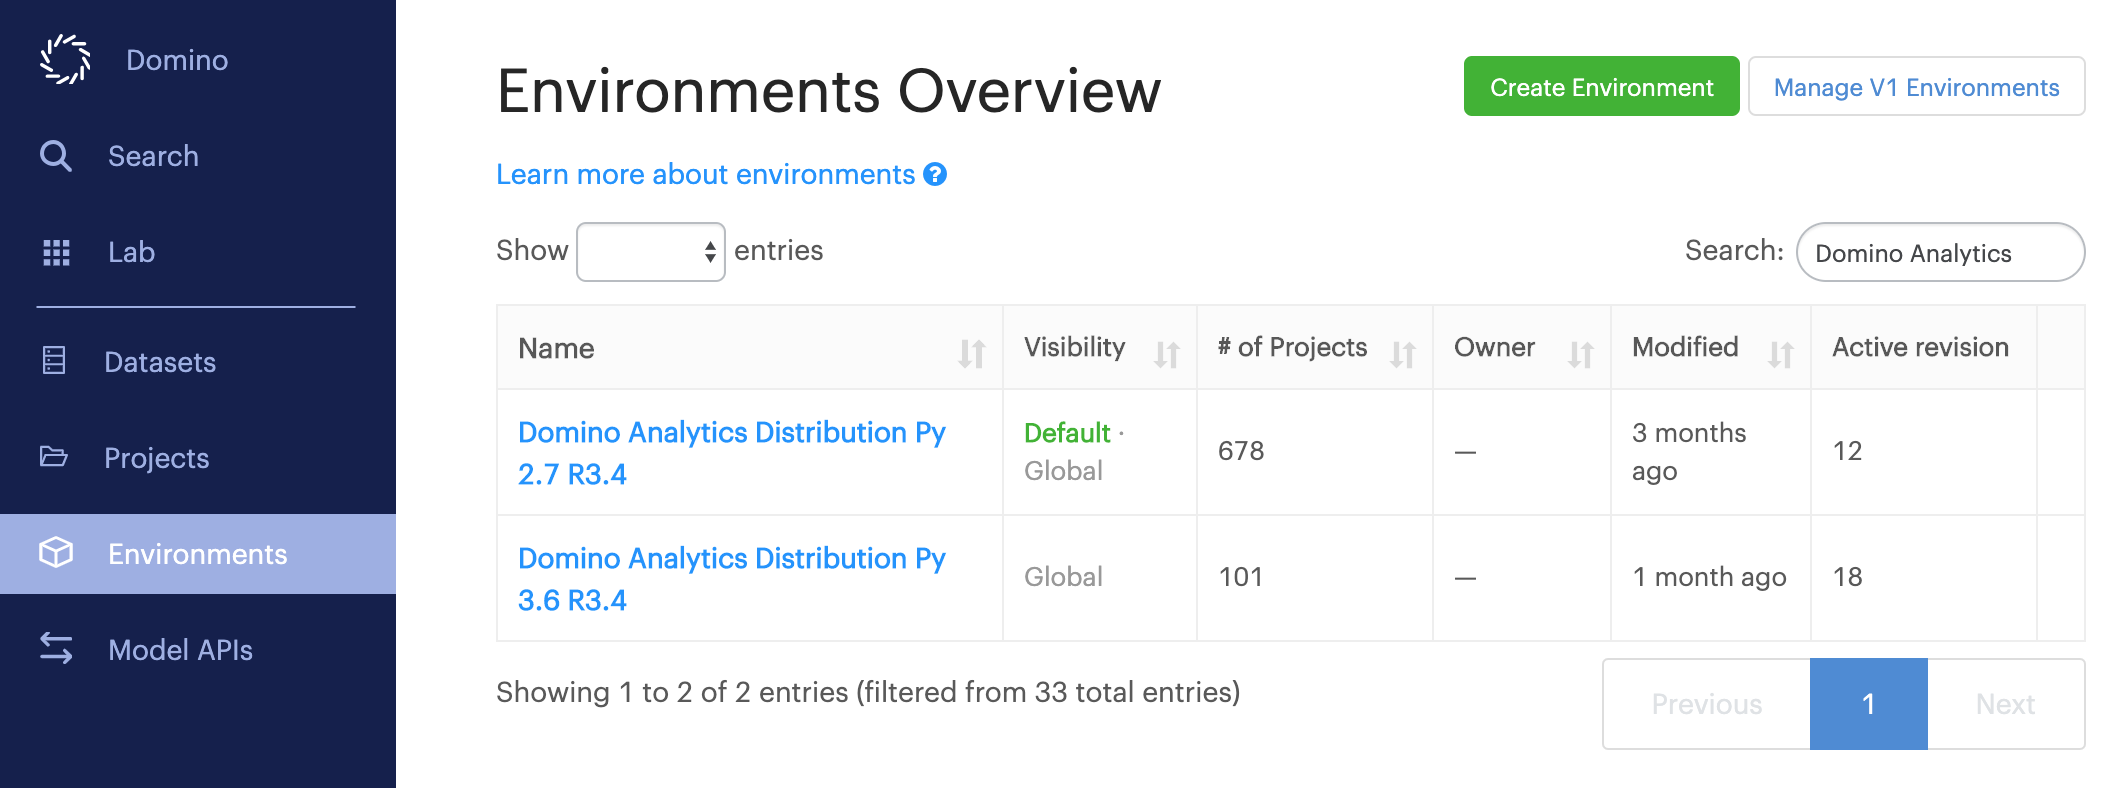
Click Environments from the Domino main menu, then click Create Environment.
-
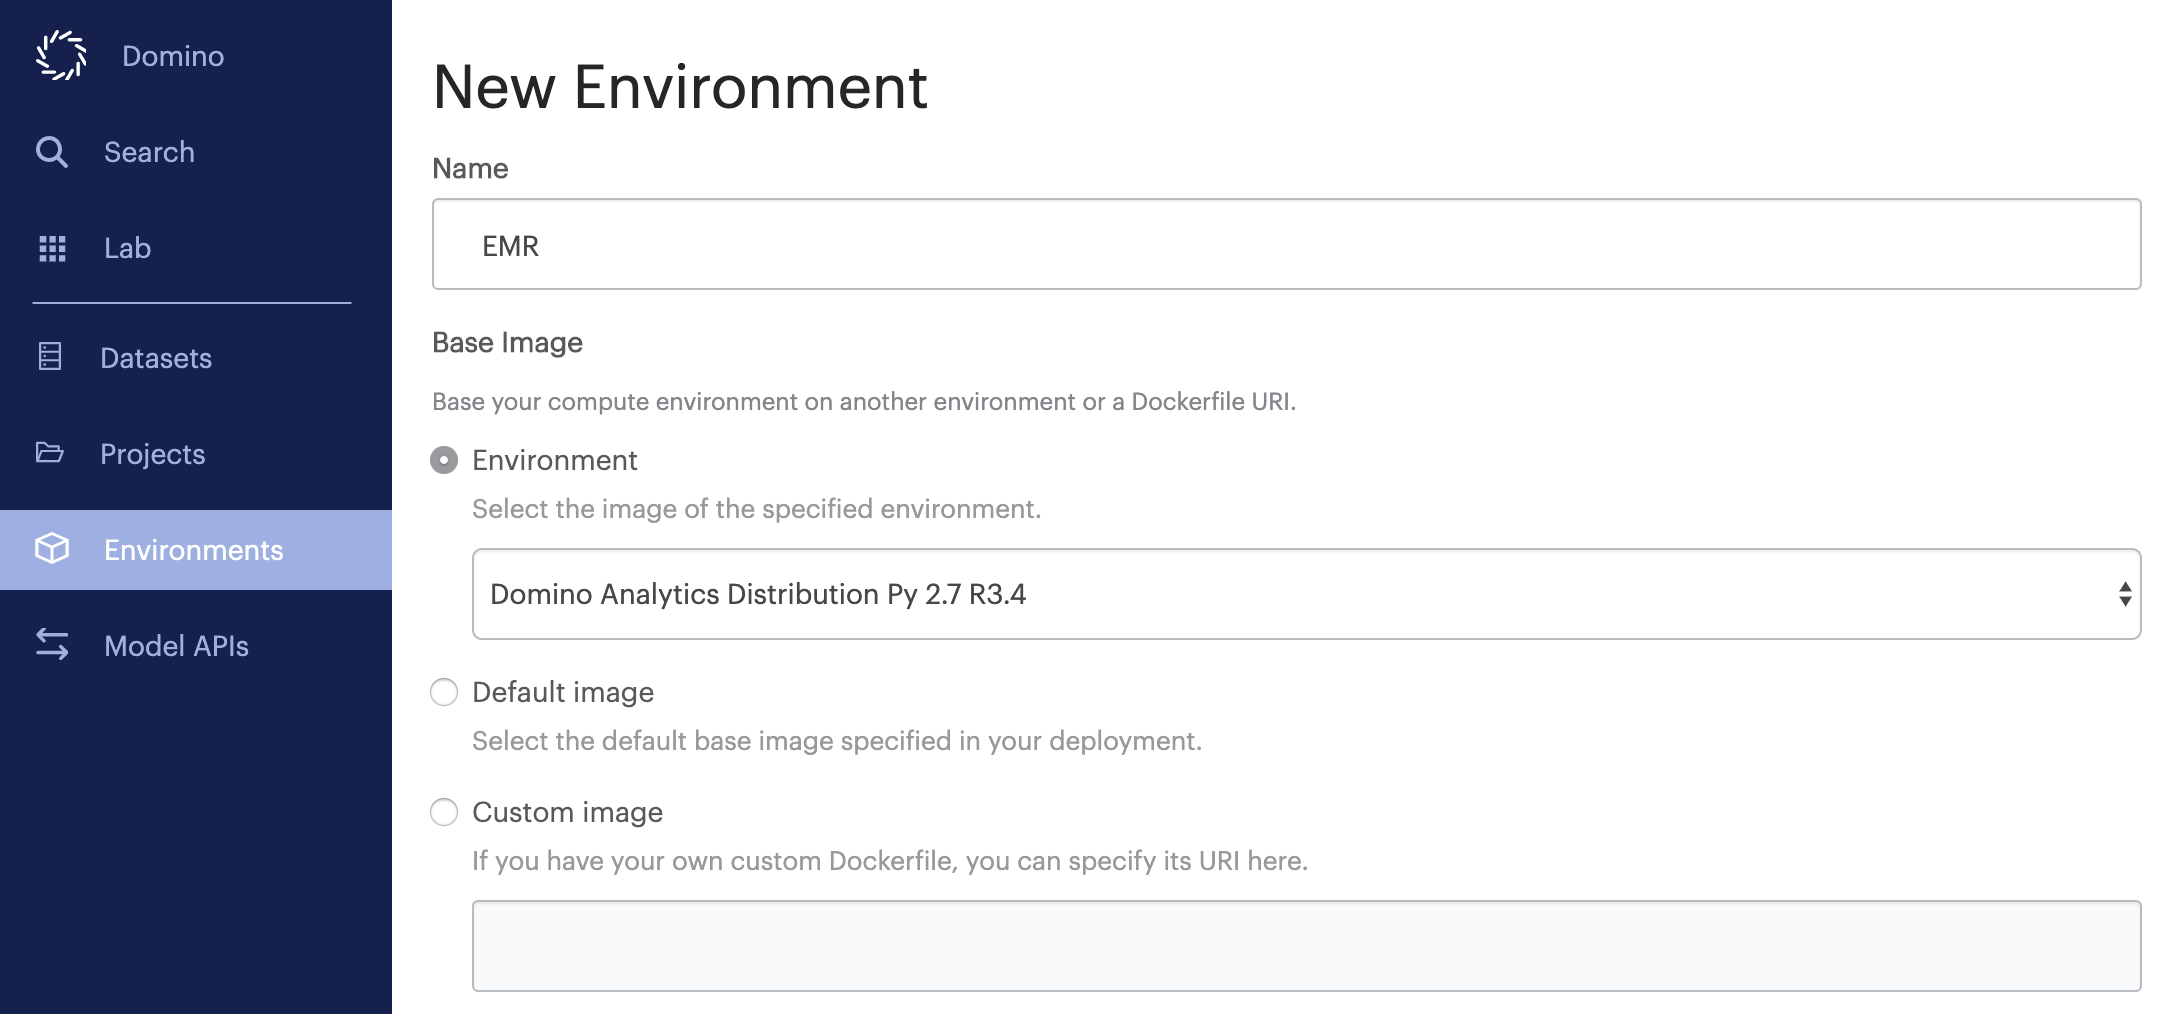
Give the environment an informative name, then choose a base environment that includes the version of Python that is installed on the nodes of your CDH5 cluster. Most Linux distributions ship with Python 2.7 by default, so you will see the Domino analytics distribution for Python 2.7 used as the base image in the following examples. Click Create when finished.
-
After creating the environment, click Edit Definition. Copy the following example into your Dockerfile instructions, then be sure to edit it wherever necessary with values specific to your deployment and cluster.
In this Dockerfile, wherever you see a hyphenated instruction enclosed in angle brackets like
<paste-your-domino-download-url-here>, be sure to replace it with the corresponding value you recorded in previous steps.You may also need to edit commands that follow to match downloaded filenames.
USER root # Give user ubuntu ability to sudo as any user including root RUN echo "ubuntu ALL=(ALL:ALL) NOPASSWD: ALL" >> /etc/sudoers # Set up directories RUN mkdir -p /opt/cloudera/parcels && \ mkdir /tmp/domino-hadoop-downloads && \ mkdir /usr/java # Download the binaries and configs gzip you uploaded to Domino. # This downloaded gzip file should have the following # - CDH and Spark2 parcel directories in a 'parcels' sub-directory. # - java installation tar file in 'java' sub-directory # - krb5.conf in 'kerberos' sub-directory # - hadoop, hive, spark2 and spark config directories a 'configs' sub-directory RUN wget --no-check-certiticate <paste-your-domino-download-url-here> -O /tmp/domino-hadoop-downloads/hadoop-binaries-configs.tar.gz && \ tar xzf /tmp/domino-hadoop-downloads/hadoop-binaries-configs.tar.gz -C /tmp/domino-hadoop-downloads/ # Install kerberos client and update the kerberos configuration file RUN apt-get -y install krb5-user telnet && \ cp /tmp/domino-hadoop-downloads/hadoop-binaries-configs/kerberos/krb5.conf /etc/krb5.conf # Install version of Java that matches hadoop cluster and update environment variables # Your JDK may have a different filename depending on your cluster's version of Java RUN tar xvf /tmp/domino-hadoop-downloads/hadoop-binaries-configs/java/jdk-8u162-linux-x64.tar -C /usr/java ENV JAVA_HOME=/usr/java/jdk1.8.0_162 RUN echo "export JAVA_HOME=/usr/java/jdk1.8.0_162" >> /home/ubuntu/.domino-defaults && \ echo "export PATH=$JAVA_HOME/bin:$PATH" >> /home/ubuntu/.domino-defaults # Install CDH hadoop-client binaries from cloudera ubuntu trusty repository. # This example shows client binaries for CDH version 5.15 here. # Update these commands with the CDH version that matches your cluster. RUN echo "deb [arch=amd64] http://archive.cloudera.com/cdh5/ubuntu/trusty/amd64/cdh trusty-cdh5.15.0 contrib" >> /etc/apt/sources.list.d/cloudera.list && \ echo "deb-src http://archive.cloudera.com/cdh5/ubuntu/trusty/amd64/cdh trusty-cdh5.15.0 contrib" >> /etc/apt/sources.list.d/cloudera.list && \ wget http://archive.cloudera.com/cdh5/ubuntu/trusty/amd64/cdh/archive.key -O /tmp/domino-hadoop-downloads/archive.key && \ apt-key add /tmp/domino-hadoop-downloads/archive.key && \ apt-get update && \ apt-get -y -t trusty-cdh5.15.0 install zookeeper && \ apt-get -y -t trusty-cdh5.15.0 install hadoop-client # Copy CDH and Spark2 parcels to correct directories and update symlinks # Note that the version strings attached to your directory names may be different than the below examples. RUN mv /tmp/domino-hadoop-downloads/hadoop-binaries-configs/parcels/CDH-5.15.0-1.cdh5.15.0.p0.21 /opt/cloudera/parcels/ && \ mv /tmp/domino-hadoop-downloads/hadoop-binaries-configs/parcels/SPARK2-2.3.0.cloudera3-1.cdh5.13.3.p0.458809 /opt/cloudera/parcels/ && \ ln -s /opt/cloudera/parcels/CDH-5.15.0-1.cdh5.15.0.p0.21 /opt/cloudera/parcels/CDH && \ ln -s /opt/cloudera/parcels/SPARK2-2.3.0.cloudera3-1.cdh5.13.3.p0.458809 /opt/cloudera/parcels/SPARK2 # Copy hadoop, hive and spark2 configurations RUN mv /etc/hadoop /tmp/domino-hadoop-downloads/hadoop-binaries-configs/configs/hadoop-etc-local.backup && \ mv /tmp/domino-hadoop-downloads/hadoop-binaries-configs/configs/hadoop /etc/hadoop && \ mv /tmp/domino-hadoop-downloads/hadoop-binaries-configs/configs/hive /etc/hive && \ mv /tmp/domino-hadoop-downloads/hadoop-binaries-configs/configs/spark2 /etc/spark2 && \ mv /tmp/domino-hadoop-downloads/hadoop-binaries-configs/configs/spark /etc/spark # Create alternatives for hadoop configurations. Update the extensions with the same strings as found in your edge node # Example: In the command 'update-alternatives --install /etc/hadoop/conf hadoop-conf /etc/hadoop/conf.cloudera.yarn 55' # make sure that /etc/hadoop/conf.cloudera.yarn is named the same as the corresponding file on your edge node. # Sometimes in the CDH5 edgenode, that is named something like /etc/hadoop/conf.cloudera.yarn_ RUN update-alternatives --install /etc/hadoop/conf hadoop-conf /etc/hadoop/conf.cloudera.yarn 55 && \ update-alternatives --install /etc/hive/conf hive-conf /etc/hive/conf.cloudera.hive 55 && \ update-alternatives --install /etc/spark2/conf spark2-conf /etc/spark2/conf.cloudera.spark2_on_yarn 55 && \ update-alternatives --install /etc/spark/conf spark-conf /etc/spark/conf.cloudera.spark_on_yarn 55 # These instructions are for Spark2 # Creating alternatives for Spark2 binaries, also create symlink for pyspark pointing to pyspark2 RUN update-alternatives --install /usr/bin/spark2-shell spark2-shell /opt/cloudera/parcels/SPARK2/bin/spark2-shell 55 && \ update-alternatives --install /usr/bin/spark2-submit spark2-submit /opt/cloudera/parcels/SPARK2/bin/spark2-submit 55 && \ update-alternatives --install /usr/bin/pyspark2 pyspark2 /opt/cloudera/parcels/SPARK2/bin/pyspark2 55 && \ ln -s /usr/bin/pyspark2 /usr/bin/pyspark # Update SPARK and HADOOP environment variables. Make sure py4j file name is correct per your edgenode ENV SPARK_HOME=/opt/cloudera/parcels/SPARK2/lib/spark2 RUN echo "export HADOOP_HOME=/opt/cloudera/parcels/CDH/lib/hadoop" >> /home/ubuntu/.domino-defaults && \ echo "export HADOOP_CONF_DIR=/etc/hadoop/conf" >> /home/ubuntu/.domino-defaults && \ echo "export YARN_CONF_DIR=/etc/hadoop/conf" >> /home/ubuntu/.domino-defaults && \ echo "export SPARK_HOME=/opt/cloudera/parcels/SPARK2/lib/spark2" >> /home/ubuntu/.domino-defaults && \ echo "export SPARK_CONF_DIR=/etc/spark2/conf" >> /home/ubuntu/.domino-defaults && \ echo "export PYTHONPATH=$SPARK_HOME/python:$SPARK_HOME/python/lib/py4j-0.10.7-src.zip" >> /home/ubuntu/.domino-defaults # Change spark-defaults.conf file permission RUN mv /etc/spark2/conf/spark-defaults.conf /etc/spark2/ && \ chmod 777 /etc/spark2/conf.cloudera.spark2_on_yarn # Copy hive-site.xml to /etc/spark2/conf to access hive tables from Spark2. RUN cp /etc/spark2/conf/yarn-conf/hive-site.xml /etc/spark2/conf/ USER ubuntu -
Scroll down to the Pre Run Script field and add the following lines:
cat /etc/spark2/spark-defaults.conf >> /etc/spark2/conf/spark-defaults.conf
sed -i.bak '/spark.ui.port\=0/d' /etc/spark2/conf/spark-defaults.conf
-
Scroll down and click Advanced to expand additional fields. Add the following line to the Post Setup Script field:
echo "export YARN_CONF_DIR=/etc/hadoop/conf" >> /home/ubuntu/.bashrc
-
Click Build when finished editing the Dockerfile instructions. If the build completes successfully, you are ready to try using the environment.
This procedure assumes that an environment with the necessary client software has been created according to the instructions above. Ask your Domino admin for access to such an environment.
-
Open the Domino project you want to use with your CDH5 cluster, then click Settings from the project menu.
-
On the Integrations tab, click to select YARN integration from the Apache Spark panel, then click Save. You do not need to edit any of the fields in this section.
-
If your cluster uses Kerberos authentication, you can configure credentials at the user level or project level . Do so before attempting to use the environment. Note that if you followed the instructions above on creating your environment, your Kerberos configuration file has already been added to it.
-
On the Hardware & Environment tab, change the project default environment to the one with the cluster’s binaries and configurations files installed.
You are now ready to start Runs from this project that interact with your CDH5 cluster.