TensorBoard is a tool for visualizing TensorFlow data. TensorBoard operates by reading events files, which contain summary data that generated by TensorFlow. You can visualize your TensorFlow graph, plot quantitative metrics about graph, and show additional data that passes through the graph.
You can install and enable the Jupyter-TensorBoard server extension in your compute Environment to use TensorBoard in your Domino Jupyter.
You must create or modify an Environment to enable this extension in your Domino Workspaces. See Environment Management.
-
In the navigation bar, click Environments.
-
Click Create Environment.
-
Give the Environment a name, and then select a base image that has Python 3.8 installed. You can use an Environment as a base image if it uses this Domino standard:
quay.io/domino/compute-environment-images:ubuntu20-py3.9-r4.2-domino5.3-gpu -
After setting the Visibility and entering a description, click Create Environment. The Environment’s Overview page opens.
-
Go to Docker Settings and click Edit Dockerfile.
-
Add the following lines to the Dockerfile Instructions:
USER root RUN apt-get update RUN apt-get install -y nodejs RUN npm install -g configurable-http-proxy RUN pip install -U jupyter jupyter-tensorboard jupyter-server-proxy ipywidgets USER ubuntu -
Add the following lines to the Pre-run script if the Project you plan to use in this Compute Environment is a Domino Project:
tensorboard --host 127.0.0.1 --port 6006 --logdir /domino/datasets/local/${DOMINO_PROJECT_NAME}/tensorboard_logs --path_prefix /${DOMINO_PROJECT_OWNER}/${DOMINO_PROJECT_NAME}/notebookSession/${DOMINO_RUN_ID}/Tensorboard & CONF_DIR="${HOME}/.jupyter" mkdir -p "${CONF_DIR}" cat << EOF >> ${CONF_DIR}/jupyter_notebook_config.py c.ServerProxy.servers = { "Tensorboard": { 'command': ['configurable-http-proxy', '--ip', '127.0.0.1', '--port', '{port}', '--default-target=http://127.0.0.1:6006/${DOMINO_PROJECT_OWNER}/${DOMINO_PROJECT_NAME}/notebookSession/${DOMINO_RUN_ID}/Tensorboard/'] } } EOF CONF_DIR="${HOME}/.jupyterlab" mkdir -p "${CONF_DIR}" cat << EOF >> ${CONF_DIR}/jupyter_lab_config.py c.ServerProxy.servers = { "Tensorboard": { 'command': ['configurable-http-proxy', '--ip', '127.0.0.1', '--port', '{port}', '--default-target=http://127.0.0.1:6006/${DOMINO_PROJECT_OWNER}/${DOMINO_PROJECT_NAME}/notebookSession/${DOMINO_RUN_ID}/Tensorboard/'] } } EOF -
Add the following lines to the Pre-run script if the Project is a Git-based Project:
-
Click Build.
The Revisions page opens. If the new revision builds successfully, you can use this Environment.
-
Open the Project you want to use with Jupyter-Tensorboard.
-
In the navigation pane, click Settings.
-
From Compute Environment, select the Environment you created previously. A notification opens to verify that the new Environment is now set.
-
In the navigation pane, click Workspaces, then select Jupyter and launch a new workspace.
-
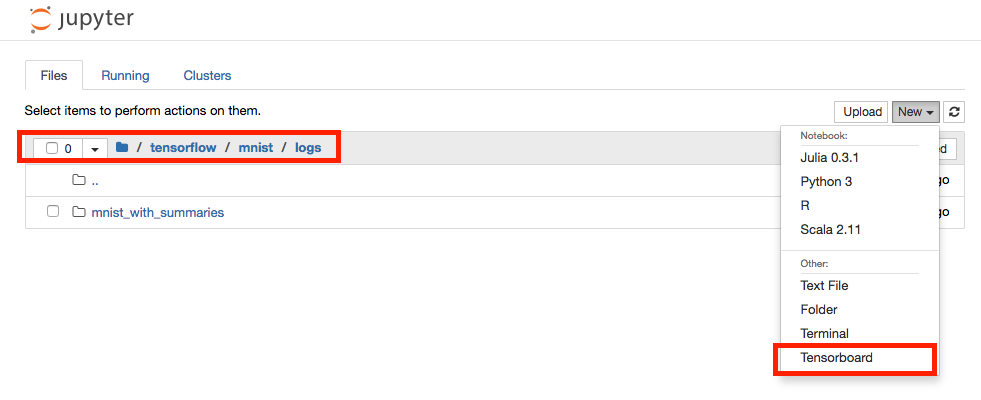
Select Tensorboard from the Launcher.
See the TensorBoard README to learn how to consume TensorFlow events.
-
If you encounter issues loading Tensorboard initially, confirm that Tensorflow is operating properly. Loading the application depends on Tensorflow.
-
By default, Domino’s standard Compute Environments have
tensorflow-gpuinstalled (for example,pip install tensorflow-gpu). Therefore, Tensorboard and Tensorflow will not work on a CPU hardware tier. If you’d like to use Tensorboard on a CPU, make sure that CPU optimized Tensorflow is installed (for example,pip install tensorflow).- Tensorboard.png
-
