The admin toolkit is an always-on tool deployed alongside Domino in the Kubernetes cluster that allows Domino administrators to run a system scan on the Domino deployment to do the following:
-
Check for unpatched known issues
-
Validate the health of core services
-
Get information to assist troubleshooting, run remediation actions, or provide context about issues affecting the deployment
-
Provide the toolkit report to Domino Support as part of an incident
The toolkit has a front-end web interface provided at https://
You can run scans as many times as necessary because the checks performed by the toolkit are only reading information and not making any modifications. You can run a scan during any of these stages:
-
After a new Domino install
-
At the start of an incident
-
In the midst of an incident
-
After incident resolution to verify health
-
Before and after a Domino upgrade
-
Before and after a Domino migration
You can find details about the specific tests that are included in the scan in the Admin toolkit documentation.
You can find check runbooks at our Support site knowledge base (requires sign-in).
Admin Toolkit is available at the URL https://<your-domino-domain>/toolkit/
Get the Admin Toolkit password
When the toolkit is installed, the installer generates a random password that does not change for the life of the toolkit deployment. If you installed the toolkit on the command line using the CLI, this password (along with the ingress URL) is displayed at the end of the installation process.
If you forget the password, you can retrieve the password using this command:
./toolkit.sh get-passwordNavigate to the Toolkit login page and do the following:
-
Enter the login you retrieved above.
-
Enter the password you retrieved above.
-
Click Login.
Get the Admin Toolkit password without the toolkit.sh CLI
The Admin Toolkit password is stored in a secret called domino-admin-toolkit-http in the domino-platform namespace.
You can also retrieve the password with kubectl:
kubectl get secret -n domino-platform domino-admin-toolkit-http -o jsonpath='{.data.webui-password}' | base64 -d; echoThe default username is admin-toolkit.
You can run a system scan using the Admin Toolkit web interface or CLI.
Run a scan using the web interface
-
Navigate to https://<your-domino-url>/toolkit/ and log in.
-
Click the Run New Report button at the bottom of the page:
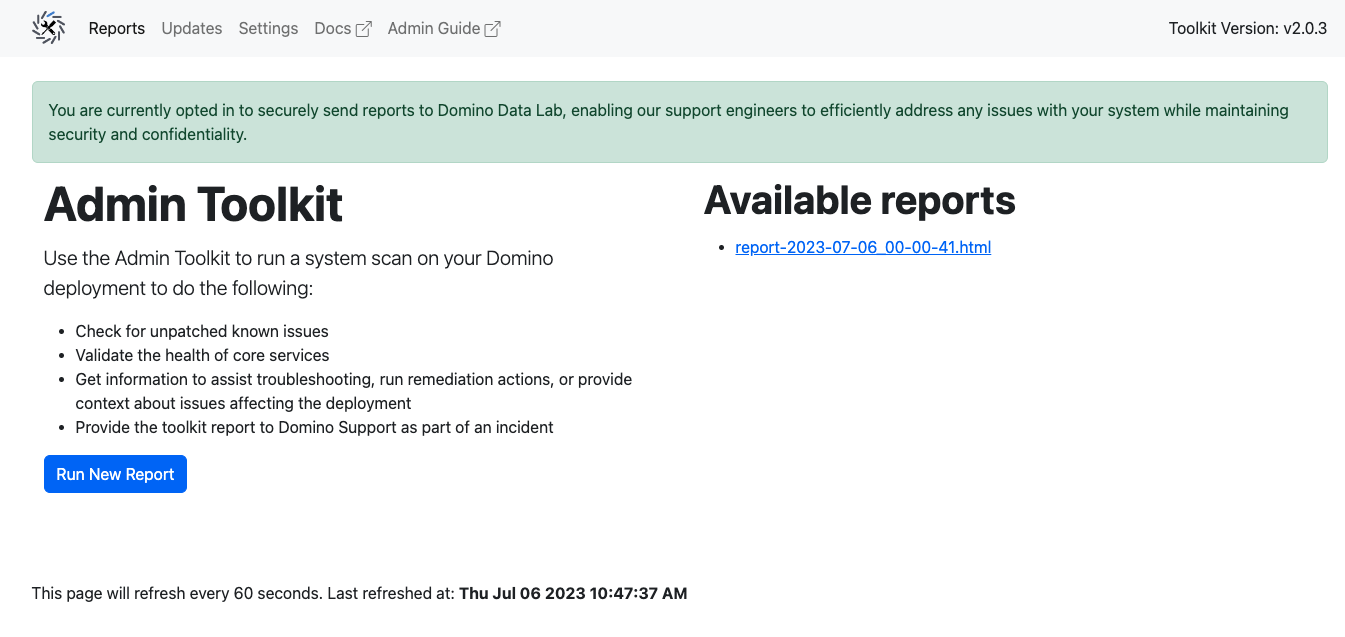
When the scan has finished, the web interface displays a link to the report.
Run a scan on an air-gapped deployment
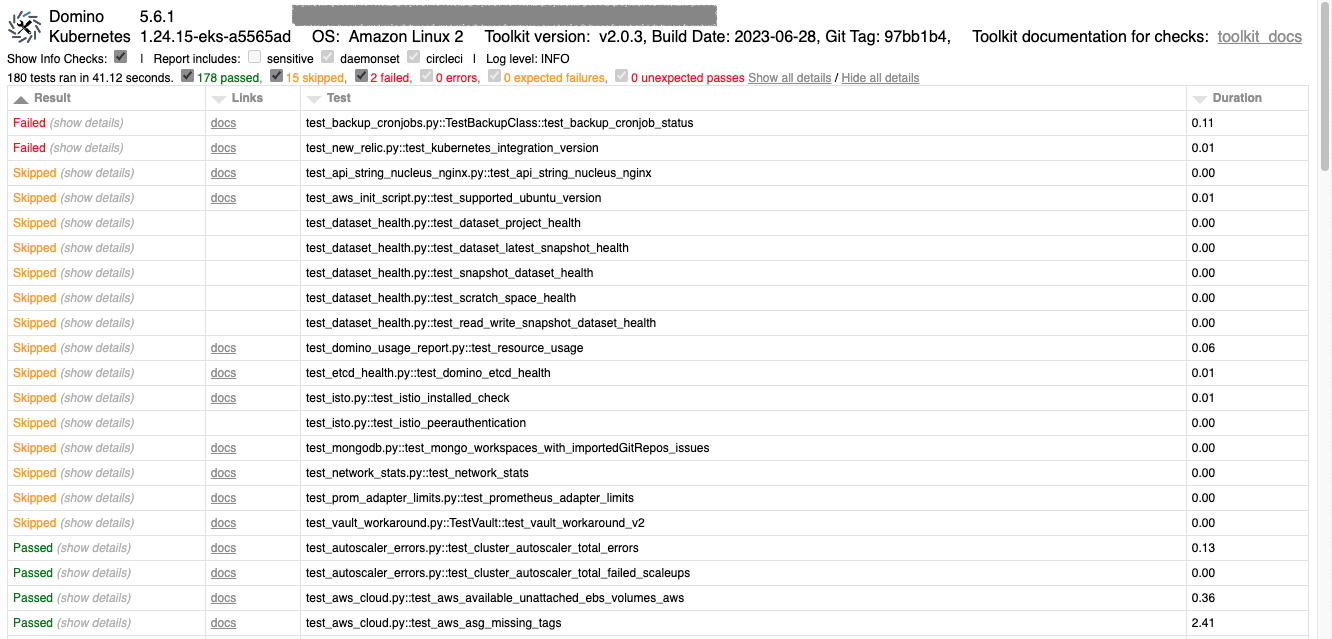
If your Domino deployment blocks AWS access, run the following command to output the report only in the console:
./toolkit.sh pytestThis runs the report and displays it to the console with no colorizing of the output, making it easier to redirect the output to a file or copy and paste from the console into a text file that can be sent to Domino. Contact Domino support at support@dominodatalab.com to pre-arrange a secure way to send the text file to Domino.
Troubleshooting
Attempting to run ./toolkit.sh results in the following error:
/usr/local/bin/python: Error while finding module specification for 'domino_admin_toolkit.test_runner' (ModuleNotFoundError: No module named 'domino_admin_toolkit')
error: Internal error occurred: error executing command in container: Internal error occurred: error executing command in container: command terminated with exit code 1
This indicates there is still a v1 toolkit installation present. Run ./toolkit.sh uninstall; ./toolkit.sh install to remove it and install the latest version.
|
Note
|
Reports are stored on the toolkit’s pod storage and are not persisted across pod restarts. With kubectl access you can download all stored reports using: kubectl cp -n domino-platform -c domino-admin-toolkit <pod_name>:/app/domino_admin_toolkit/ui/templates/reports/ ./reports/ replacing <pod_name> with the complete name of the toolkit pod.
|
Regardless of whether a scan runs from the web interface or CLI, the toolkit can automatically and securely upload the report to an S3 bucket in Domino’s AWS account that is specific to your deployment.
This behavior is on by default, but can be disabled by either selecting the option in the web interface to opt out of uploads, applying a ConfigMap, or when using the command line by running with the --local-only option:
./toolkit.sh test --local-only|
Note
|
The --local-only option applies to that run only and does not change the default behavior.
|
If you have opted out of uploads, you can still upload a report to Domino using the CLI:
./toolkit.sh test --upload-reportThere are many benefits to uploading reports to Domino:
-
Quicker resolution of support tickets.
-
Validation of deployment configuration.
-
Receive more proactive, rather than reactive, support.
Domino can also use the data collected from multiple customers to better understand how customer-specific configuration and infrastructure affect the overall performance and stability of the Domino platform so that we can deliver a more robust and performant product with each release.
|
Important
| Admin Toolkit reports do contain potentially sensitive information such as IP addresses, hostnames, partial log files and usernames. Passwords are not included. If you have concerns about any of the information collected, contact us at support@dominodatalab.com or through your CSM or TAM to discuss your concerns. Since the always-on Admin Toolkit can be updated independently of the Domino version of your deployment, addressing such concerns can be quick. |
By default, the functionality to have reports uploaded to Domino is enabled.
In both v1 and v2 of the toolkit, each newly generated toolkit report is securely sent to Domino Support and Engineering.
This allows Domino engineers to gain access to the reports faster during an outage and get historical context to previous outages.
You can opt out of this service (or opt in again) via the web interface or through an applied Kubernetes ConfigMap.
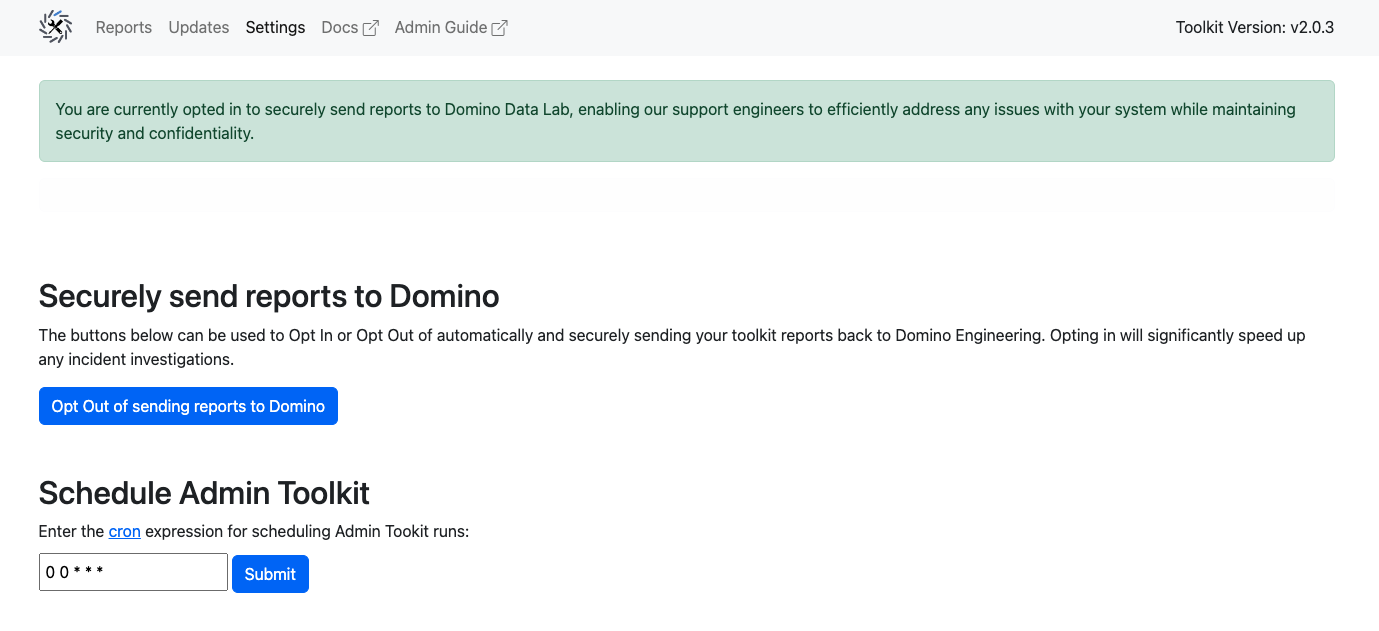
To opt out of sending reports to Domino via the web interface, navigate to the Settings tab and then click the Opt Out of sending reports to Domino button. To opt back in, click the Opt Into sending reports to Domino button.
To opt out of sending reports to Domino through an applied Kubernetes ConfigMap, follow the instructions below.
|
Note
| These reports only collect deployment and service verification data and do not contain any sensitive data. |
v2 ConfigMap
In v2, a ConfigMap is generated by default. Here is an example of the default ConfigMap:
apiVersion: v1
name: domino-admin-toolkit-config
data:
  crontab_entry: '* * * * *'
  send_to_domino: "True"
kind: ConfigMap
To opt out of sending reports to Domino, change the send_to_domino value to "False".
|
Note
|
crontab_entry is a new configuration item available in v2, allowing you to schedule runs of the toolkit.
|
v1 ConfigMap
For v1, there is no configmap created on deploy. You can opt out via the web interface by clicking the opt-out button. This generates a configmap for you with your options specified. You can also create your own configmap following the instructions below.
-
Copy and paste the following template into a file, changing the namespace to meet your deployment’s platform namespace:
kind: ConfigMap
apiVersion: v1
metadata:
  name: domino-admin-toolkit-cm
  namespace: <platform-namespace>
data:
  send_to_domino: "True"
To opt out of sending reports to Domino, change the
send_to_dominovalue to"False". -
Apply the new configuration:
kubectl apply -f <configmap>.yaml
The requirements are:
-
ConfigMaptype. -
Metadata name:
domino-admin-toolkit-cm. -
Data must only use key
send_to_dominoand the value is a boolean type (True or False).
Scheduled reporting lets you generate Domino health reports at regular intervals. Having a "healthy state" report handy provides a comparative baseline during system disruptions. This can be invaluable in swiftly identifying system anomalies, thus accelerating the issue resolution process.
Set up scheduled reporting
Follow the steps below to set up scheduled reporting:
-
Open the toolkit web interface and navigate to the Settings tab.
-
Under the Schedule Admin Toolkit section, specify the frequency and timing for the reports as per your requirement. This is accepted in cron formatting only.
-
Click Submit.
Now the toolkit generates and stores system health reports according to the schedule you’ve set. These reports can be accessed and reviewed anytime, providing you with a consistent and regular overview of your system’s health.
|
Important
|
By default:
|
Utilize scheduled reports during system disruptions
In case of a system disruption or outage:
-
Access the most recent "healthy state" report from the stored scheduled reports.
-
Generate an immediate system health report (if possible).
-
Compare the two reports to identify any deviations or unusual activities.
Sharing this information with the Domino support team can expedite the troubleshooting process and guide us toward the root cause of the problem more efficiently.
By leveraging scheduled reporting, you can manage system health more effectively, contributing to smoother, more reliable operations in your Domino environment.
The Admin Toolkit documentation provides comprehensive information about the checks, their meanings, and any details on resolving issues. Use the toolkit and its documentation to quickly identify and resolve issues, and ensure optimal performance of the Domino platform. You can access the documentation in two ways:
-
Publicly-accessible online documentation:
-
https://docs.toolkit.re.domino.tech/ (always updated to the latest version of the toolkit).
-
Support site knowledge base (requires sign-in).
-
-
Documentation included within the Domino deployment:
https://<your-domino-url>/toolkit/docs/(specific to the deployed version of the toolkit).
There are some breaking changes in Domino Admin Toolkit v2 that require a minimum Kubernetes version of 1.18 or later. The compatibility matrix for Kubernetes and toolkit versions is shown below.
To see whether you have Domino Admin Toolkit v1 or v2, you need to consult the toolkit UI which displays the version number at the top right corner. The v1 toolkit uses the Domino version number here, so it displays "5.x.y". The v2 toolkit has a version number of "2.x.y".
| Kubernetes Version | Admin Toolkit v1 | Admin Toolkit v2 |
|---|---|---|
<= 1.17 | YES | NO |
>= 1.18 | YES | YES |
The following describes the toolkit parameters.
./toolkit.sh -h
toolkit.sh version: v2.1.2, 2023-12-01

Usage: toolkit.sh [command] [options]

Run with no parameters to create resources and run the tests.

Commands:
  install [options]  Install and start the admin toolkit.
  uninstall          Uninstall the admin toolkit, deleting all resources.
  start              Starts the admin toolkit if it is stopped.
  stop               Stops the admin toolkit if it is running.
  status             Shows whether the admin toolkit is installed and running.
  test    [options]  Run tests with given options and upload HTML report to S3.
  pytest  [options]  Run pytest directly, see https://docs.pytest.org/en/7.1.x/how-to/usage.html
  exec    [command]  Execute a command in the toolkit container (by default /bin/bash), useful for debugging.
  logs               Show toolkit container logs.
  download-reports   Retrieve a locally stored copy of the toolkit reports in tar.gz format.
  version            Show toolkit container version.
  get-password       Retrieve the admin toolkit UI username and password.
  push               Push the image to a registry using docker. Example: ./toolkit.sh push <registry-host>:<port>/domino-admin-toolkit
  skopeo-push        Push the image to a registry using skopeo. Example: ./toolkit.sh skopeo-push <registry-host>:<port>/domino-admin-toolkit
  help               Get this help message.

`install` command options:
  ./toolkit.sh install --image                   Pass a registry specific image. Defaults to 'quay.io/domino/toolkit'.
  ./toolkit.sh install --tag|-t tag              Pass a particular image tag. Defaults to 'v2'.
  ./toolkit.sh install --daemonset               Enable daemonset functionality.
  ./toolkit.sh install --daemonset-port|-d port  Set the host port the daemonset listens on. Default is port 5000.
  ./toolkit.sh install --no-ingress              Disable ingress route to the admin toolkit pod.
  ./toolkit.sh install --debug                   Turn on debugging for helm install.

`uninstall` command options:
  ./toolkit.sh uninstall --image                 Pass a registry specific image. Defaults to 'quay.io/domino/toolkit'.
  ./toolkit.sh uninstall --tag|-t tag            Pass a particular image tag. Defaults to 'v2'.

`test` command options:
  ./toolkit.sh test --help                       Show help including choice of parameters.
  ./toolkit.sh test --log-cli-level DEBUG        Show extra debugging output.
  ./toolkit.sh test --local-only                 Copy toolkit HTML file locally to host as report.html and don't send a copy to Domino.
  ./toolkit.sh test --upload-report              Send the toolkit report output to Domino's S3.

`pytest` command options:
  ./toolkit.sh pytest <path>/<check>.py          Execute a single check, e.g. ./toolkit.sh pytest domino_admin_toolkit/checks/test_kubernetes.py
  ./toolkit.sh pytest --collect-only             List all available checks but don't run them.
./toolkit.sh pytest --log-cli-level=DEBUG Show extra debugging output.Toolkit v2
As of version 5.6.1 of Domino, we have introduced version 2 (v2) of the toolkit. Prior to this version, the toolkit was available as version 1 (v1).
The toolkit version is not tied to the Domino release. If you’re currently using v1 of the toolkit, you can update it to v2, regardless of the Domino version you’re using.
Details of how to upgrade from v1 to v2 of the toolkit can be found in the upgrade section below.
Prerequisites
-
Kubernetes version compatibility
There are some breaking changes in Domino admin toolkit v2 that require a minimum Kubernetes version of 1.18 or later. The compatibility matrix for Kubernetes and toolkit versions is shown below.
| Kubernetes version | Toolkit v1 | Toolkit v2 |
|---|---|---|
<= 1.17 | YES | NO |
>= 1.18 | YES | YES |
-
A deployment of Domino 4.x or newer. This version of the toolkit does not run on Domino 3.x or older.
-
Administrative access to the Kubernetes cluster that hosts Domino.
-
The Kubernetes control plane must be working so that the toolkit can interrogate the Kubernetes API server.
-
A bastion host, laptop, or other host running a Unix-like OS with
kubectlaccess that has network connectivity to the target Kubernetes cluster. -
The latest admin toolkit CLI script, called
toolkit.sh, which you can download to your bastion host or laptop using this command:-
For v2
curl -sSLO https://toolkit.re.domino.tech/toolkit.sh && chmod a+x ./toolkit.sh -
For v1
curl -sSLO https://toolkit.re.domino.tech/v1/toolkit.sh && chmod a+x ./toolkit.sh
-
|
Note
| We highly recommend updating to our latest v2 toolkit version to ensure the best performance, latest features and system checks. |
-
Some features of the toolkit, such as automatic upgrading or automatic uploading of scan reports, require an internet connection from the Kubernetes cluster.
Install the toolkit
You can install the toolkit using the toolkit CLI script as follows:
./toolkit.sh installIf there is a legacy version of the toolkit installed and running in the cluster, the v2 toolkit.sh detects it and prompts you to uninstall it before installing the new version. Legacy versions can be uninstalled using the v2 toolkit script.
The install command also accepts the --no-ingress option that installs the toolkit with the /toolkit ingress route disabled. When installed with this option, it is not possible to use the web interface and only the CLI can be used to operate the toolkit.
Update the toolkit
The toolkit can be updated independently of the Domino version deployed. Domino regularly publishes new versions of the toolkit Docker image with new and updated checks.
In the toolkit web interface, click on the Updates tab and then on the Check for updates button to check for a new toolkit Docker image. Click on Update now to deploy it. You can also force an immediate check for a new version by stopping and restarting the toolkit like this:
./toolkit stop && ./toolkit start|
Note
| The update options above only update you to the latest version of the toolkit version you are currently running. That is, if you are running Toolkit v1 you get the very latest v1, and if you are running Toolkit v2 it pulls the latest v2 updates. |
Upgrade from v1 to v2
For a detailed list of changes from v1 to v2, see the 5.6.1 release notes.
To upgrade from v1 to v2, follow the steps below:
-
Download the latest
toolkit.shand make it executable:curl -sSLO https://toolkit.re.domino.tech/toolkit.sh && chmod a+x ./toolkit.sh -
Uninstall the v1 toolkit:
./toolkit.sh uninstall -
Run the installer:
./toolkit.sh install
Push the toolkit Docker image to your internal registry
If your deployment is air-gapped and doesn’t have access to either quay.io or mirrors.domino.tech, then you must push the toolkit’s Docker image to your internal registry. When running install or uninstall commands, you’ll need to use the --image option.
On a machine with access to both the internal registry and quay.io/mirrors.domino.tech, run:
./toolkit.sh push internal-registry-host/domino-admin-toolkitInstall the toolkit
From your bastion host, run:
./toolkit.sh install --image internal-registry-host/domino-admin-toolkitUninstall the toolkit
To uninstall the toolkit, run:
./toolkit.sh uninstall --image internal-registry-host/domino-admin-toolkitThis completely removes all Kubernetes resources associated with the toolkit. Any reports still on the toolkit’s pod storage are deleted.
Update the toolkit
In an air-gapped deployment you must use the ./toolkit.sh push command to manually push the latest version of toolkit’s Docker image to your internal registry in order to enable the upgrade feature.
Upgrade from v1 to v2
For a detailed list of changes from v1 to v2, see the 5.6.1 release notes.
To upgrade from v1 to v2, follow the steps below:
-
On a machine with access to both the internal registry and
quay.io/mirrors.domino.tech, run:./toolkit.sh push internal-registry-host/domino-admin-toolkit -
Download the latest
toolkit.shand make it executable:curl -sSLO https://toolkit.re.domino.tech/toolkit.sh && chmod a+x ./toolkit.sh -
Uninstall the v1 toolkit:
./toolkit.sh uninstall --image internal-registry-host/domino-admin-toolkit -
Run the installer:
./toolkit.sh install --image internal-registry-host/domino-admin-toolkit
|
Important
| The publicly accessible online documentation is always up-to-date with the latest version of the toolkit, while the documentation included within the Domino deployment corresponds to the version of the toolkit being deployed. This allows you to reference the most relevant documentation for your specific Domino environment. |
SSO login is now available for the Admin Toolkit web interface.
v2 of the admin toolkit is now available.
-
Significantly improved toolkit UI.
-
Uplift in architecture for improved report running and overall performance and reliability of the product.
-
The ability to schedule reports.
-
Many new checks and existing check improvements.
-
A single configmap for changing all required toolkit settings.
-
helmandyqdependencies are removed. -
The web-based UI is now password-protected.
-
The web-based UI can be disabled using
--no-ingressparameter.
-
Prerequisites now include
helmandyq. -
The web-based UI is now interactive.
-
The
--load-balanceroption is deprecated. Instead, use the new ingress route,/toolkit, on the same domain as the deployment. -
A new
--runtime-timeoutoption sets the maximum runtime of the toolkit in seconds.