This topic describes how to connect to Snowflake from Domino.
The easiest way to connect to Snowflake from Domino is to create a Domino Data Source as described below.
You must have network connectivity between Snowflake and your Domino deployment.
To use Snowflake code integrations, such as Snowpark, you must agree to the Snowflake third party terms. To agree to these terms, you must have a Snowflake account with the ORGADMIN role. If you don’t have access to a Snowflake account with the ORGADMIN role, submit a Snowflake support ticket.
Domino recommends that you use a Domino Data Source to connect to a Snowflake instance from Domino.
-
From the navigation pane, click Data.
-
Click Create a Data Source.
-
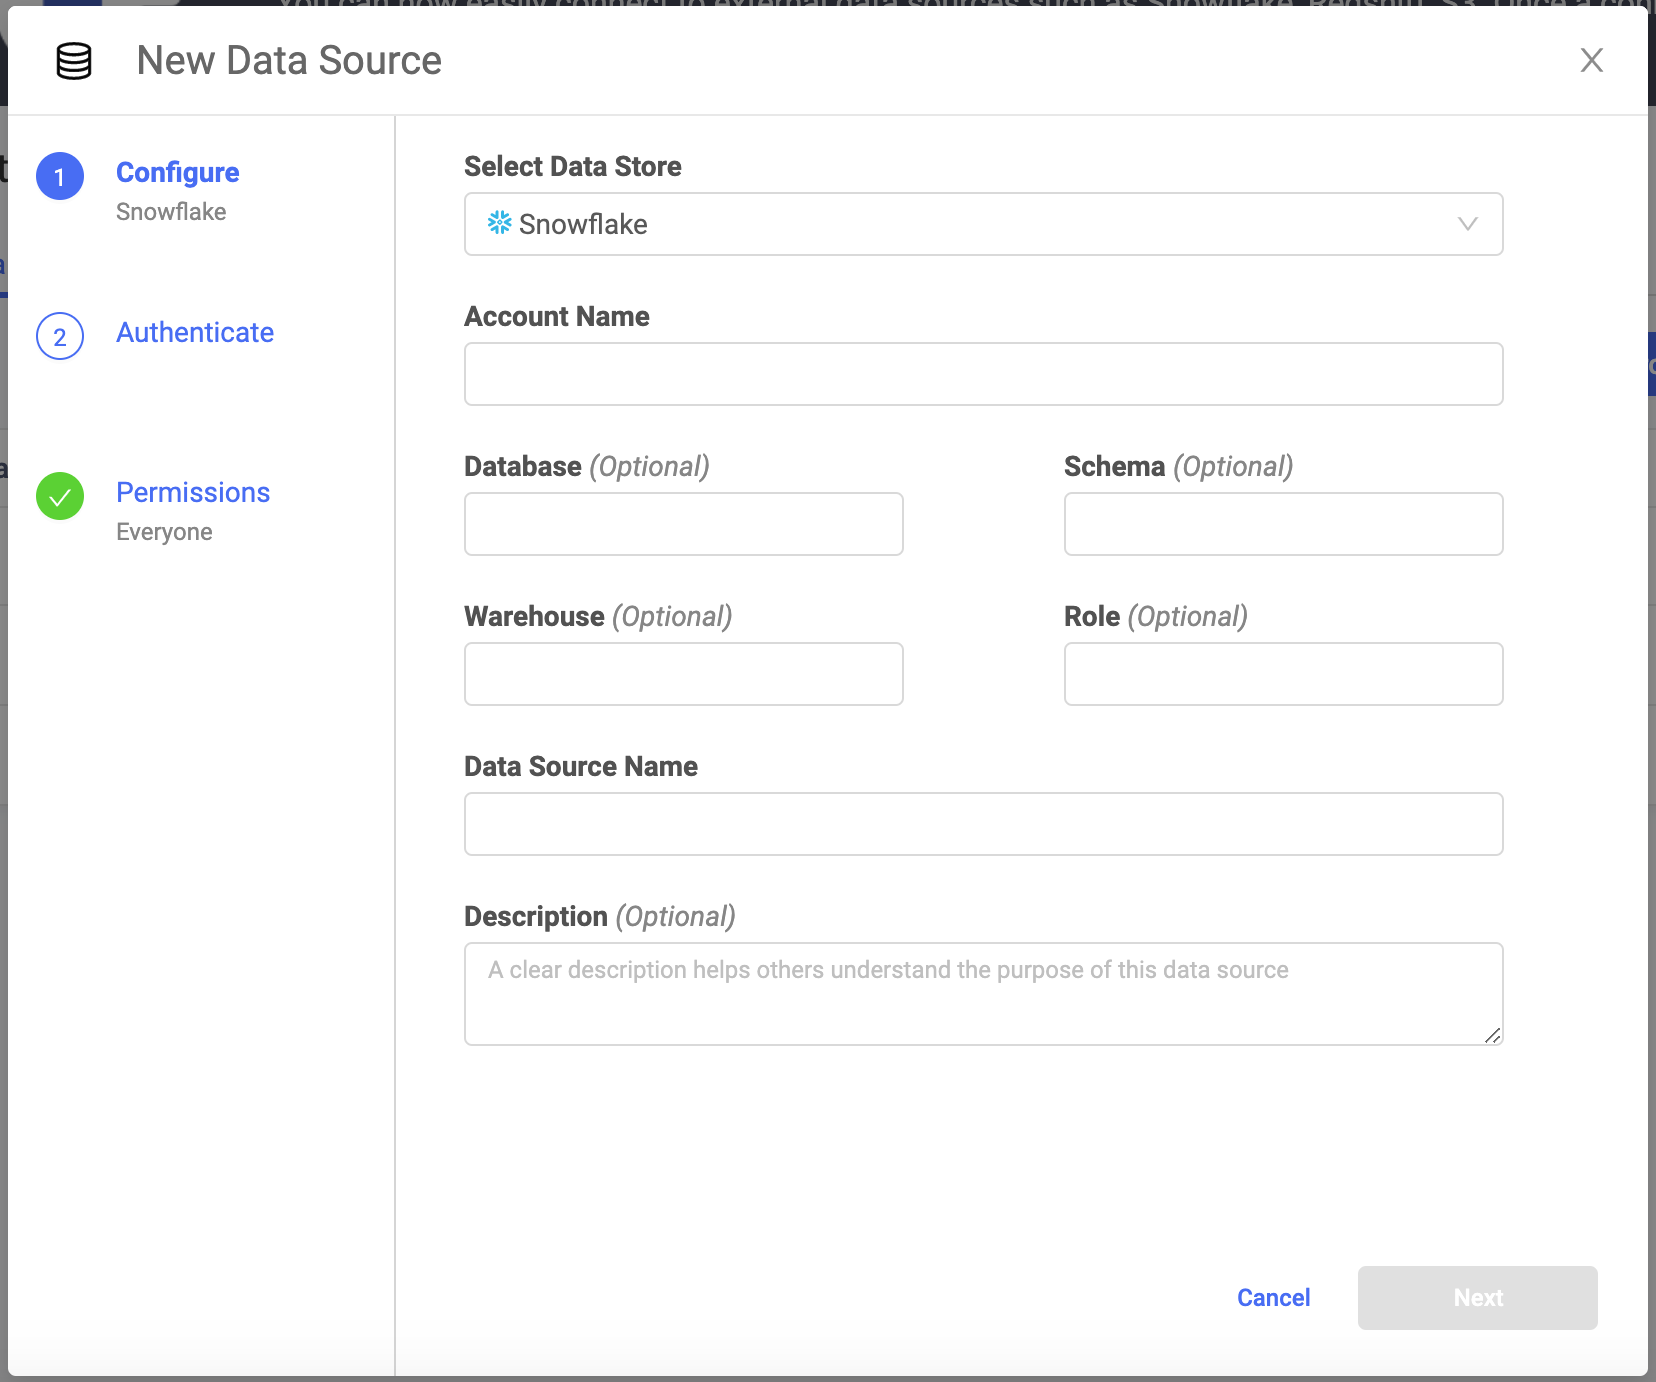
In the New Data Source window, from Select Data Store, select Snowflake.

- Account Name
-
If the Domino deployment and Snowflake Data Source, are in the same region, enter the Account Name as
<account name>. However, if the Domino deployment and Snowflake Data Source are in different regions, enter the Account Name as<account name>.<region>. For example,abc.us-east. (For Azure, these might take the form ofdef.east-us-2.azure.) - Optional: Database
-
The name of the Snowflake database that contains the data.
- Optional: Schema
-
The name of the active schema for the session.
- Optional: Warehouse
-
The name of all the compute resource clusters that provide the resources in Snowflake.
- Optional: Role
-
The role that has privileges to the Data Source.
- Data Source Name
-
The name that identifies the Data Source.
- Optional: Description
-
The purpose for the Data Source.
-
Click Next.
-
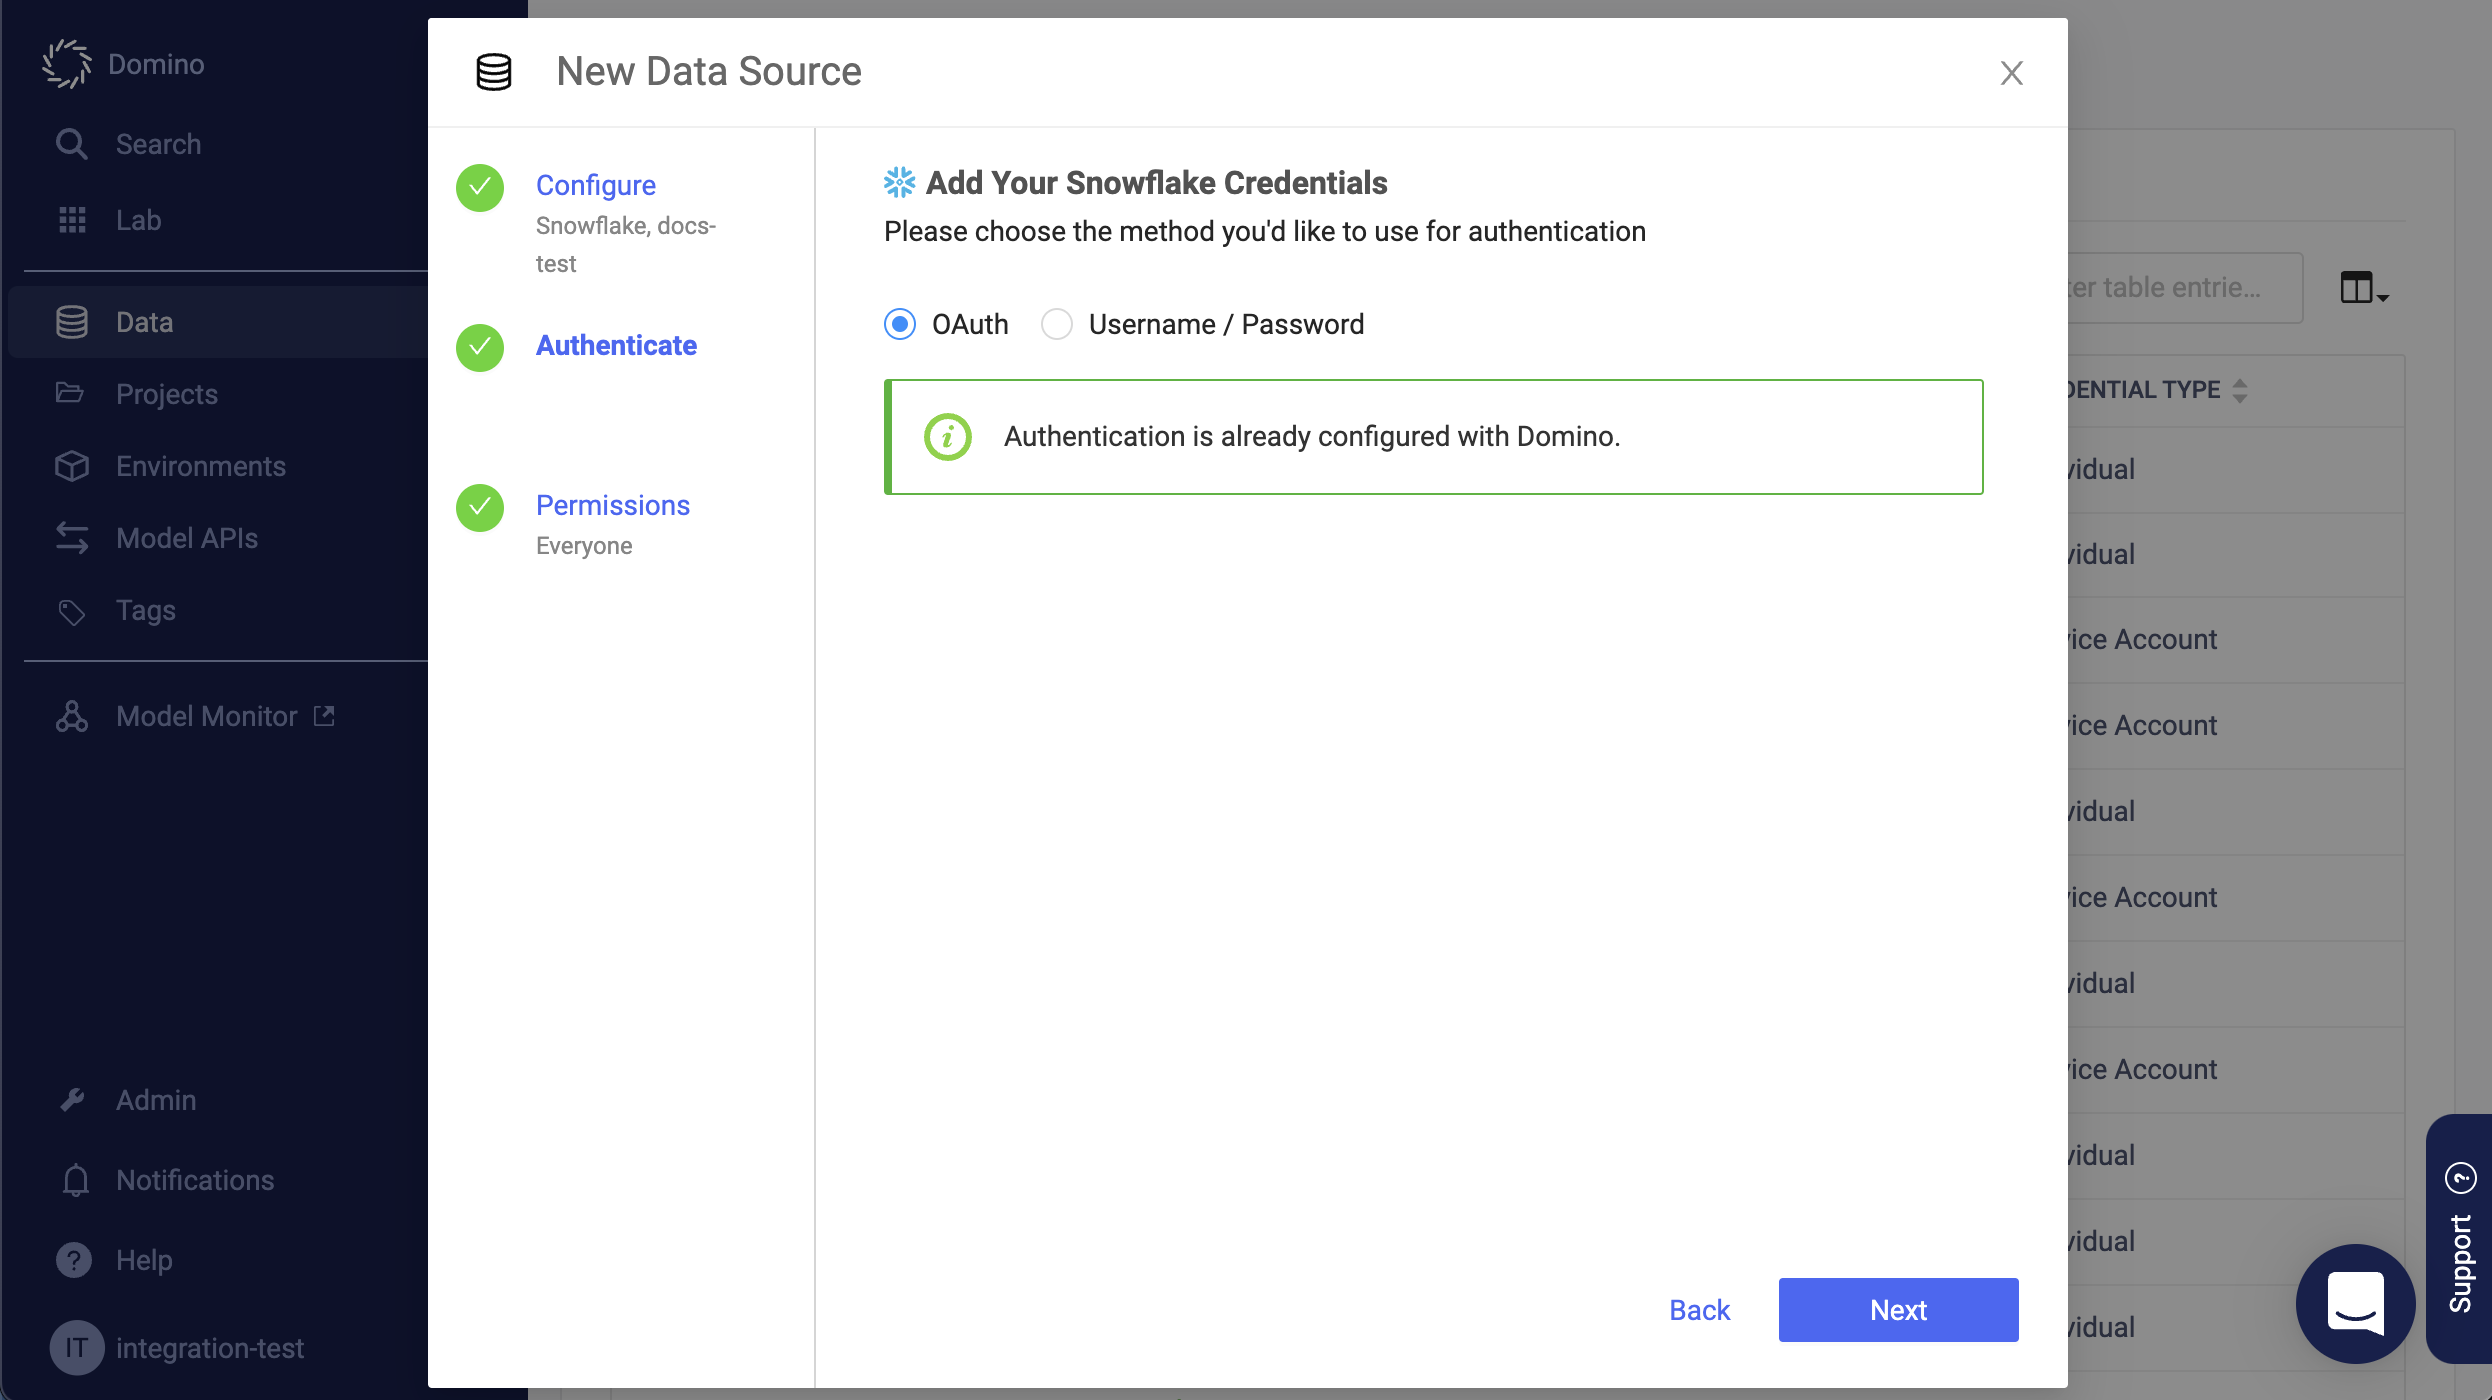
Specify the credentials for authenticating to Snowflake.
-
Basic authentication is supported by default. The Domino secret store backed by HashiCorp Vault securely stores the credentials.
-
OAuth authentication is available if your administrator has enabled this option.
 Note
NoteOAuth-authenticated connections can be used for any execution type except Model APIs.
-
-
If you are using basic authentication, click Test Credentials to validation your username and password.
-
Click Next (or Skip for Now to configure authentication later).
-
Select who can view and use the Data Source in projects.
-
Click Finish Setup.
If your users have Domino permissions to use the Data Source and enter their credentials, they can now use the Domino Data API to retrieve data with the connector.
See Retrieve Data for more information.
-
After connecting to your Data Source, learn how to Use Data Sources.
-
Share this Data Source with your collaborators.
