You can manage node pools in your Domino cluster. You can manage node pools in the local Domino data plane and in any Domino-managed data plane.
You can view existing node pools, add new node pools, and delete existing node pools.
In the admin portal, go to Platform Settings > Deployment Configuration.
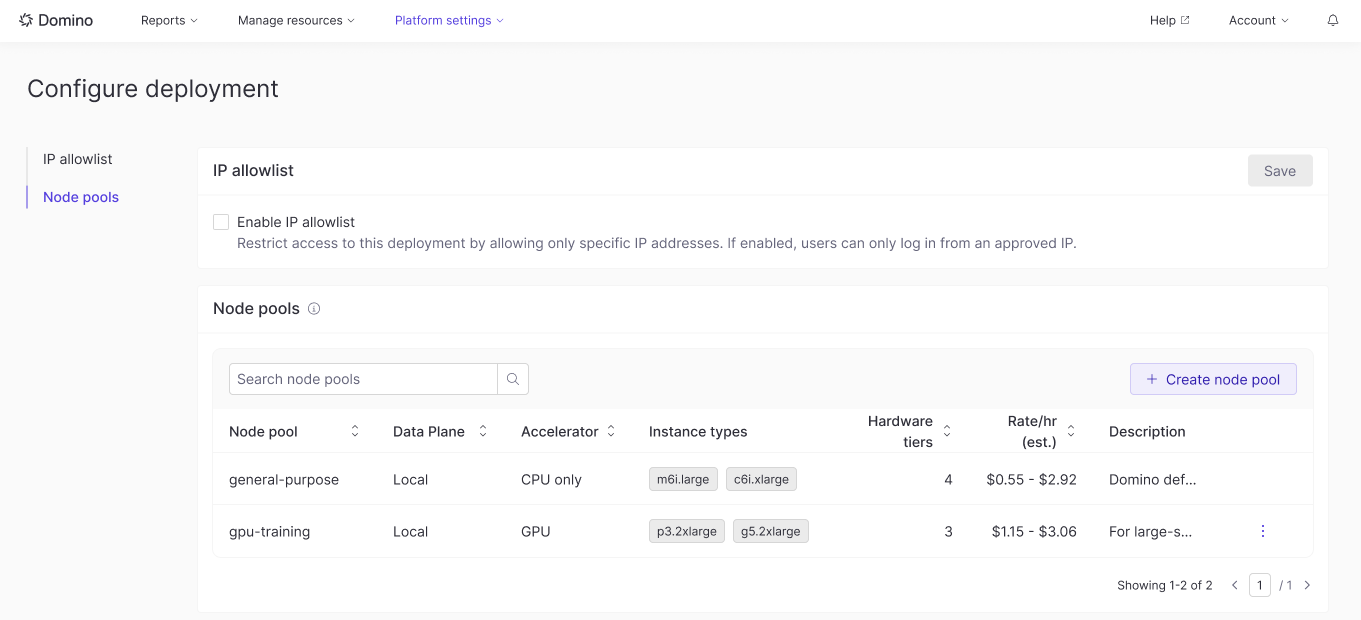
You can view the existing node pools in the table. The table shows the following information for each node pool:
-
Node pool: The name of the node pool.
-
Data plane: The data plane where the node pool is located.
-
Accelerator: The accelerator used by the node pool. It can be CPU only, GPU, or Neuron.
-
Instance types: The instance types configured in the node pool.
-
Hardware tiers: The number of hardware tiers that have configured this node pool.
-
Rate/hr: An estimate of the cost per hour for the node pool, based on the instance types configured in the node pool.
-
Description: A description of the node pool.
-
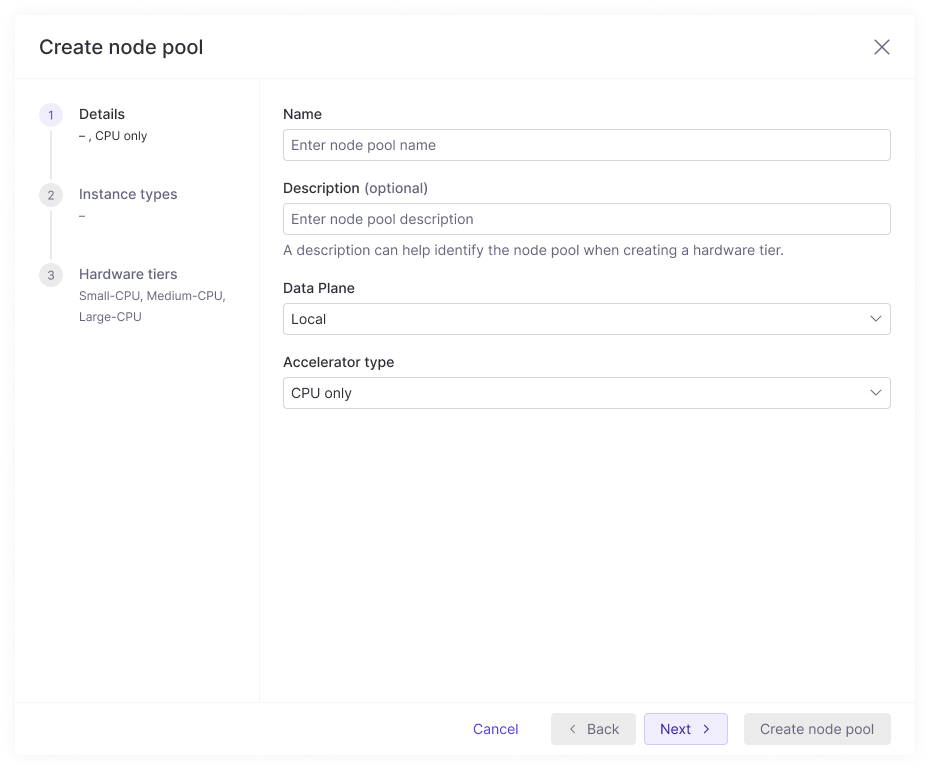
To add a new node pool, click the Add Node Pool button.
-
In the Add Node Pool dialog, fill in the following fields:
-
Name: The name of the node pool.
-
Description: A description of the node pool.
-
Data plane: The data plane where the node pool will be created.
-
Accelerator type: The accelerator type for the node pool. It can be CPU only, GPU, or Neuron.
-
-
Select the instance types you want to add to the node pool by checking the checkboxes next to the instance types.
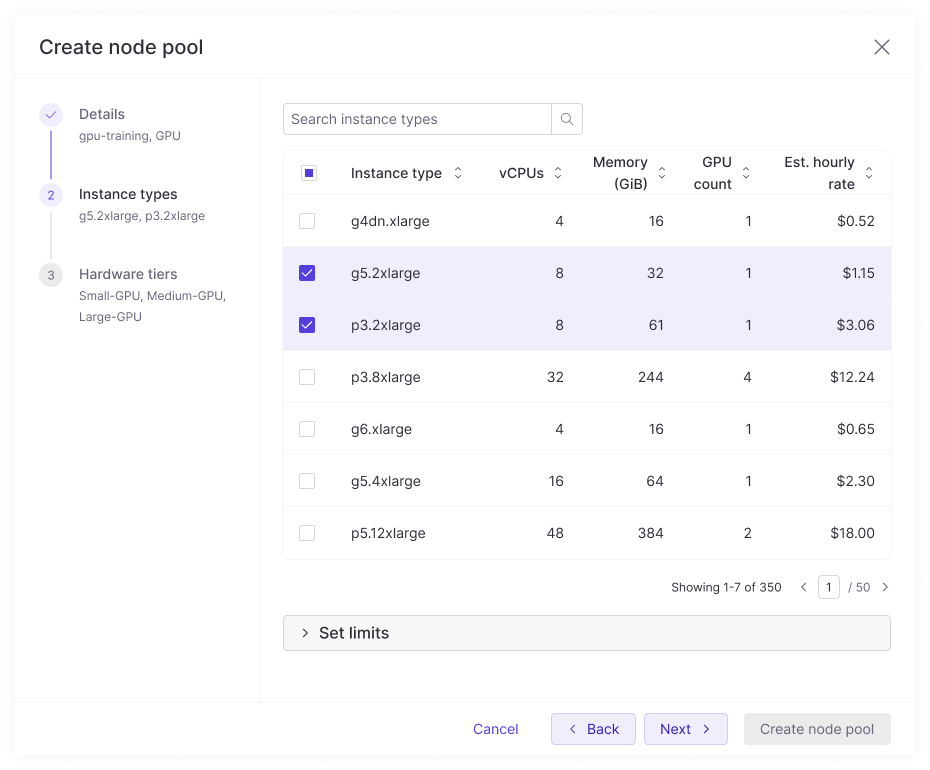
For each instance type, you will see the following information:
-
Instance type: The name of the instance type.
-
vCPUs: The number of virtual CPUs in the instance type.
-
Memory (GiB): The amount of memory in the instance type.
-
GPU count: The number of GPUs in the instance type, if applicable.
-
Est. hourly rate: An estimate of the cost per hour for the instance type.
-
-
You can set the limits for the node pool in the Set Limits section. The limits are the maximum number of nodes that can be created in the node pool. This helps you to avoid creating a large number of nodes and helps keep costs under control.
Limits are defined by the following fields:
-
Maximum CPU: The maximum number of virtual CPUs that can be used in the node pool (integer).
-
Maximum memory: The maximum amount of memory that can be used in the node pool (binary SI units, e.g.,
16Gi; see Binary SI).NoteTo limit the node pool to a number of instances, you can multiply the vCPU value of the instance type by the number of instances you want to limit the node pool to. For example, if you want to limit the node pool to 10 instances of
c5.2xlarge, you can set the maximum CPU to80(10 * 8 vCPUs).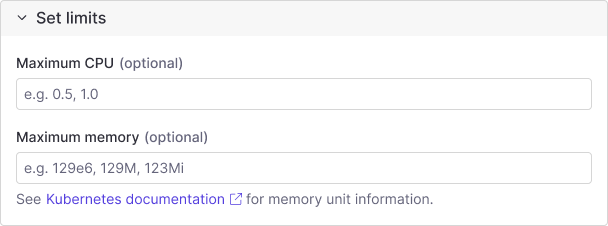
-
-
Click the Create Node Pool button to create the node pool.
-
If the node pool is not used by any hardware tier, you can delete it by clicking the three dots menu in node pool row and selecting Delete.
-
A confirmation dialog will appear. You will see one of the following messages:
-
If the node pool is not being used by any hardware tier:
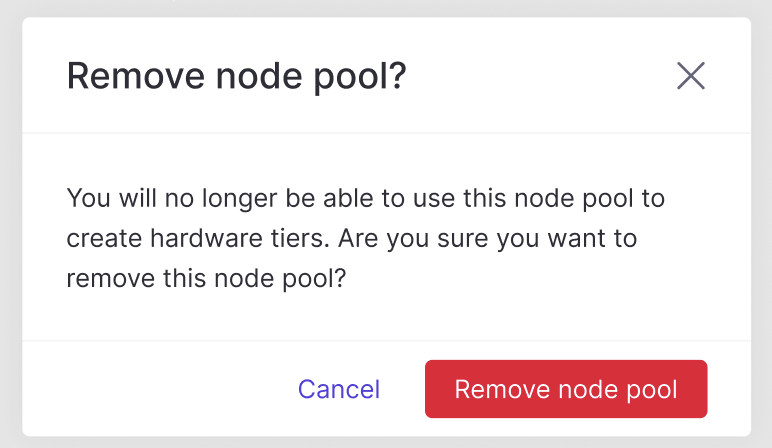
You can delete it by clicking the Remove node pool button.
-
If the node pool is used by some hardware tier:
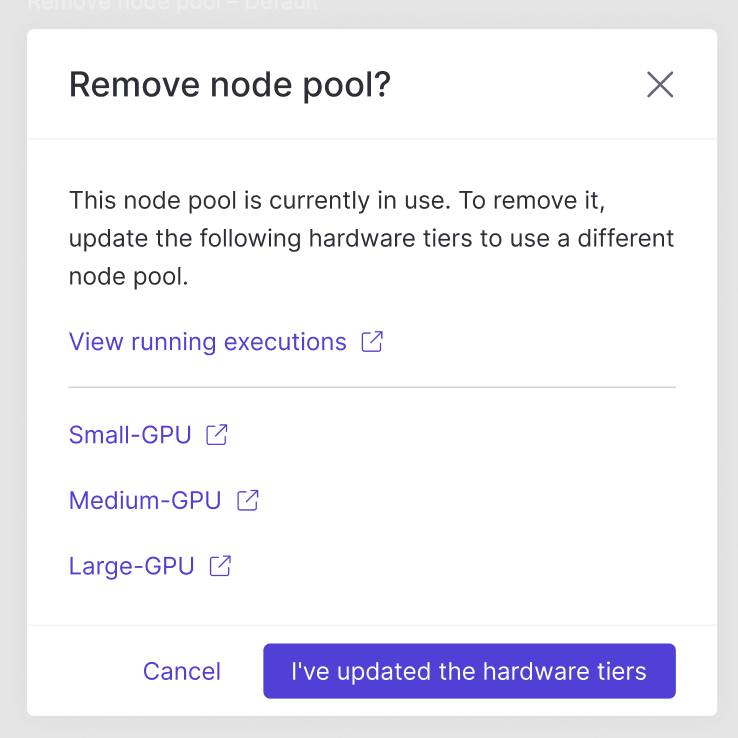
You can click each hardware tier name to go to the hardware tier configuration page and remove the node pool from the hardware tier.
Once the node pool is not used by any hardware tier, you can delete it by clicking the I’ve updated the hardware tiers button.
-