This walkthrough demonstrates the modeling assistant skill from start to finish. Starting from an empty project with a single dataset, the coding agent analyzes the data, generates training scripts, trains multiple models as Domino Jobs, and compares results in Experiment Manager.
|
Tip
| This walkthrough follows the AI Coding Assistants quick intro video. You can watch it alongside this guide for the full experience. |
This demo uses a Domino project with a single dataset for predicting diabetes. The project has no existing code or models.
-
Create a new Domino project or use an existing one with a dataset.
-
Launch a VS Code workspace using the Domino Standard Environment.
-
Open Claude Code and authenticate (as explained in Get started).
In the Claude Code prompt, type:
Use the modeling assistant skill. Do a quick analysis of the data set
in the project and then train a few models and validate.-
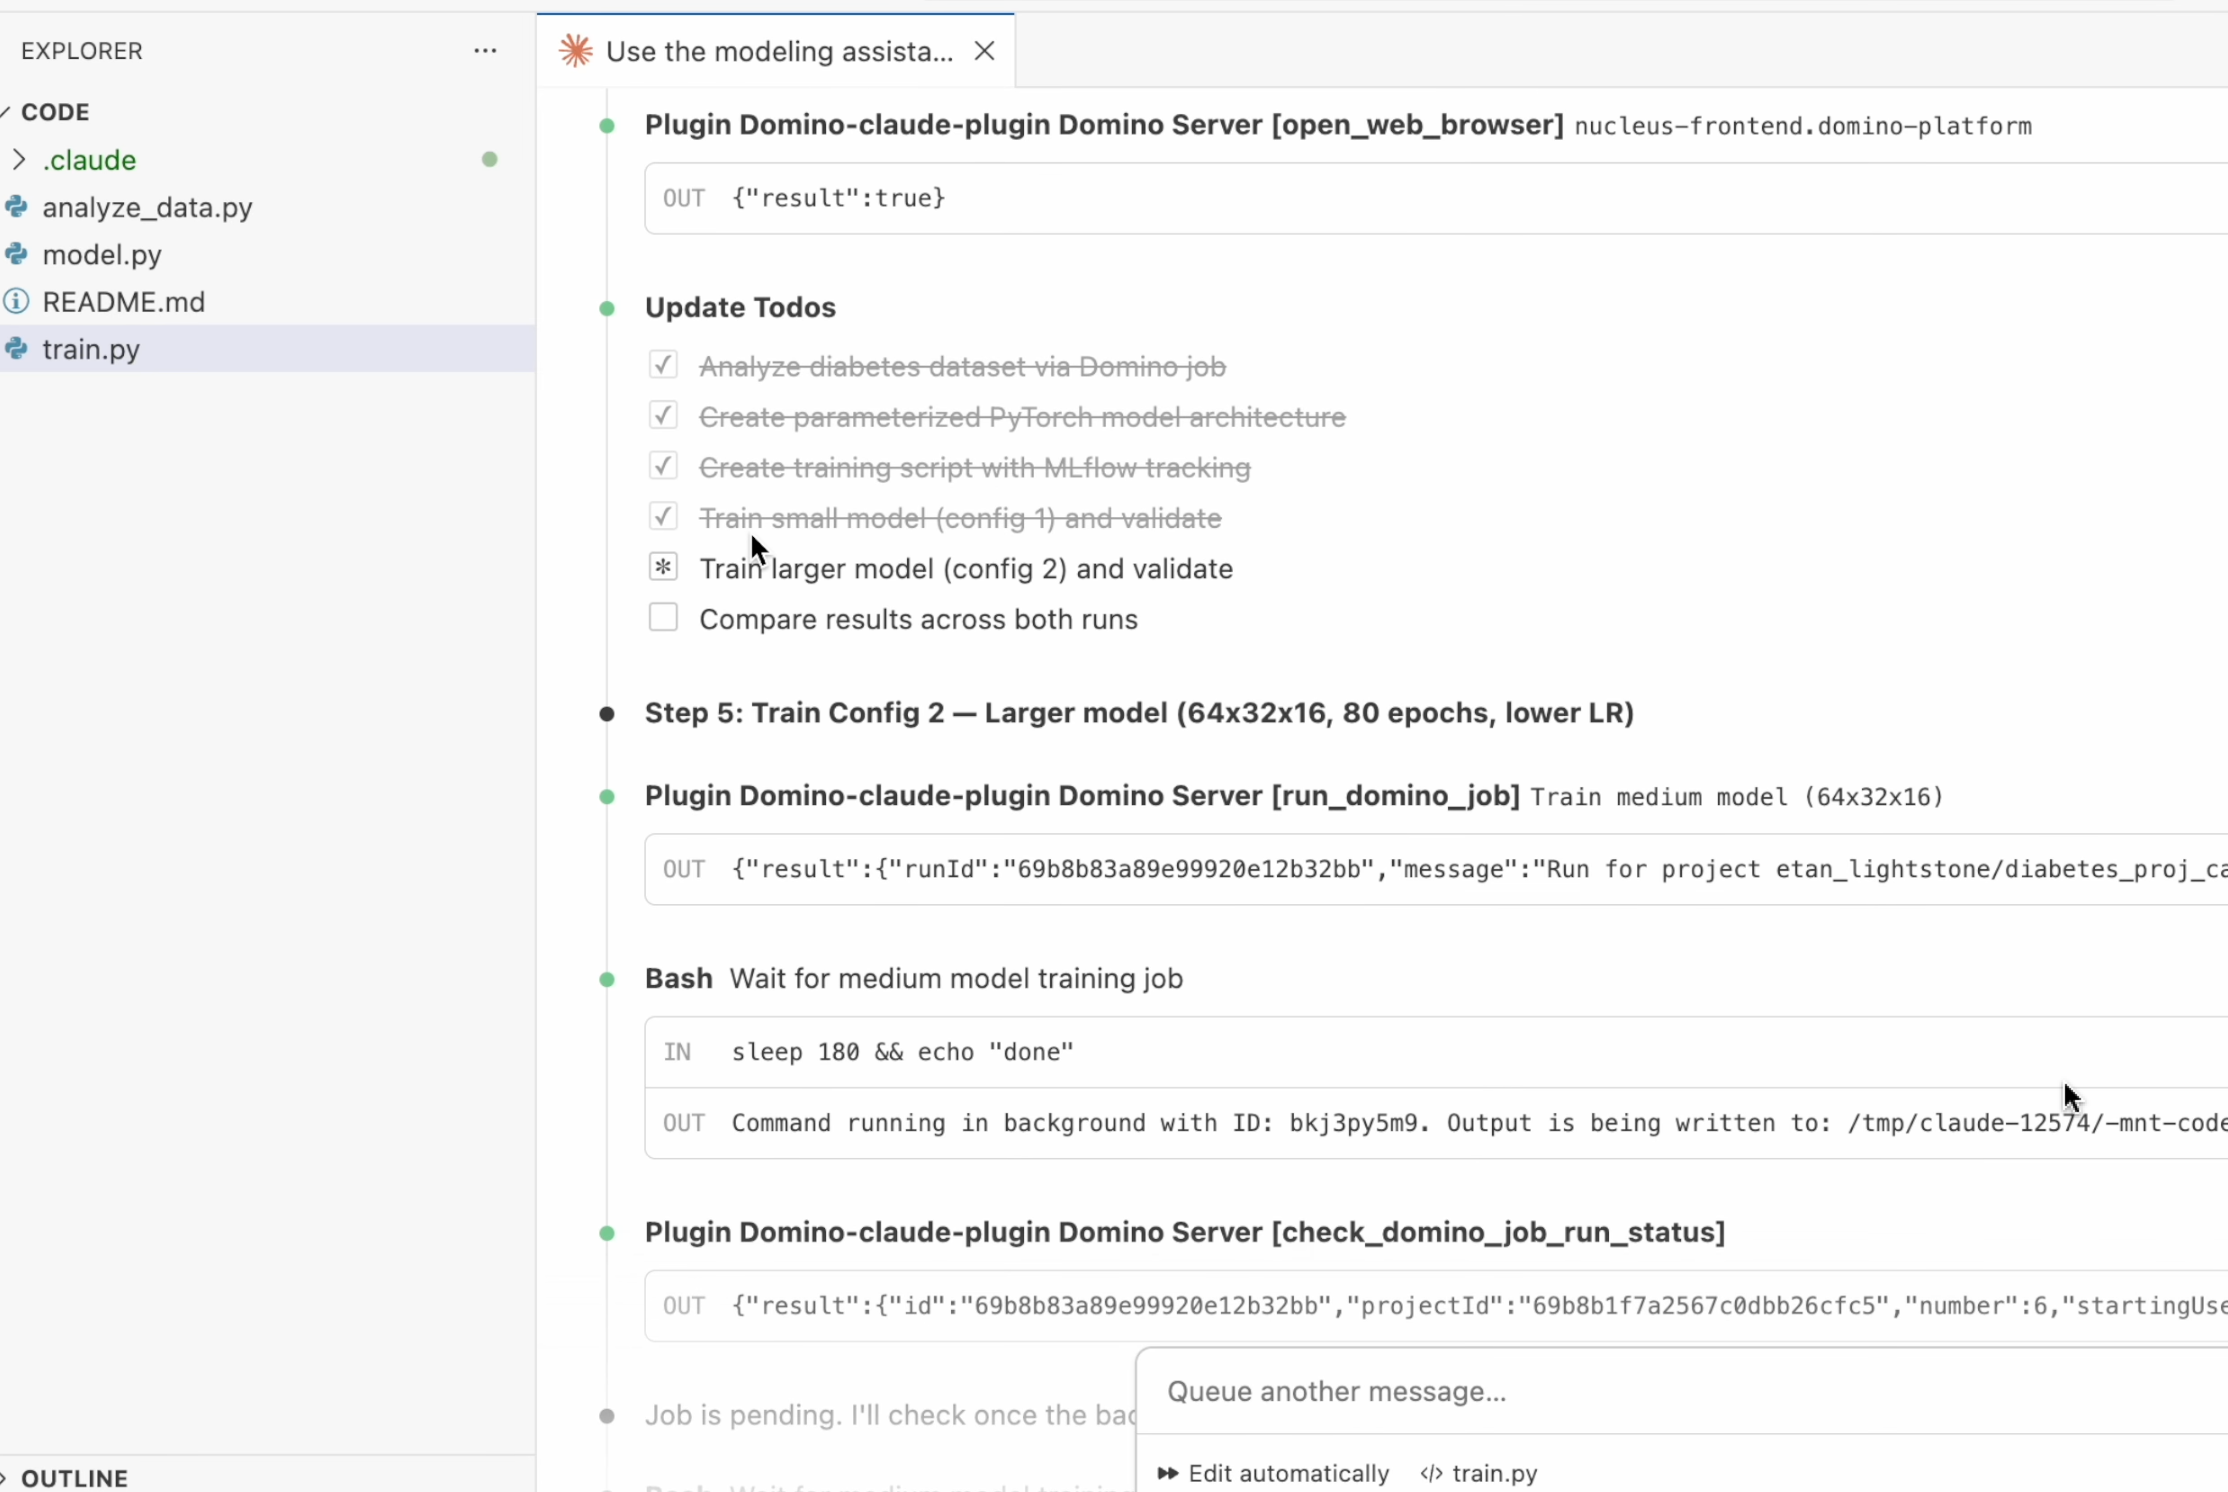
Claude Code activates the modeling-assistant skill and begins by detecting the Domino environment.
-
The agent identifies the project, locates the dataset, and starts the workflow.
The agent writes a data analysis script, generates a parameterized PyTorch model, creates a training script with MLflow tracking, and submits training as Domino Jobs. All steps run automatically.
Key details about the generated training pipeline:
-
Training runs as a reproducible Domino Job, not inline in the workspace.
-
All parameters, including batch size, learning rate, epochs, and architecture, are logged to Experiment Manager.
-
The agent trains multiple models with different configurations for comparison.
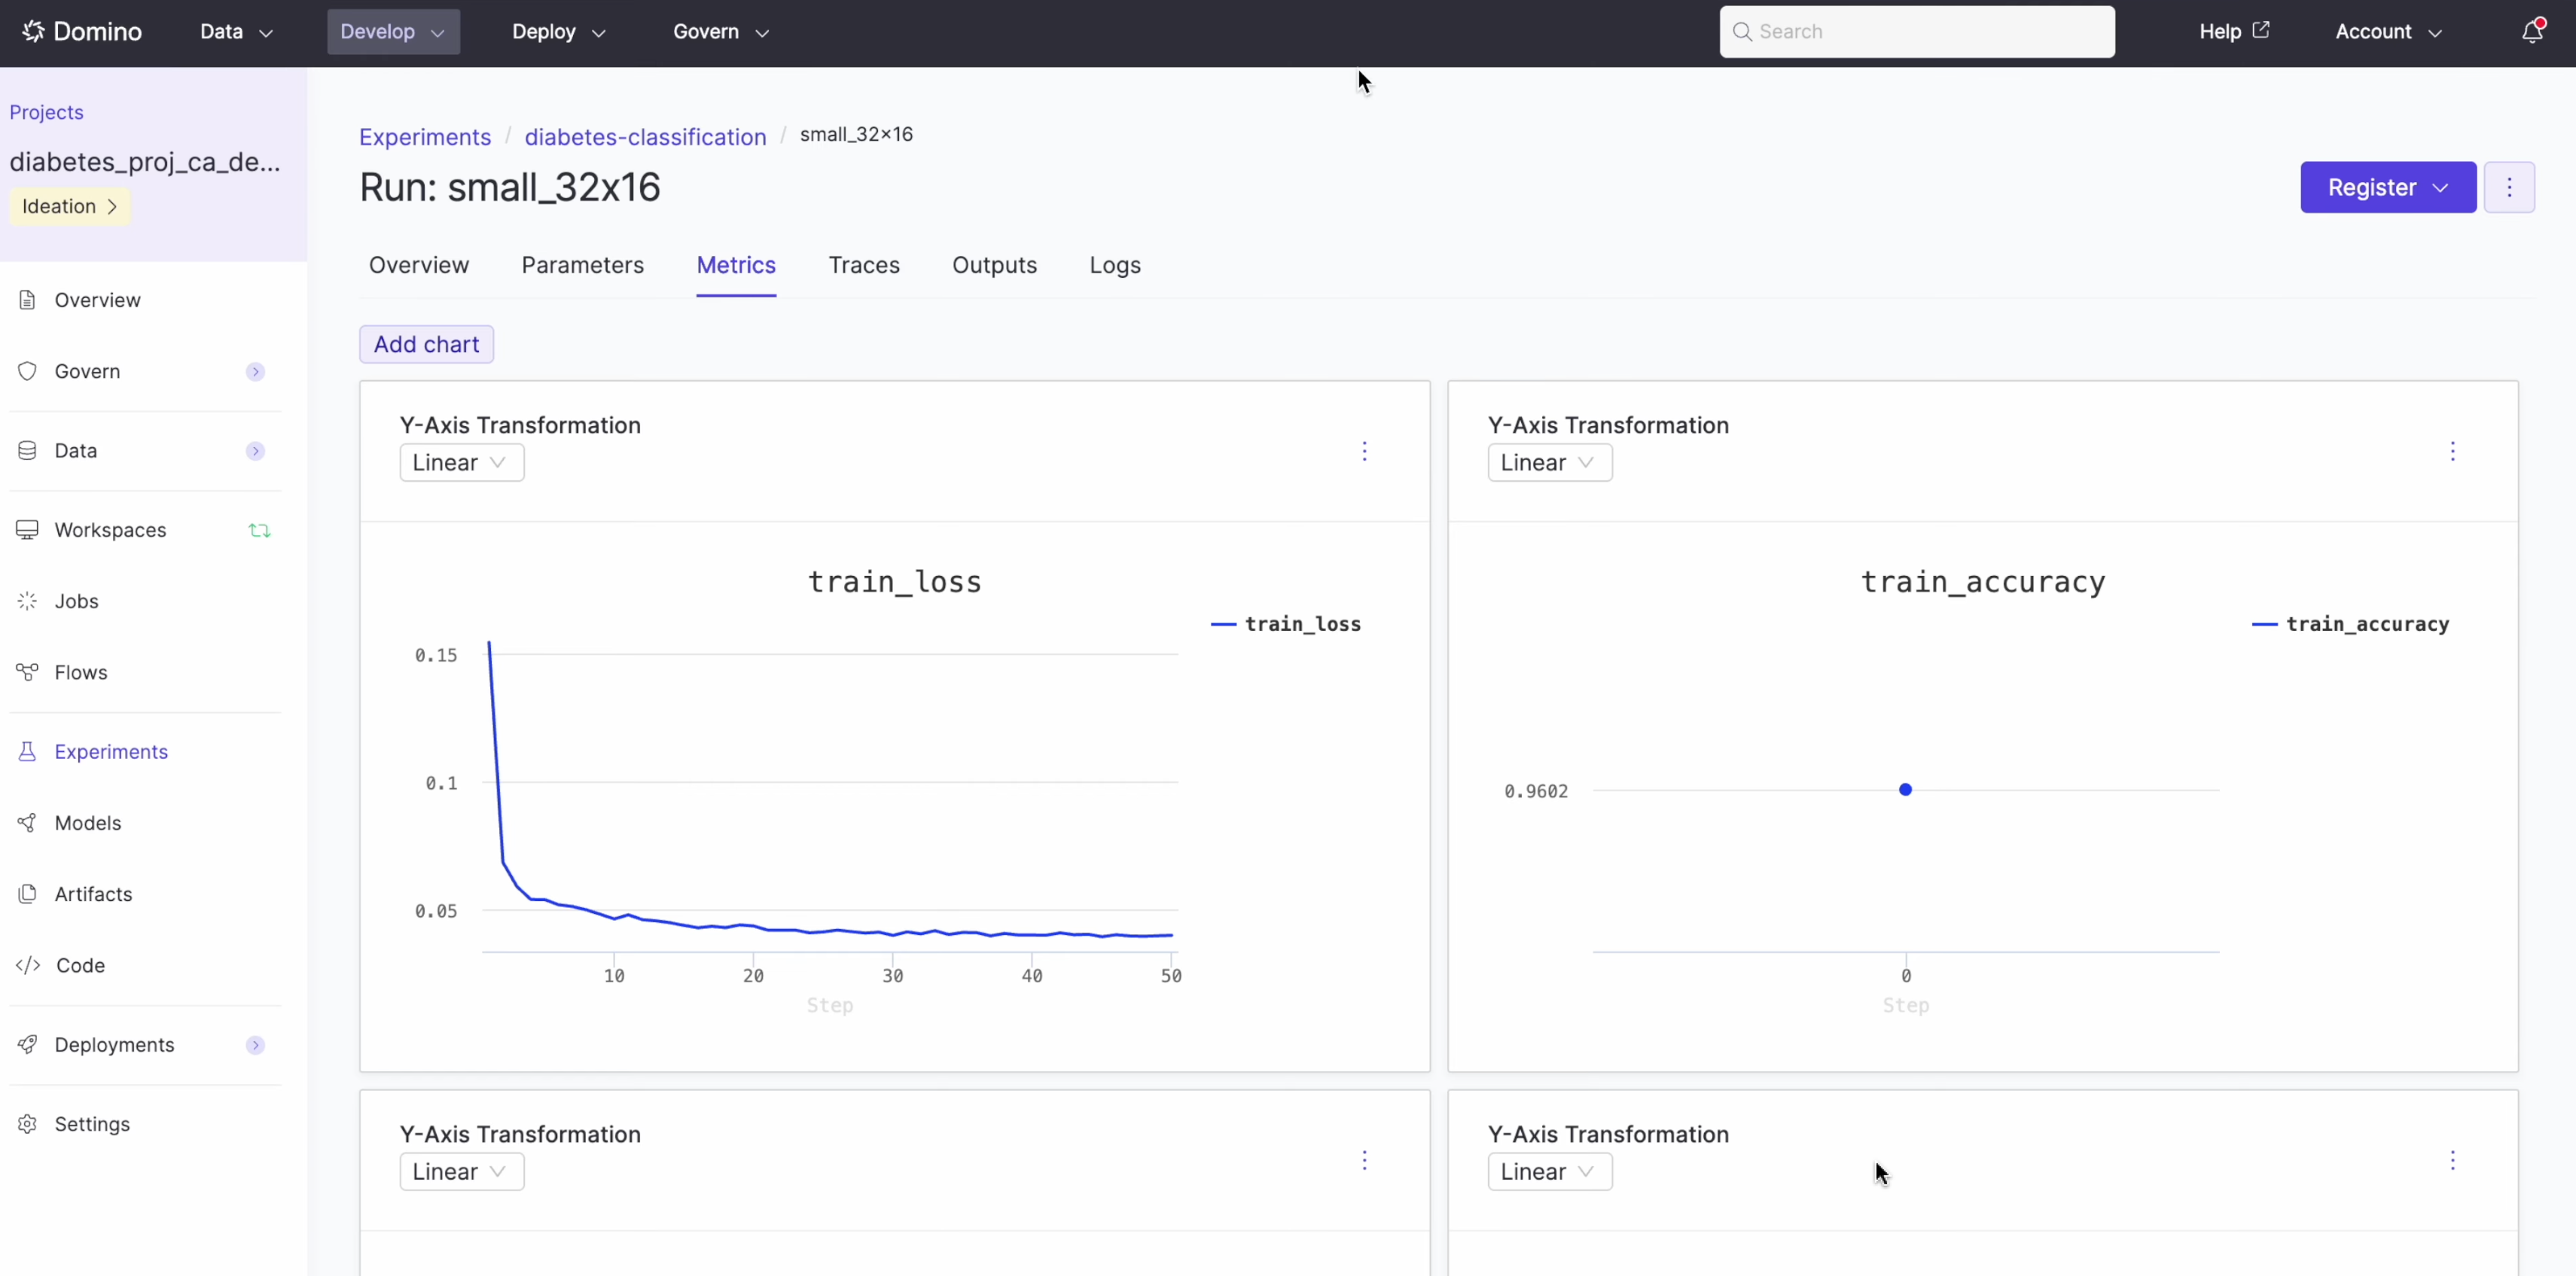
Experiment Manager tracks each training job with complete parameter lineage.
Navigate to Experiments in your project sidebar to see the runs.
The experiment view displays:
-
Training loss and accuracy curves over time.
-
Model parameters, including activation, batch size, dropout, epochs, and hidden layers.
-
Full lineage back to the training job and code.
After all models finish training, the agent generates a comparison grid showing both models side by side with key takeaways:
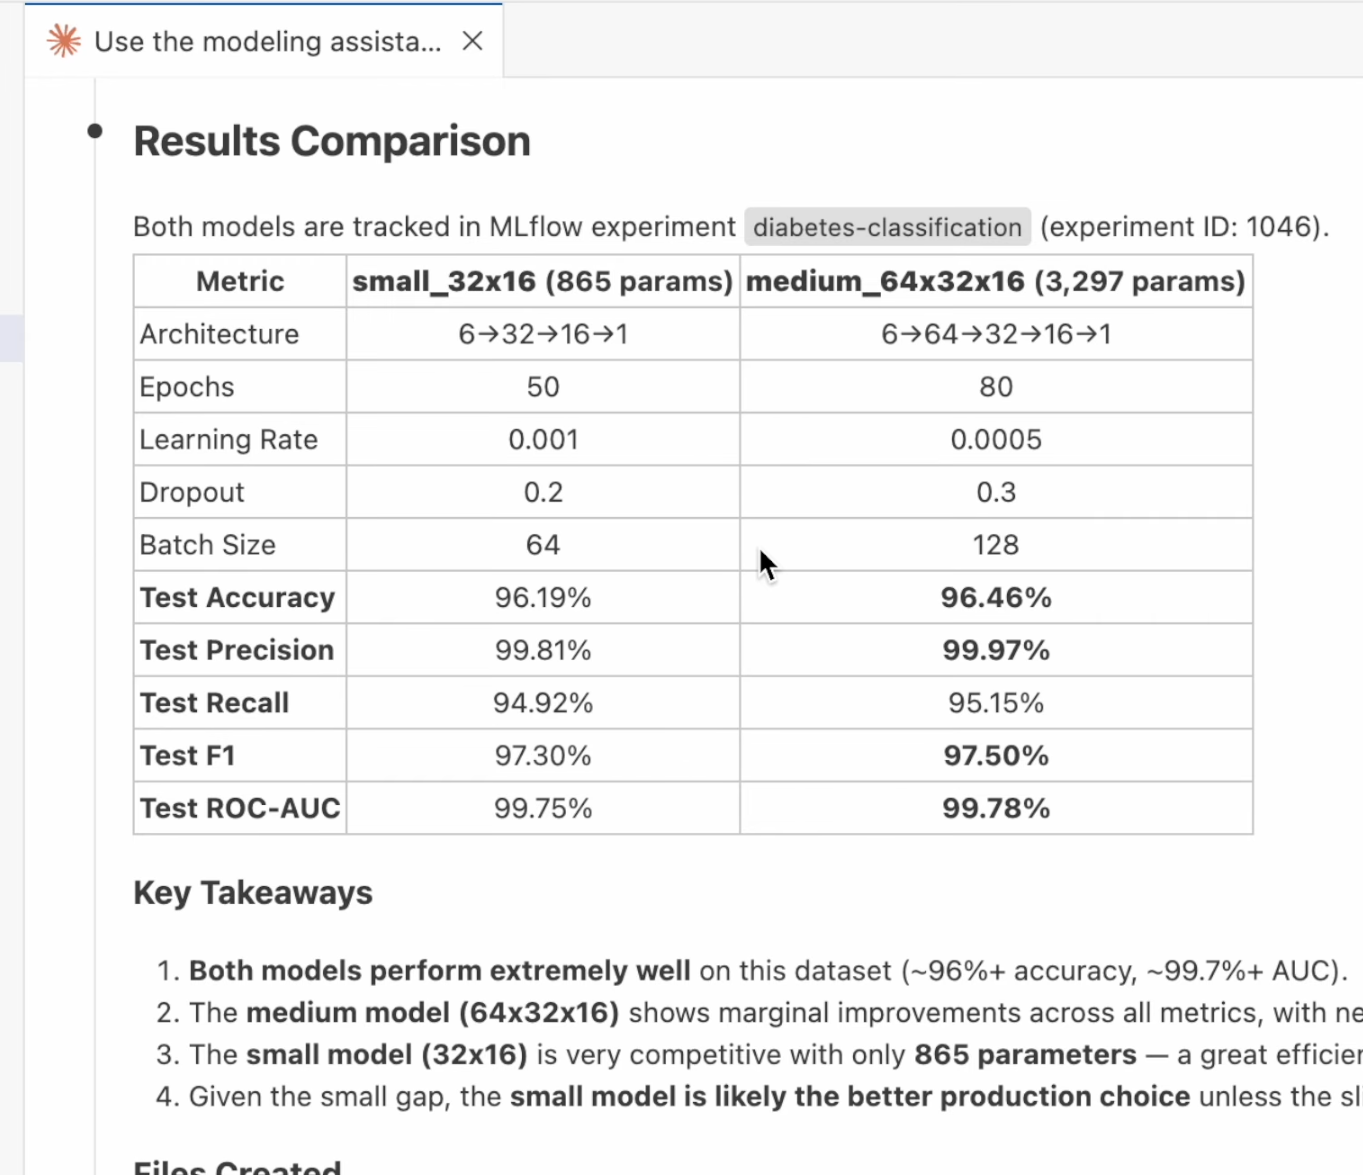
In this example, the agent trained two models:
| Metric | small_32x16 (865 params) | medium_64x32x16 (3,297 params) |
|---|---|---|
Test Accuracy | 96.19% | 96.46% |
Test Precision | 99.81% | 99.97% |
Test Recall | 94.92% | 95.15% |
Test F1 | 97.30% | 97.50% |
The agent concluded the small model is the better production choice given the marginal accuracy difference and significantly fewer parameters.
In this walkthrough, the modeling assistant skill handled the complete workflow:
-
Detected the Domino environment and project structure.
-
Explored and analyzed the dataset.
-
Generated a parameterized PyTorch model and training script.
-
Submitted training as reproducible Domino Jobs.
-
Tracked all parameters and metrics in Experiment Manager.
-
Compared multiple model configurations with recommendations.
All lineage stays intact. The Domino platform tracks, reproduces, and audits every step from data analysis to model comparison.
-
Domino Skills: Explore all available skills beyond the modeling assistant.
-
Custom environments (advanced): Add additional agents or customize your setup.