Domino Environments, or Compute Environments, help teams manage their projects better. They improve processes in MLOps, generative AI, and data science workflows.
In Domino, environments are defined by Docker images that create isolated containers for each execution unit including Workspaces, Runs, Apps, and Models. This setup allows professionals to experiment and customize their work in a contained, versioned, and shareable space, boosting reproducibility and collaboration.
You can create new environments, use those provided by Domino, or modify existing ones. You might choose to create or alter an environment if:
-
You must install a package for Python, R, Octave, or some other software dependency.
-
You want to cache a package or library so that it’s immediately available when you start a run.
-
You manage an organization and want to create a default Environment for all projects.
Domino has two main types of Compute Environments: the Domino Standard Environment (DSE) and the Domino Minimal Environment (DME). The DSE offers a complete set of libraries and packages, while the DME is lighter and includes fewer packages.
Domino also provides Cluster Environments, which work like DSEs but are designed for specific types of clusters. The environments are smaller and simpler, suitable only for worker nodes in a cluster, while DSEs cannot be used for worker nodes.
You can view the environments that you can access by clicking Govern > Environments in the navigation bar.
In the Environments Overview page, you can see a list of:
-
Global Environments.
-
Specific environments used by Projects you collaborate on.
-
Environments shared with organizations you belong to.
To switch from the default table view to the tree view, use the selector on the top right, below the + Create Environment button. The tree view allows you to see hierarchical relationships between environments, collapse and expand nodes with children, view environment metadata, and filter by visibility.
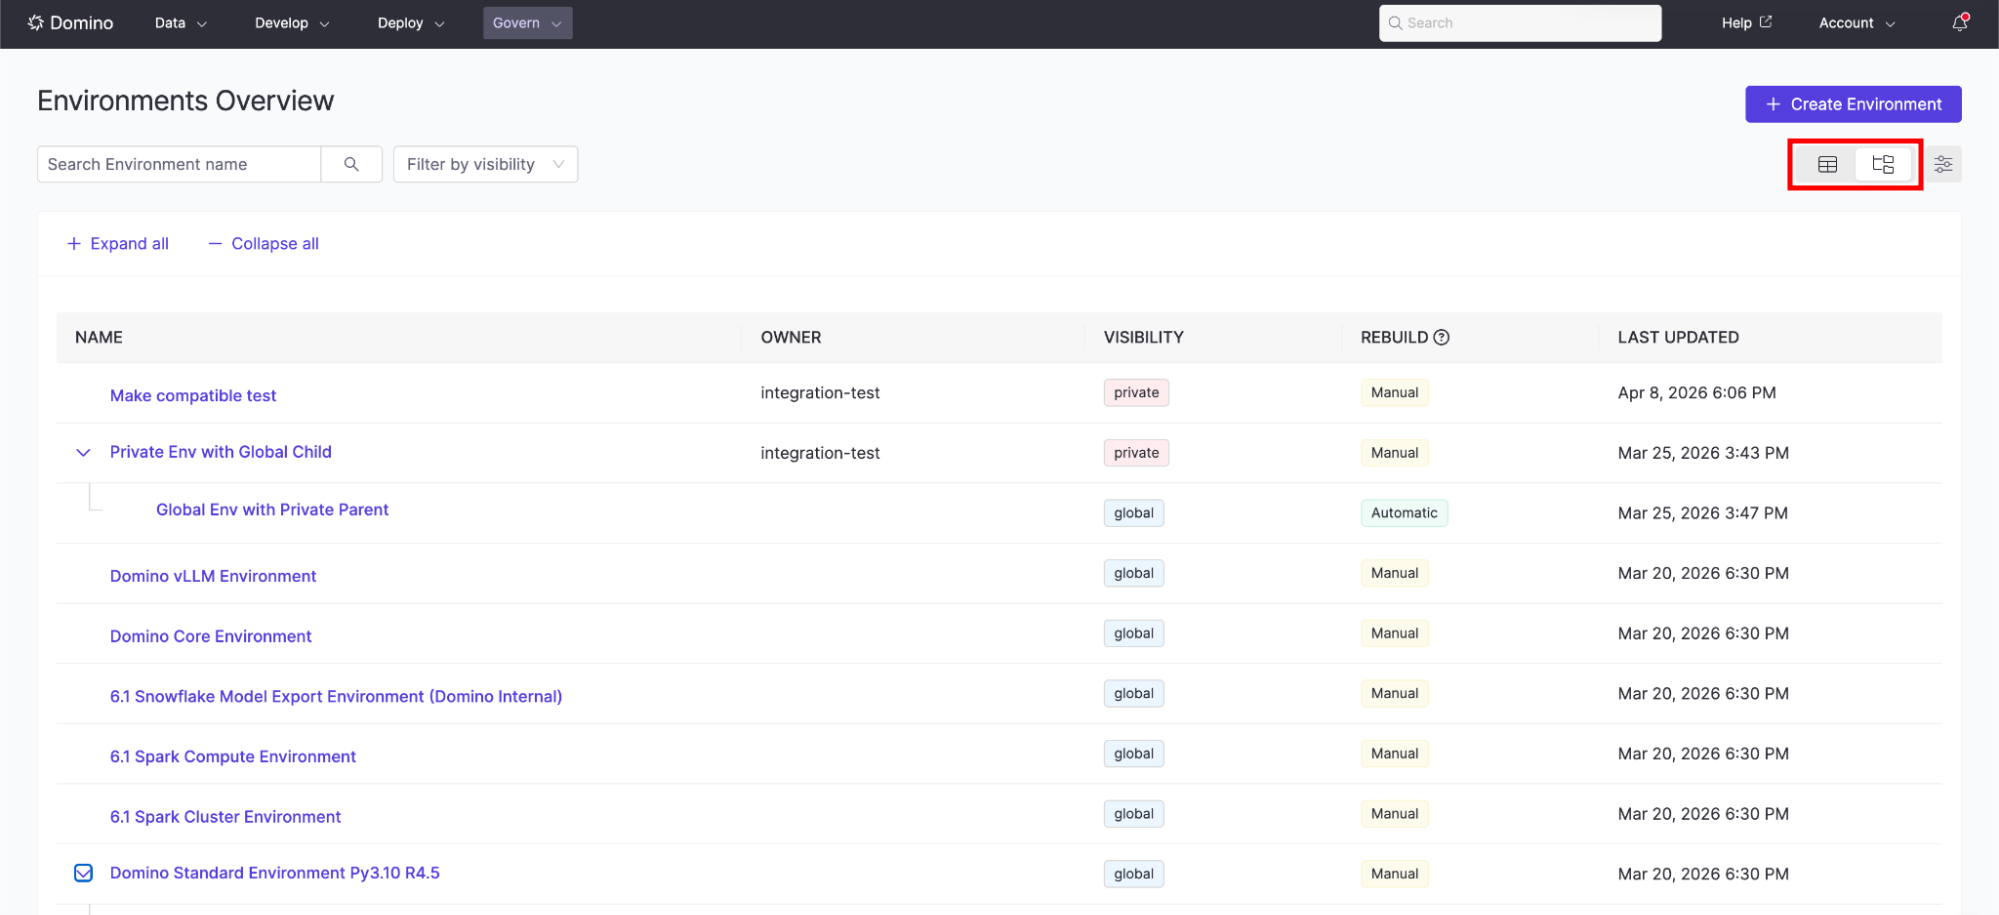
To see more details about an environment, click on that environment’s name.
| Field | Description |
|---|---|
Overview | The Overview tab lists all metadata about your environment or image. If your environment is built on top of another, you may need to click through to the parent environment before seeing the underlying Docker image. Click Edit Definition if you need to make changes to your environment. |
Revisions | All revisions of your compute environment are listed here, along with their build status, timestamp, and Docker image URI. Each saved change increments the revision number by one. By default, the latest successfully built revision is automatically set as Active. If you’d like to keep a specific revision active instead, you can disable the Auto-assign next new revision as Active toggle to lock your chosen revision in place. Domino rebuilds the environment and pushes the resulting image to the local Docker registry. By default, the latest successfully built revision becomes the Active revision. The list also indicates whether a revision was built automatically via build propagation, and includes metadata about its parent revision—specifically, which revision it was derived from and whether that parent is currently Active. This context helps track inheritance chains and understand how updates cascade across environments. |
Revision details | Click the three vertical dots for additional options like viewing build logs, downloading an image source project, or canceling builds. |
Projects | These are listed after being assigned to an environment. You can view details of the project by clicking its name. |
Endpoints | Shows you a list of endpoints for that environment, including the status of the endpoint. |
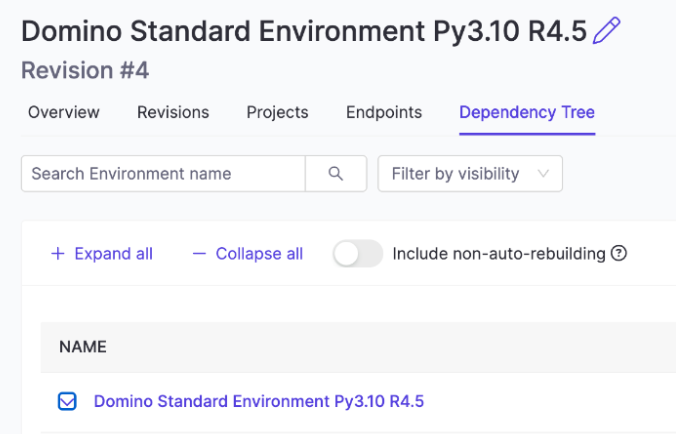
Dependency Tree | The Dependency Tree view is similar to the global tree view, except that it only displays the subtree of the selected environment, with it as its only root node. By default, only the descendants that would receive automatic downstream rebuilds are shown. The Include non-auto-rebuilding toggle allows you to see all descendants. |
-
Our Best Practices will guide you in setting up and maintaining your Domino environments.
-
Domino Standard Environments describes the pre-configured environments that come with Domino.
-
Create a Domino Environment using an existing environment or start from a custom setup.
-
Use Environment Revision Controls in Domino to manage environment inheritance and revision lifecycles.
-
Customize your Environment to enable tools, run scripts, or manage environment variables.
-
Set default Environments establishes a starting point for all new projects or an environment for a specific project.
-
Use Environment Revision Controls in Dominoto manage environment inheritance and revision lifecycles with build propagation, revision pinning, and revision selection.
-
Compute Environment Catalog provides images to add various environments to any Domino installation.
-
Manage environment variables to configure how the system runs and manage secrets or settings across different areas.