Domino Projects help you follow best practices in your work. Projects are flexible and can fit your organization’s workflow. From initial idea to production, Projects support you through the entire process of creating analytical assets.
Domino Projects include two types:
-
Git-based Projects give you more control over code synchronization. You can use features from external Git providers and get a more modern development experience. Domino recommends that you use Git-based Projects when possible.
-
Domino File System (DFS) Projects organize all your Project’s assets as data or files.
You can create a Project from scratch, from a template, or from existing content. You can also copy or fork an existing Project to create a new one.
Many users prefer to start a Project from scratch to learn the interface.
-
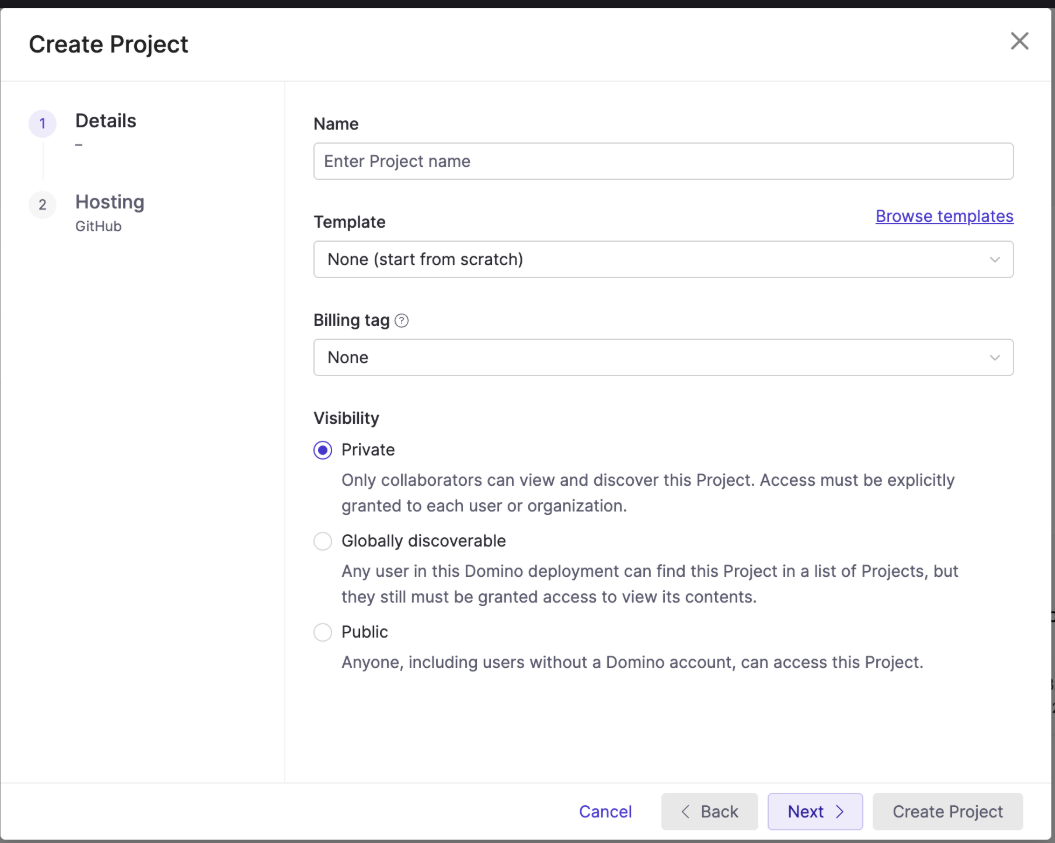
Go to Domino, then click Create Project.
-
Enter a project name, then select a Project template or None (start from scratch), and configure visibility settings.
-
Click Next.
-
From the hosting provider list, select your Git provider or select Domino (local hosting).
-
Enter your credentials and repository URL, then click Create.
Your project is now ready for you to upload files or folders.
Add Git credentials
If you need to add new Git credentials, click Add credentials in the hosting step. Complete the credential form and save. You return to the wizard to complete the project setup.
Before you start your Project, look for existing content in your organization. Projects that others have created in Domino can help you reach your analytical goals faster.
-
Search your Domino deployment to find Domino Projects.
-
On your Projects home page, examine the tabs to see Projects where you are a collaborator and Projects that Domino recommends.
-
AI Hub example projects can be deployed directly to your Domino instance. You can find a summary of these Projects on the Domino Data Lab AI Hub templates page.
-
Copy a Project: Create a copy of an existing project. The copy does not include project settings, run history, or scheduled jobs.
-
Fork a Project: Create a new project and include everything from the source project.
-
Import Git repositories: Access the repository and commit changes to repository contents.
-
Export and import Project content: Share content among projects by exporting and importing.